 by Seth Levy

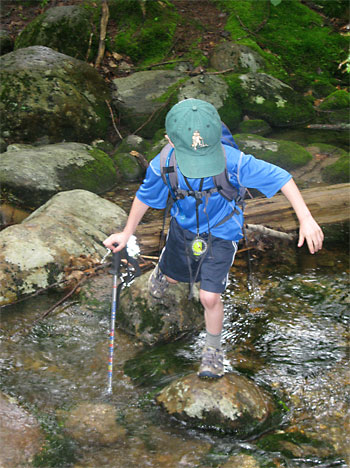
A hiker crosses the creek on the Lost Coast Trail near Shelter Cove, California. (Photo: Seth Levy)
Spring showers mean flowers to some, but hikers are right to think of swollen streams before crocus blossoms. Heavy rain, melting snowpack, and still frozen ground all can cause streams and rivers to widen, deepen, and accelerate.
Though steam and river crossings deserve special attention in spring, crossing moving water is not only inconvenient, but also potentially hazardous, year-round.
According to Arizona State University's Force of Flowing Water Calculator, a stream two feet deep flowing at five miles per hour exerts more than 200 pounds of pressure. Unfortunately, abstract physics become real when unwary hikers run afoul of raging rivers.
In Maine, the Appalachian Trail Conservancy established an official canoe ferry service after an AT thru-hiker drowned in 1985 while attempting to ford the Kennebec River. And every year, other hikers suffer close calls.
Here are some basic tips for crossing moving water when hiking and backpacking.
More advanced techniques may be needed for water crossings you encounter on the trail.
Beforehand
Where and when you head for your hike matters.
- Check the weather. Has there been a lot of rain? Have the temps recently warmed in an area with dense snowpack? If so, plan a hike in an area without deep or numerous stream crossings or at risk of flash floods.
- Consider upstream events. During a long crossing, even a shallow stream can deepen to a rushing river if an upstream hydro dam releases or if a faraway storm dumps rain. Treat even shallow crossings with caution when water levels can increase rapidly.
- Consider time of day. A particular stream or river's flow is the result of numerous seasonal and daily factors. However, during times of greater snow melt and runoff, minimum flow generally is in the morning and peak flow is in the late afternoon. So that shallow stream you crossed after breakfast may be deeper and faster on the way back to the trailhead.
Choose Your Crossing
You've encountered some moving water you need to cross. Now find your way across.
- Scout a crossing. Sometimes the trail crosses at the deepest point. Look upstream and downstream for shallower water. Be aware that narrower crossings will likely be deeper and swifter. Smoother water usually means a smooth streambed to walk on.
- Look downstream for falls, rapids, or other hazards, should you get swept off your feet. Don't cross above dangerous hazards.
- Look at both banks. If the far bank is steep or undercut, don't cross there, as you may have trouble getting back up on land.
- Water is probably deeper and faster than it appears from shore. Be sure you can make it all the way across and find the trail on the other side with the crossing you've scouted.
Get Gear Ready
Think ahead and protect your gear and yourself.
-
Protect essential gear. Put anything that needs to stay dry (for example your camera, GPS receiver, phone, matches, map) in a waterproof dry sack or case. Or at least pack it safely inside your pack, instead of around your neck or in your pocket.
-
Place extra layers in a dry stuff sack. Wet clothes can lead to hypothermia, especially in cool weather. If you fall in, you'll want or even need dry clothes on the other side.
- Keep your shoes on. Don't go barefoot. Stream bottoms often accumulate a thick coating of slippery algae, and sharp rocks can damage feet. Take off your socks and remove your insoles, but cross in your usual hiking footwear, or change into sport sandals, water shoes, water socks, or camp shoes. Or you can multitask by soaping up (with a biodegradable soap) a dirty pair of extra socks. Socks provide more traction than bare feet, and might end up cleaner to boot.
- Roll up your pants. Besides keeping them dry, bare legs present less resistance to rapidly flowing water.
- Loosen your pack. Unbuckle your backpack's hip belt and sternum straps and loosen its shoulder straps so you can slip out of your pack quickly if you fall. Until it fills with water, a pack is more buoyant than you and can force you under. Plus, a heavy pack can move you downstream faster. The hiker that drowned on the AT was reportedly trapped by a fully-buckled pack.
The Crossing
Get moving to the other side.
-
Face upstream. Facing upstream can make it easier to confront the force of the water and keep your balance. Rely on your trekking poles or hiking stick to brace your downstream side.
Trekking poles or a stick can help with balance. - Maintain at least two points of contact (preferably three) with the bottom. If you don't use trekking poles or a hiking staff, grab a stout stick and plant it firmly ahead before lifting your advancing foot. A pole or stick also lets you determine the depth of the stream ahead before each step.
- If possible, don't lift your feet at all, but shuffle across. Groups might hold hands or link arms.
- Be careful on rocks and logs. It's tempting to rock hop to keep boots dry, especially if rocks are laid out as stepping-stones. But a fall from a slippery rock will soak all your gear, and put you at risk for a “rock to the noggin.” Trekking poles or a stick will help with balance. Use logs as bridges with caution, as they can be slippery or tippy.
- Wading may be the safest option.
- Watch for rising water levels, especially on longer crossings, which can indicate a flash flood or dam release upstream.
- If the water is moving fast, angle downstream and across with the current, instead of fighting it directly across.
- Prepare to fall. If you fall during a stream crossing, get out of your pack ASAP. If you can hold on to it by a strap without compromising your safety, do so, but do not risk drowning to save your pack. Point your feet downstream and aim for the bank in a diagonal direction. Don't try to fight the current straight across.
- Avoid ropes. Roped crossings are an advanced technique that has the potential to increase hazards if not executed skillfully. Do not attempt a roped crossing without training. If you lack the training to rig a roped crossing on a river that requires it, come home with a good story, and don't try to ford the water.
- Planning an advanced swim or float across a river? Read Colin Fletcher's "River Crossings" section of The Complete Walker.
- Don't be afraid to turn back. Crossings can deepen dramatically in the middle, where increased water velocity removes more of the stream bottom. Poke around to see if a there's a shallower spot close by. If all else fails, turn back. Coming back with a good story is better than not coming back at all.
Have a suggestion for safe water crossings? Share it below.


