MSR Snow Fluke


 Reviewed by
Bill S
REVIEW CORPS
+4,657
 August 13, 2012 (original Aug 8, 2012)
I found the MSR fluke to have some interesting and potentially significant improvements over older designs. This extension of their venture into anchors, in keeping with the full name of MSR (Mountain Safety Research), is a further development of their Coyote Picket, introduced in 1987, which in turn followed the 1969-70 MSR Snow Picket and Snow Fluke.
MSR also had an ice ax and ice screws in their line in the 1970s. MSR, a division of Cascade Designs, is better known these days for their excellent stove designs (with a couple of exceptions), innovative snowshoes, and tents. Cascade Designs also makes sleeping pads (Therm-a-Rest), SealLine dry bags, and water treatment systems.
Pros
- Relatively light, due to large lightening holes
- Increased area from reinforced synthetic facing (polyurethane on nylon scrim)
- Reinforced grommets reduces cable and fluke wear
- Behaved well when shock loaded (fluke dug deeper into soft snow)
Cons
- Durability of polyurethane facing was not tested, but might not last as long as traditional single piece aluminum flukes.
- Durability of rivets holding polyurethane facing in place was not tested, but my experience is that such rivets are often a weak point.
Location of gear test on Mt Hood.
Size: Fluke - 11 x 6-¾ in (Large)
Color: aluminum
Weight: Fluke 8- ¾ oz (Large)
Suggested price: Fluke - $50 for version tested (L), $40 for small
Warranty: standard Cascades Designs Limited Warranty
Background: Over the years, I have used a variety of commercially and homemade pickets and flukes, almost exclusively for practicing crevasse rescues (thankfully, only a couple of real retrievals of fellow team members and a few more retrievals of members of other teams).
One of the vital requirements is being able to quickly place anchors while in a self-arrest position. Both pickets and flukes were designed with this requirement in mind. Flukes are particularly rapid, especially when the cable is properly attached.
On challenging climbs where falls, injuries, or other incidents are possible, dependable protection in the form of anchors is vital. Because snow, whether fresh-fallen, softened by the sun, consolidated, or firmed into neve has less holding power than rock, water ice, or alpine ice, anchors for use in crossing glaciers or ascending steep snow slopes must present a large cross-section, while at the same time being light enough to carry a sufficient quantity for the climb at hand. This means that they are by necessity physically larger than can be carried on a sling like chocks or cams.
One of the main uses is for protection on steep snow slopes or when crossing a crevassed glacier, where the crevasses may be hidden under the snow or crossed by an iffy snow bridge, as well as having a solid anchor that can be placed rapidly to aid in retrieving an unfortunate climber who has fallen into a crevasse and needs to be retrieved quickly before hypothermia sets in.
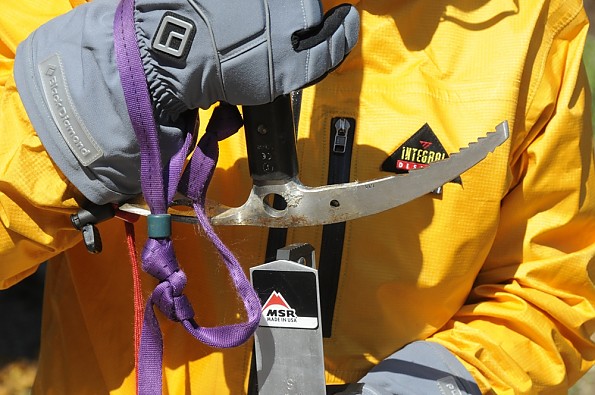
Common method of using ice ax head to hammer pickets and flukes into snow
Most teams carry a combination of flukes and pickets, sometimes one of each for each team member, sometimes only a couple of each in the whole party. Despite most snow anchors being made of aluminum, the weight for a team could easily add up to the weight of an old-school piton rack for big wall climbing.
So an additional requirement to ease of placement, light weight, and ample cross-section (hence holding power) is ease of retrieval to move on to the next location. The reason for having a mix of pickets and flukes is the variance of snow conditions. Both pickets and flukes are usually hammered into the snow using the head of the ice ax as shown in the photo above, which will damage both the top of the fluke or picket and the head of the ice ax with time.
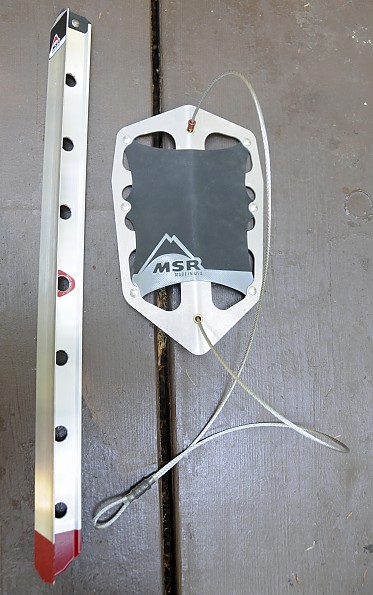
MSR Snow Anchors tested (Fluke on right, picket on left)
Flukes are shaped roughly like the blade of a shovel (on the right in the photo). They are equipped with a swaged steel cable with a loop placed such as to cause a pull to force the fluke to “dive” further into the snow, thus increasing its anchoring power.
Contrary to what one might think, the central vertical bend in the fluke is point forward. This turns out to be the best shape for causing the fluke to act like a plow and dig further under the snow. When properly placed, the upper cable is tight and parallel to the surface of the snow, while the lower cable is tight and coming directly out of the snow, pulling in the downslope direction.
Details:
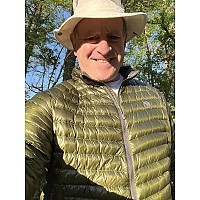
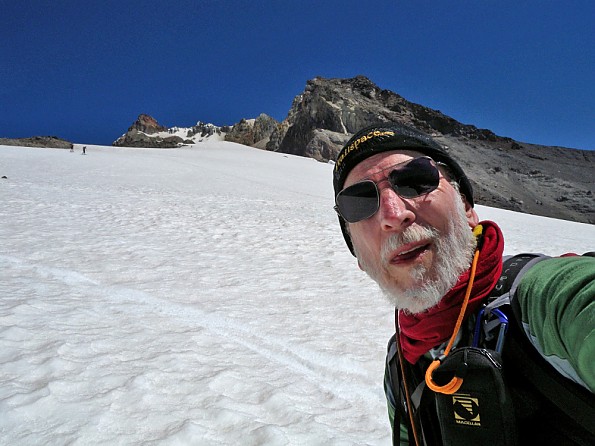
Trailspace’s Chief of Gear Reviews, Seth, sent me an email asking if I would like to review a pair of new snow anchoring devices. Despite the fact that it was summer, I was already planning to head for the Cascades to do some climbing on glaciated peaks. Most of the testing took place on the Zigzag Glacier on the slopes of Mt. Hood, not far from the Silcox Hut (upper portion of the mountain in the intro photograph).
I intended to use the lower reaches of the Palmer Glacier, but was informed on getting there that, with the intensive summer training of would-be junior Olympians using that area for their practice ski racing and snowboard gymnastics, I would have to move over to the currently designated Climbers Route. The heat wave had spread from the eastern 2/3 of the continent toward the West, which meant that the surface 6 inches of the glacier surface was mushy, while the ice below that was basically neve, potentially a challenge for anchors.
I reviewed the large (9 ounce, 8-3/4 ounces on my electronic scale) version of the fluke. There will also be a 7 ounce version of the fluke. At this writing, I still have a few minor questions that Seth has relayed for me to MSR that await responses. When the responses get to me, I will add any needed relevant notes. Because (1) snow pickets and flukes perform similar functions and (2) MSR provided both the new picket and new fluke at the same time, the reviews for both (this Snow Fluke and the Snow Picket) overlap and contain several identical sections.
The fluke is made of 7000-series aircraft aluminum. Though similar in size to my SMC fluke, the MSR differs significantly in having larger lightening holes plus the riveted-on polyurethane-covered nylon scrim (think of nylon bug screening, but of a much stronger material for the mesh). The main purpose of this is to lighten the fluke, while also improving performance.
When I weighed the new MSR fluke, I found it weighed a quarter ounce less than the weight given in the press release, though a full ounce heavier than my older (and smaller surface area) SMC fluke.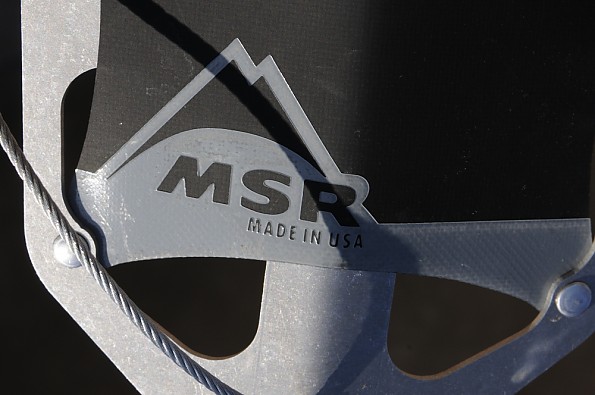
Closeup of MSR fluke showing scrim-reinforced polyurethane facing
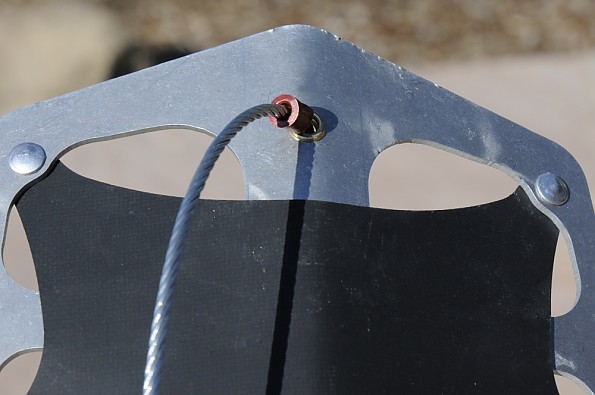
Upper edge of MSR fluke, showing grommet reinforcement on cable hole and swaging
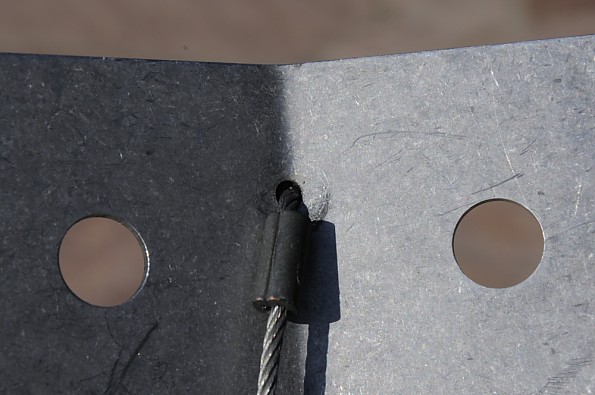
Upper edge of SMC fluke, showing swage and lack of grommet for comparison to MSR
The SMC is the fluke on the left in the photo below, while the new MSR is the fluke on the right. In a close-up of the lower part of the MSR (above), you can see the scrim through the translucent material. The upper part of the MSR fluke is slightly peaked, rather than flat like the older SMC. This does not seem to make any difference when driving it into the snow, at least for the softer upper layers on the glacier I encountered during my testing.
One other thing to note in the photo of the upper part of the fluke is that the holes through which the cable passes are grommeted, unlike the holes on the SMC. This should increase lifetime by reducing wear between the cable and the fluke. For comparison, the rear of the SMC is shown, so that the lack of a grommet can be seen. The swages on the cable on both front and back sides of the flukes (found on both the MSR and SMC flukes) are intended to limit the motion of the cable and maintain the proper relative angles of the top and bottoms sections when loaded.
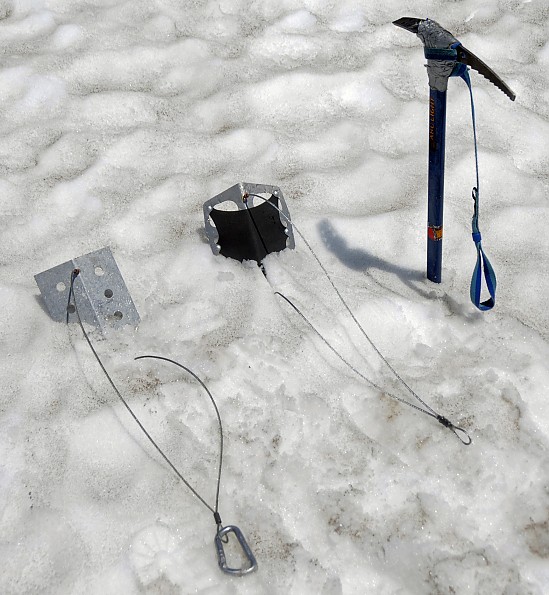
SMC fluke on left, new MSR fluke on right prior to being properly placed in snow
As noted in the “cons” list above, I have found in actual practice that the type of rivet used to secure the polyurethane to the fluke’s frame can fail over time. But I will also note that this is the same type of rivet used on MSR’s snowshoes.
Barbara and I lead snowshoe hikes, as most readers of Trailspace know. I have not seen a rivet failure on any of the MSR snowshoes on these hikes, although I have seen failures of similar rivets on most other brands of snowshoes. Knowing that MSR gear is generally very durable, I have less worry about rivet failure on the MSR flukes than I would other brands, plus the rivets are not located in high-stress positions on the fluke.
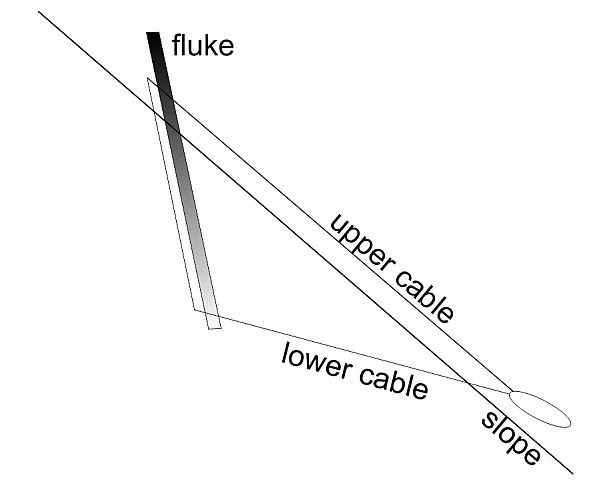
The testing procedure for the fluke was similar to that used for the picket. The fluke was placed in the snow tilted relative to the snow surface with the upper cable parallel to the surface and a slot cut in the snow so the lower cable would be aligned straight to the eye of the cable, in the proper orientation as shown in the diagram above. Neglecting this trench will result in the fluke being levered out of the snow.
A single carabiner was placed in the eye and the rope attached to the carabiner and to my harness. I then applied body weight, then tugged harder, finally leaving about 10 feet of slack and ran down the slope until arrested by the fluke.
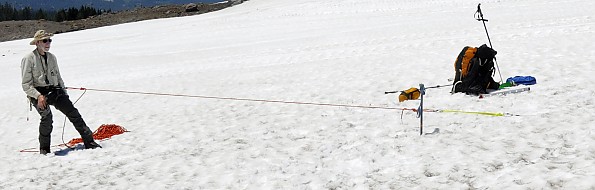
The end result of one of these runs is shown in the wide photo below, taken by a curious climber returning from a training foray up on the Palmer Glacier in preparation for his ascent attempt the following day. The MSR fluke dove further into the snow on my first placement.
On the other hand, I did not place the SMC quite right at first try, with the result that, although it did dive further into the snow and held my running shock load, it displaced the soft snow at the top by about an inch while diving a couple inches deeper. The second placement behaved as expected, with no displacement of the surface snow and the fluke diving deeper as it should.
The better performance of the MSR can possibly be attributed to several factors. First, I believe I placed the MSR fluke more correctly on first try, and placed the SMC fluke slightly too vertically (top cable not as parallel to the surface as it should have been). Second, the polyurethane on the MSR with its more complete coverage and non-freezing to the snow probably allowed the fluke to dive more efficiently. A third factor is that the upper cable length on the MSR fluke is 20% longer than the lower cable, a greater difference than the SMC.
This means that when the upper cable is parallel to the surface, the fluke angle of the MSR lays back almost 10 degrees farther, thus entering the snow at a shallower angle. Another way of looking at this is that the pull on the lower cable has a stronger tendency to pull the fluke deeper into the snow.
Conclusion:
The new MSR snow fluke has several significant improvements over older versions. It performed better in my limited tests than my older gear. As with everything, the new gear will cost more than the old. The price on REI.com for the small and large SMC flukes are available for $32 and $36, compared to the MSR press release of $40 and $50.
If you are heading off for some glacier travel or ascending glaciated and snow-covered peaks, I would choose these new MSR anchors over the older designs.
Source: received for testing via the Trailspace Review Corps
Your Review
Where to Buy
You May Like
Specs
| Price |
MSRP: $39.95 Current Retail: $59.95-$64.95 Historic Range: $23.97-$64.95 |
|
Small 200 g / 7 oz. $39.95 |
|
|
Large 253 g / 9 oz. $49.95 |