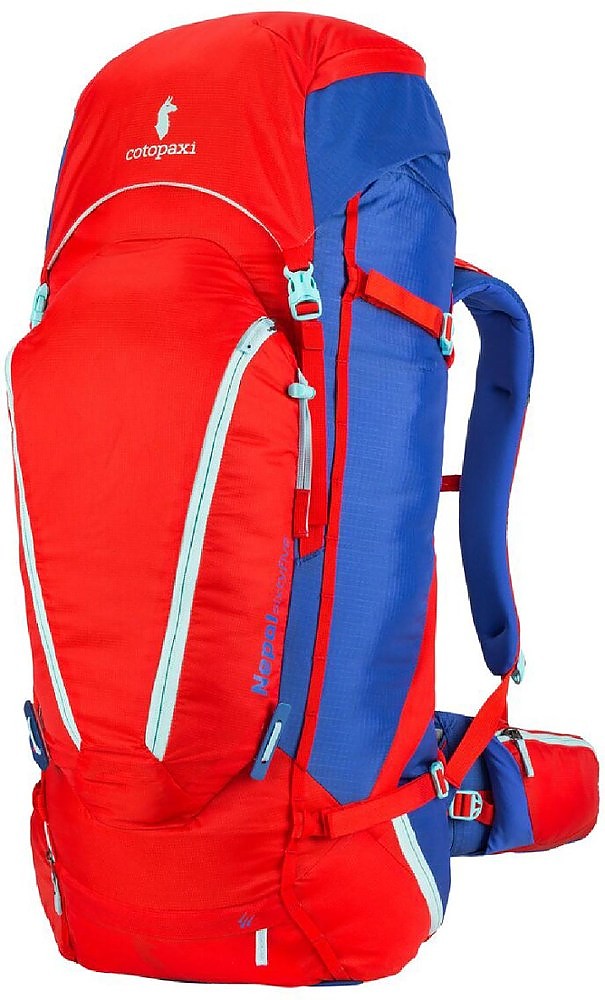
Cotopaxi Nepal 65


 Reviewed by
bheiser1
+1,527
 December 1, 2014 (original Nov 30, 2014)
The Cotopaxi Nepal 65L pack has a number of innovative features, and is appropriate for trips of a few days or longer. While it didn’t work well for my body type and the weight I carry, it’s worth a look due to its design and unique features.
Pros
- Unique internal compartment design
- Full side zipper for easy access to interior
- Multiple external compartments
- Plentiful carry points for carrying objects outside the pack
- Stable ride with almost no squeaks or creaks
- The company contributes a portion of product sales to humanitarian causes
- Neat, compact, and trim shape enables easy maneuvering through tight spots or hiking off trail
- Reasonably priced relative to comparable packs
Cons
- The multiple external compartments are small, reducing flexibility in packing options; similarly, there is only one side water bottle pocket (not 2 as is more typical)
- Hip and shoulder strap material causes chafing
- Hip belt slippage
- Difficult to adjust suspension
Introduction
I feel a bit conflicted in writing about this pack. I really wanted to like it. It’s an interesting pack with some unique design features. Also, Cotopaxi commits to contributing part of the proceeds of each product sale to worthy causes. In the case of the Nepal 65, contributions go to HealthandEd4Nepal. It’s nice to see a company doing this sort of thing (no sign of corporate greed here). However for my own gear weight and methods of packing, the pack didn’t work out as well for me as I’d hoped.
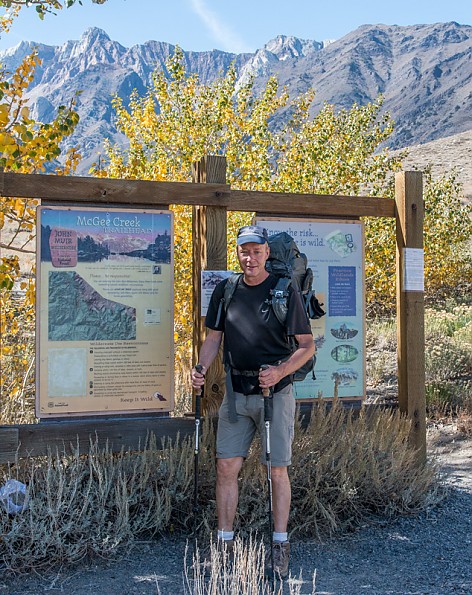
I used the pack on four trips in California’s Sierra Nevada. All of them were on the east side, at elevations of 9-11,000 feet, and at temperature ranging from the mid 20s in the early morning, to probably the 80s during the day. One trip was a 3-nighter and the remainder were each one night. Hiking distances carrying the pack were on the shorter side, between about 5-8 miles per day. My trips were on-trail except for a couple of bits of off-trail hiking, in particular, one stretch where I crossed over from the Gem Lakes to Treasure Lakes in the upper part of the Little Lakes Valley.
For the sake of comparison, other packs I’ve used recently are the Deuter ACT Lite 65+10 and the Bergan's Glittertind 70. In the past I used an old Kelty D4 frame pack on their Mountaineer frame.
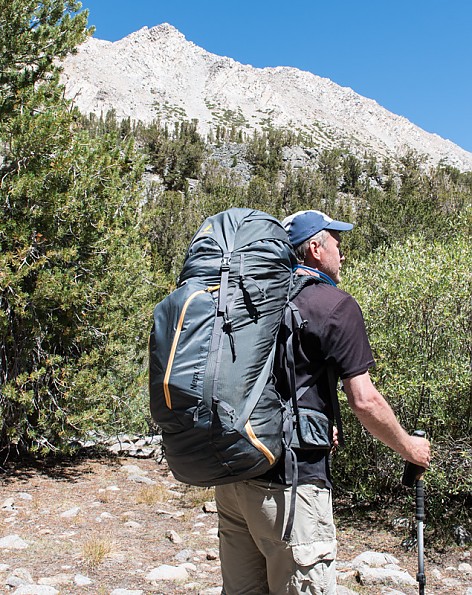
Here's the Cotopaxi pack on the trail. Note I used a Peak Design Capture Clip to attach a DSLR to the left shoulder strap.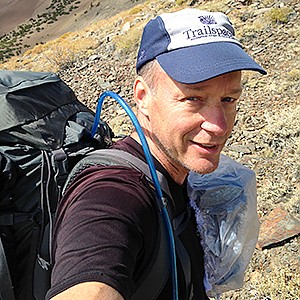
Design
The Nepal 65 has a very trim shape when packed. From the outside it appears to be of a fairly standard layout with a sleeping bag compartment at the bottom, a top section with a removable upper pocket and compartment, and so on. It has a typical “water bottle” pocket on one side only.
One of Cotopaxi’s selling points I was to evaluate in this review is that “at only 4 pounds, this is one of the lightest fully-featured 65L packs in its category”. This statement is qualified by excluding the rain cover, head, and day pouch in the four pound claim.
I weighed the various components as follows:
- Pack: 66.5 oz. (4.16 lbs.)
- Head: 6.85 oz.
- Hydration pocket (and day pack): 3.6 oz.
- Rain cover: 3.7 oz.
Total: 80.65 oz. (5 lbs.)
It makes sense to me that they excluded the rain cover and hydration pocket from the weight claim, as these are features not typically included on competing packs. However in my opinion the pack and head (top cover/compartment) are both required to qualify as a “fully-featured pack”.
The combined weight of these is 4.58 lbs. This places it between the Deuter ACT Lite 65+10 (4 lbs) and others like the Bergan’s and Osprey Aether 70 (both with slightly larger rated capacity) at about 5 pounds. The bottom line is this is a fairly light pack, though by no means ultra-light.
The pack has a number of unique design attributes which one may find useful depending on the gear you carry and how you prefer to pack.
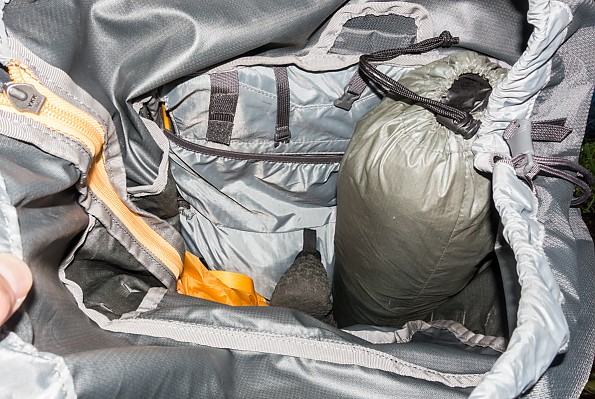
- Back compartment/pocket design: Many internal frame packs include some sort of back pocket. I’ve noticed (including with my prior packs) this is usually one largish pocket, often of a stretchy mesh. In contrast, the Nepal back compartment is divided into two sections which form vertical pockets, with zippers that run their length, opening from the top to the bottom.
Recalling my frame pack days, I thought these smaller compartments would be handy for containing individual items. While I did make them work, the reality was I prefer the single larger pocket approach — it’s much more flexible. It was challenging to get things to fit into the smaller compartments, and if any of my items had been any larger (for example a more typically shaped bottle), they wouldn’t have fit. In my case, I was able to use one of these compartments to hold my “toilet kit” (trowel, zip lock bag with toilet paper, scent-blocking bag with used TP, hand sanitizer).
The other compartment held a tall and thin 1.5L “grey water” bottle which I use to fill the water bags for my filter (or UV treatment container). In this case the separation was good <grin>, but it did limit me to a very specific bottle of a specific size and shape – larger items wouldn’t have fit
These photos illustrate the two narrow back pockets in use. Although it may not appear so in the photos, closing the zippers with these items loaded resulted in a tight fit. Anything larger would have kept the zippers from closing.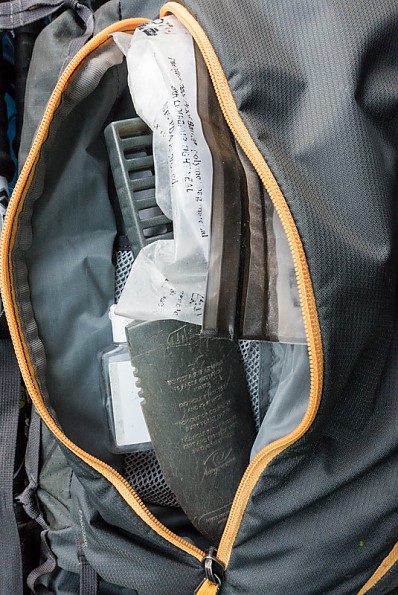
- Side access to sleeping bag compartment: Unlike many other packs which have a lower compartment with a zip-down flap for loading and unloading a sleeping bag, the sleeping bag compartment in the Nepal 65 opens to the (right) side. This worked OK, although my preference is the more traditional back-opening sleeping back compartment because I find it easier to stuff my bag in.
This photo shows how the bottom compartment opens to the side.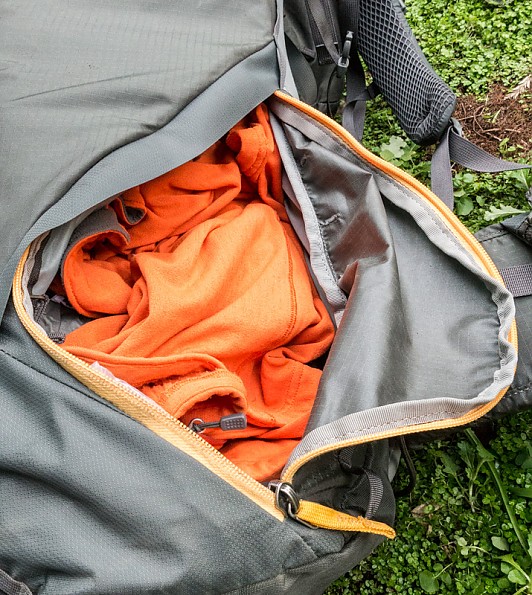
- Size zipper to main compartment: Years ago I recall seeing Jansport packs with an arch-shaped zipper on the main compartment, to make it “front loading.” I always liked the looks of this arrangement because, in comparison with the more typical top-loading design, it made for easy access to the interior.
The Nepal 65 comes close, or maybe exceeds that design with a zipper that fully opens one side of the pack. It zips down from the top flap, nearly to the bottom of the pack. I thought this would be a huge advantage. In reality, I didn’t use it very much, mainly because it was almost too much. When fully open, the pack loses its structure, so there’s nothing left to hold items inside, even if the pack is lying down. I did tend to open it partway from the top, to facilitate top-loading. I also did fully open it on occasion on my return home from a trip, when emptying the pack.
In the field, however, I found opening it fully wasn’t practical. It might work better if it opened just halfway, retaining the pack’s structure, while still facilitating access to the inner compartment. This would also save a bit of weight by having a shorter zipper.
Here the main compartment side zipper is shown.
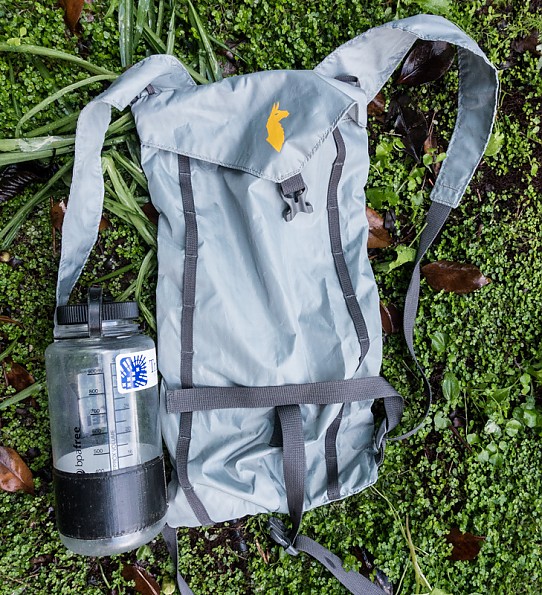
- Water bladder sleeve (or day pack): The Nepal 65 comes with a small “hydration sleeve” with shoulder straps. The idea is that it can be used to hold a water bladder (in the typical position along the inside of the back of the pack). It can also be removed and used as a very small summit pack.
In reality, I ended up leaving this item at home after the first trip. It was unnecessary to hold a 2L water bladder in the pack (I hung the bladder from the provided hook in the provided compartment). It’s also too small to hold more than a couple snacks for day hiking. I like to carry extra clothes and rain gear on side hikes, as a safety measure in case I were to get stuck out on the trail, and they would be a really tight fit in this bag. I already use a larger, but still very light summit pack which doubles as a sleeping bag sack.
I think Cotopaxi’s idea was good, though it might work out better if the sleeve was a little larger. Depending how much you carry on your “summit hikes”, for example just a light jacket, water bottle, and snack, it might work for you.
This is the water bladder sleeve, removed from the pack, ready to use as a day pack.
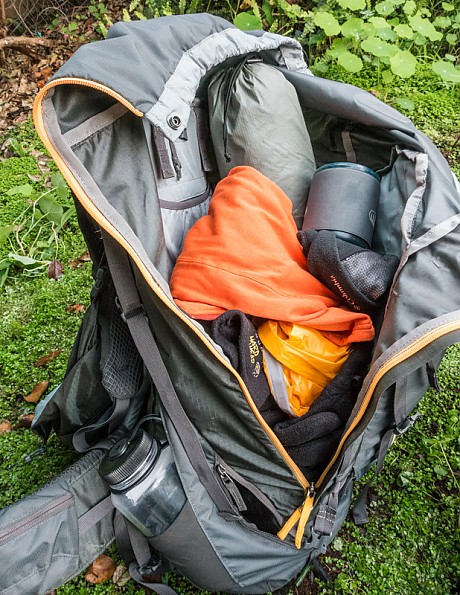
- Wedge shaped main compartment divider: Many other packs of this type have a divider between the main compartment and the sleeping back compartment. In some packs they are fixed, in others they zip out, and in some cases use hook and loop or other fasteners. All of the ones I’ve seen are positioned horizontally between the compartments.
In the Nepal 65, however, the divider is positioned diagonally (front to back). The result is the sleeping bag compartment has an upward facing wedge shape at the top. The converse is true of the main (upper) compartment. I have mixed feelings about this arrangement. On one hand, it allowed for some flexibility in that I could put (much) more than just my sleeping back in the lower compartment. On the other hand, once the lower part was packed, it reduced the usability of a good part of the upper compartment.
It’s a tradeoff, and I think if I had to pick one design or the other, I would probably go for the conventional design here simply because overall it makes space inside the pack more usable. I really do like having the extra space in the sleeping bag compartment, but not necessarily at the expense of impinging on the capacity of the upper compartment. The divider does zip open (but is not removable), so the pack is configurable as one large compartment.
In spite of my hesitation on this, I do think it’s great to see an innovative design to provide more flexibility for the user.
Here is a view in from the top. You can see where I have my tent and small items shoved down into the narrow wedge caused by items in the lower compartment pushing up and intruding into the wedge of the top compartment.
This photo shows, again, the side-opening lower compartment, but with the top/bottom divider partially unzipped.
- Hydration clip on shoulder strap: Sometimes the really small things count. Usually I find myself trying to find a place to stick the tube from my water bladder such that it’s out of the way, doesn’t drip on me (or my camera gear), yet is readily accessible. The Nepal 65 nailed this with a convenient plastic clip on the (right) shoulder strap.
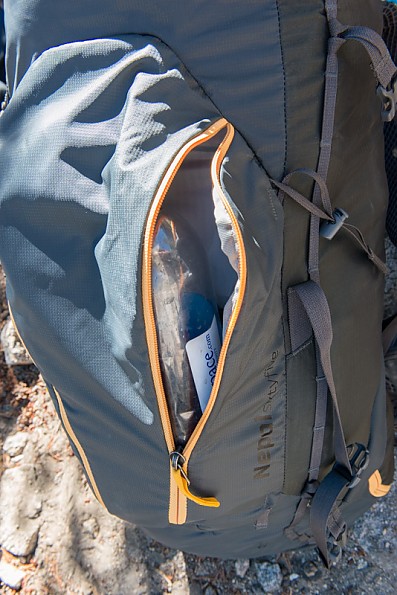
- Belt & Shoulder pockets: Many packs, though not all, have small pockets on the belt and/or shoulder straps. The Nepal 65 has both. Again, it’s a great idea, though some tweaking of the details could result in better usability. The shoulder strap pocket is large enough for, for example, a small thermometer, but not much else. The hip belt pockets are more useful — they’re large enough for a very small pocket camera, or (if you don’t mind getting food odor on your pack) a granola bar or two.
These photos show the strap pockets. For sake of reference, the camera in the hip belt pocket is a Sony RX-100 Mark 3 (although it's a compact camera, it's a very tight fit and the pocket flap won't close).
Hip belt pocket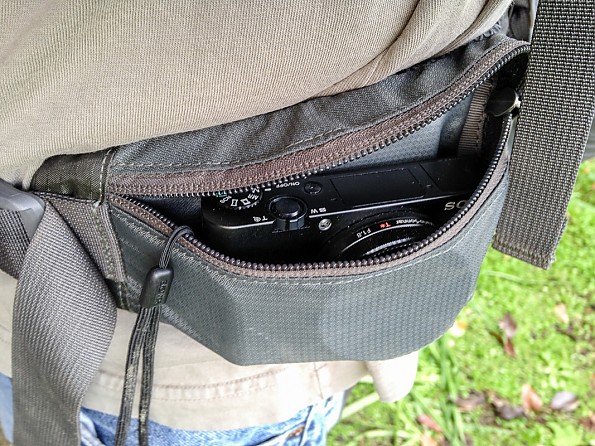
Shoulder strap pocket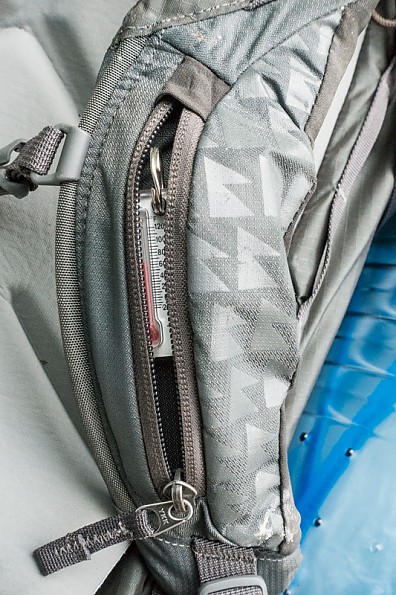
- Trekking Pole Carrying: The Nepal 65 includes an option for carrying trekking poles on the left side. While I didn’t have an opportunity to use this, I did test attaching my Black Diamond Alpine Carbon Cork poles, and they fit just fine.
I can see this being useful if going over an extended section with scrambling over rocks, or other situations which require both hands to be free. It’s another unique design feature by Cotopaxi that I haven’t had on other packs I’ve used.
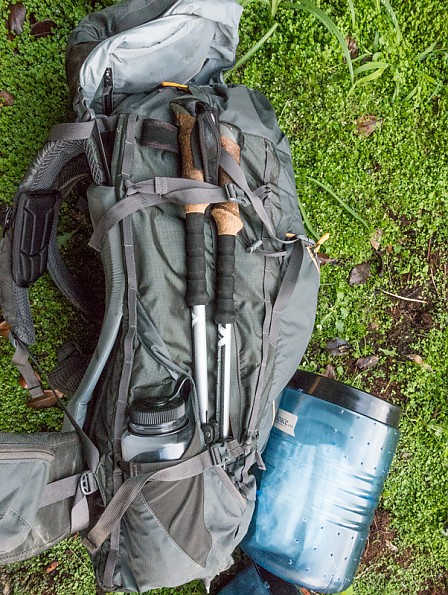
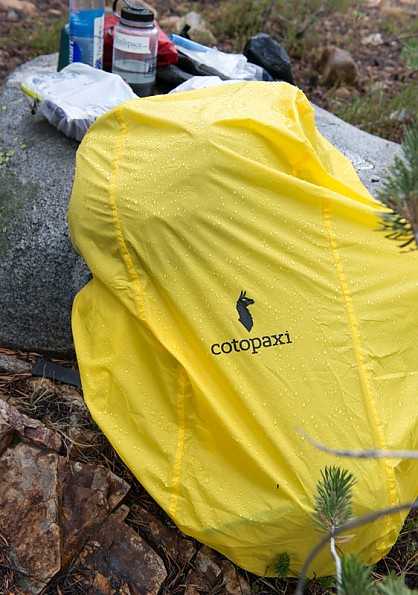
- Integrated Rain Cover: While not the only pack on the market to include one, the Nepal 65 is somewhat unique in that it includes a rain cover. It attaches to the pack by way of a small strap and buckle, and is removable. When not in use it fits into a dedicated compartment on the back side of the sleeping bag compartment.
Since my testing was all in California, and we’re in a period of extreme drought, I didn’t have a chance to fully test this. I did experience a light rain shower on one trip, and observed water beading up on the outside of the cover. I also tested it at home during a light rain shower that lasted maybe 15-20 minutes. I placed some packing paper underneath the cover to make it easy to see if any leakage occurred. The paper felt damp, as expected after being out in the rain, but showed no signs of actual leakage.
One thing to note is the cover is a very bright yellow. You may consider this a plus or a minus depending on your point of view about bright colors in the backcountry (perhaps in inclement weather it’s not a bad thing).
These photos show the rain cover after a light rain shower in the eastern Sierra.
Sizing, Adjustability
While there isn’t an established standard by which ordinary users can accurately measure pack volume, I got a sense of the pack’s relative capacity by comparing how my gear fit compared to the aforementioned Deuter ACT Lite 65+10 and Bergan’s Glittertind 70.
Overall it felt roughly comparable to the fully expanded Deuter (in the “+10” configuration). It felt significantly smaller than the Bergan’s. All of my summer gear fit just fine. However I found myself thinking that I’d want to find a larger pack for cold season use when I’d be carrying extra bulky clothes and other gear. I don’t consider this to be a fault of the pack, it’s only a 65L pack, presumably not designed for winter expeditions.
Adjustability is a mixed bag, no pun intended. The pack was designed with a variety of adjustment points. It was clear a lot of thought went into it. Adjustments include the hip belt, shoulder straps, and load lifters, suspension/pack body attachment, and the usual lid adjustment such that the lid can be raised or lowered depending on how full the pack is.
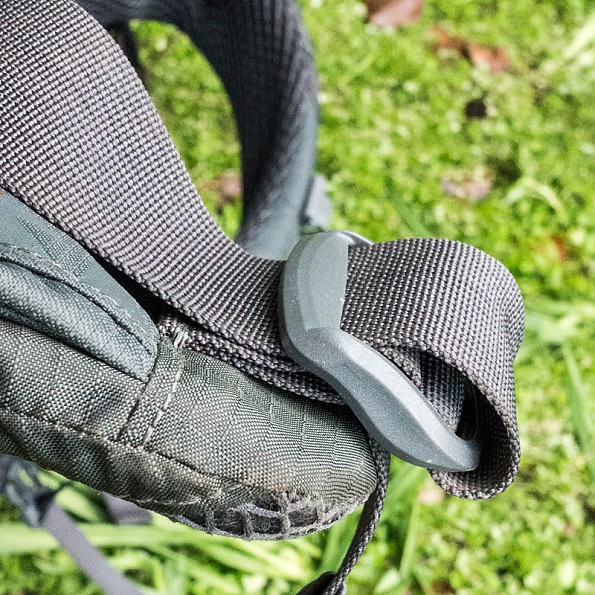
The hip belt has snap fasteners which can attach in three different positions for people of different girths. The shoulder straps adjust in much the usual way, including straps for tightening load-lifters. Both adjusted just fine. However, as with the Bergan’s pack I reviewed previously, I had serious issues with strap slippage. With the Bergan’s it was mostly an issue with the shoulder straps and load lifters. With the Cotopaxi, it was mostly with the hip belt.
With this one I mostly solved it by looping the extra belt material back through the buckle. It didn’t completely resolve the issue, but at least made the pack usable. I don’t recall having to do this in the past, but maybe it’s just a property of how pack belts are manufactured these days. Or maybe I was just lucky before. My only real gripe is that even with it looped back, it still slipped a bit, requiring periodic tightening.
This is the belt fastener with the belt looped back through.
The area where I did have issues was with the way the suspension is adjusted to accommodate different torso lengths. The pack is permanently attached to a foam back pad. However the height of the bag relative to the suspension and pad is adjustable by way of removing two straps from their attachment buckles, changing the position, and re-fastening the straps in the fasteners.
I wanted to raise the pack bag as it would have ridden better and alleviated the back strain I felt; however from the position it was in when I received it, the only possible adjustment would have been in the opposite (wrong) direction, resulting in it being lower on my back.
I’m glad I didn’t actually have to go through with this adjustment. The adjustment buckles are down between the bag and the pad, so they are very difficult to reach. It would take super dexterity to be able to reach the buckles & adjust the tightly fastened straps. [Note: I understand a fellow Trailspace reviewer, who tried this pack before me, did succeed in making this adjustment]
The pack comes in two sizes, S/M and M/L. This one had a tag on it marked M, so it’s unclear which size it was.
Though a little hard to tell just how difficult it is in person, those fasteners you see here are what adjusts the suspension. They're in a very tight spot between the foam back pad and the pack body.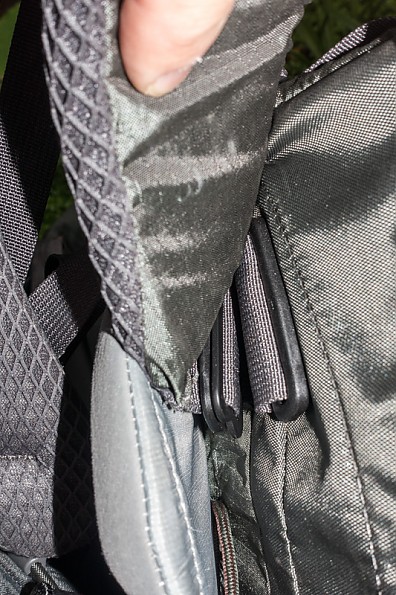
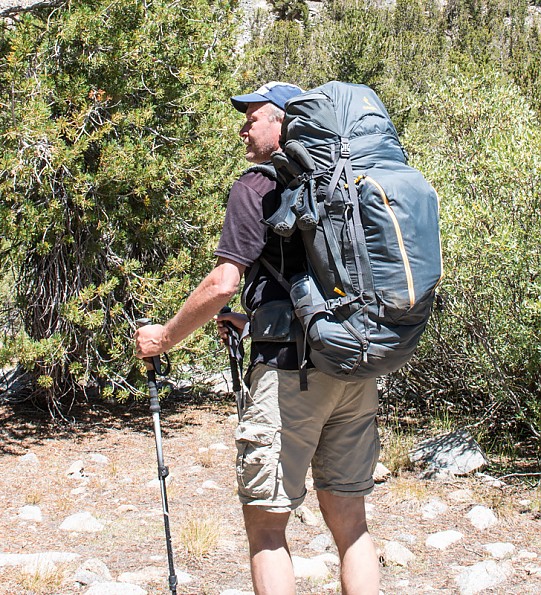
Fit, Comfort, Ride & Suspension
Unfortunately, this is where I was the least satisfied with this pack, and my overall scoring takes a hit here. I’ll qualify this with some words about my pack weight.
To be fair, I did carry fairly heavy loads for a weekend pack. With camera gear, food, and water, on some trips the weight was up into the upper 40 pound range (maybe 48-49). The good thing was that even with this load, the pack did not flex, creak, or in any way show signs of strain under the load.
But the bad thing was it felt stiff on my back, like I was carrying a pack board, reminiscent of my days as a volunteer for the Appalachian Mountain Club in New Hampshire. It is nothing like the Glittertind, which with its special flexible cross-frame, felt like it adapted to the shape of my back, and my movements while hiking, even off trail.
One could argue that a pack of this type isn’t designed for carrying the weight I carried. However, as I mentioned, the pack showed no signs of straining under the load. It didn’t flex, and there was essentially no creaking or squeaking. If the weight had been an issue I’d have expected the pack to show signs of straining. Therefore I feel comfortable commenting on the pack’s comfort with this weight.
In spite of trying the various adjustments, I never did get it to feel comfortable for more than a few minutes. At best, it felt “OK”, but before long I felt a strain in my upper back. As mentioned previously, I kept finding myself wishing I could raise the pack body. And, in fact, if I reached back and lifted the pack up, it seemed to then be in a position where it would feel more comfortable on my back. Unfortunately there wasn’t a way to keep it there, and no amount of adjusting the various settings changed that.
In addition to the stiffness and back strain, I also had issues with chafing in a couple different areas. One was in the shoulder straps. Unfortunately their placement, and lack of contour, resulted in their rubbing on the sides of my torso. It wasn’t severe, but it was annoying. On a longer trip it might have gotten worse, and hiking without a shirt in hot weather wouldn’t have been feasible.
The other area was with the hip belt. No matter how I adjusted it, it ended up chafing on the skin above and below it. Similarly, the shoulder straps caused chafing on my shoulders. The reason for this is that Cotopaxi used a harsh waffle style fabric on the underside of the straps. The design is probably intended to vent. However, for me at least, the result of this pattern was that any movement caused chafing — and I had the body sores to prove it after each trip.
I've had comfort issues with other packs, but it’s usually a matter of a trip or two before it (and my body) adapt, and it gets better. Unfortunately the Nepal 65 didn’t improve with use.
I will note that on later trips, I cut down on some of the heavy gear, food, and water I carried previously. On these trips I got the overall weight down to 40-ish pounds (I still carried a heavy DSLR and tripod). There was a noticeable improvement in comfort, but the same issues with back strain and chafing persisted, just to a lesser degree.
This is an overview shot of the back panel and suspension. If you look closely you can also see the clip holding the water bladder tube on the shoulder strap.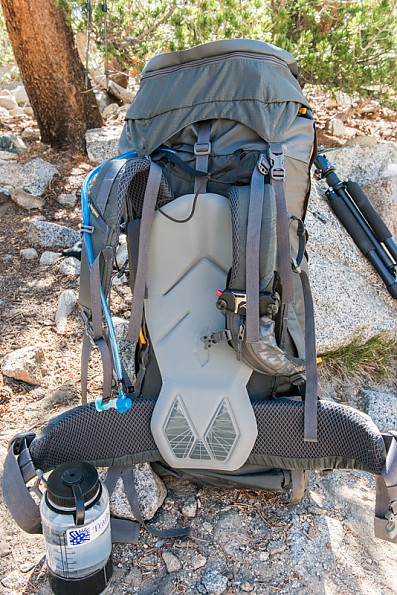
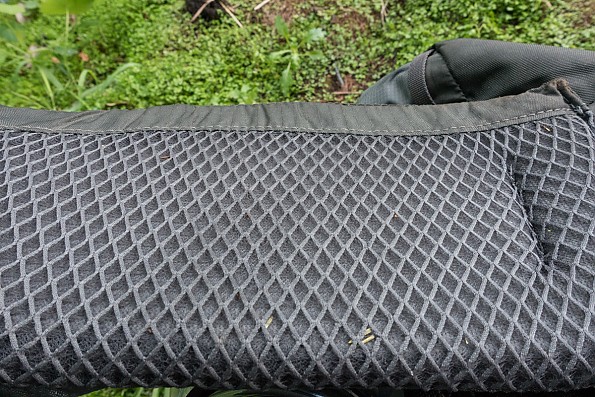
Here's what the hip belt and shoulder strap backing material looks like.
Capacity (and external carrying)
As previously mentioned, this pack seems to be true to the stated capacity. While my ACT Lite seems small for its rated capacity, the Glittertind felt much larger than rated. The Cotopaxi was in between, but closer to the Deuter.
In spite of its slim and trim appearance, the Nepal 65 does well in terms of options for external carrying. There is a pair of loops running down the back. Also I found the compression straps on each side to work well for fastening gear, for example I carried a semi-compact tripod on one side using these straps, and had no issues with stability. Unlike the hip belt, these fasteners held tight.
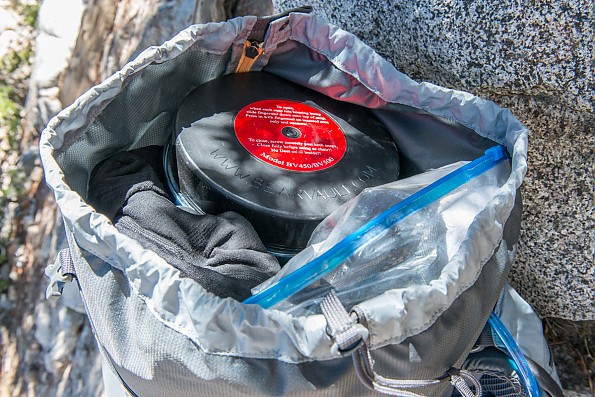
Here's a view of the top of the pack, with a BV500 bear canister and other gear loaded.
Organization & Accessibility / Ease of Use
In the previous sections I described the unique organizational capabilities of this pack. I applaud Cotopaxi for breaking away from the norm and being innovative with new features. At the same time, for my particular packing style, I got them to work, but felt I had to adapt myself to the pack, instead of the other way around. This of course is subjective as each person has their own selection of gear and method of packing.
In terms of ease of use, there were just two issues — one was the very difficult suspension adjustment; the other was the slipping belt buckles. The zippers all worked well (and I have a checkered history with gear zippers). All of the other fasteners worked well without incident (unlike some on the Deuter, which broke starting on the very first trip).
Construction & Durability
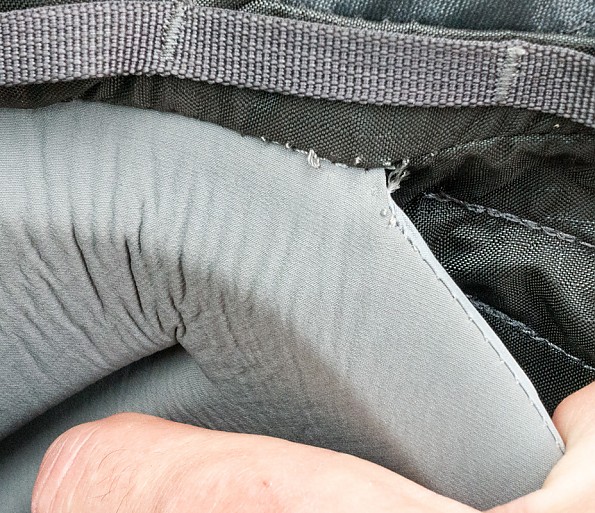
My first and lasting impression of the Nepal 65 was that it is a well-made pack. Sometimes you pick up a pack, and the very feel of it exudes “cheap”. Not so with the Cotopaxi. The pack material feels solid, and showed no signs of wear, even when rubbing against rocks and trees in normal use.
That having been said, I did notice one small sign of threads coming apart, where the foam back pad attaches to the pack body. A longer term test would be required to see if this was an aberration.
As I mentioned, even the (YKK brand) zippers worked well, even under the strain of a full pack. Cotopaxi lists the pack materials as “Ultra durable 210D Nylon 66 rip stop / 210 dynagin nylon / 630D HD nylon.
Summary
There's a lot to like about the Cotopaxi Nepal 65. With its somewhat unique “slim and trim” shape, it is easy to maneuver through tight spots, especially if you hike off-trail. With a plethora of unique design features, it has some characteristics which are different, and in some cases, better than the typical pack.
Unfortunately, the over-riding issue for me was the inability to hike comfortably without chafing and upper back strain. Some of this may just come down to the pack not fitting properly for my physique, or because of the weight I carried, and it might be better for others. While comfort isn’t the only feature that counts in a pack, it’s of paramount importance for long hikes, and very important to me.
With the caveats I've mentioned, I feel the Cotopaxi Nepal 65 is still worth checking out due to its unique design features. If it had been more comfortable to carry, I’d have given it a score of 4 or higher to reflect its unique design features. As it was, I scored it a 3 out of 5.
Source: received for testing via the Trailspace Review Corps
(Sample provided by Cotopaxi for testing and review)
Your Review
Where to Buy
You May Like
The Nepal 65 is Cotopaxi’s most technical backpack and is ready for adventures from backpacking and thru-hikes to international expeditions.
The Nepal weighs less than 4 pounds and features a powder-coated spring steel frame, an adjustable torso and waist belt, contoured harnesses with a cell phone pocket and hydration clip, trekking pole stowage, access to a sleeping bag compartment via a side pocket, and two large front pockets for stowing and accessing gear easily.
Available in medium or large, the Nepal can be stripped of its raincover, head, and day pouch for a minimal carry.
The purchase of each Cotopaxi product benefits a specific charity.
Specs
| medium | large | ||
|---|---|---|---|
| Price |
MSRP: $229.00 Historic Range: $109.00-$230.00 |
||
| Weight | 2.16 kg / 3 lb 13 oz | 2.2 kg / 3 lb 14 oz | |