Ed's Wilderness Systems Snow Clipper


 Reviewed by
muller_jim
+27
 April 1, 2011
A Review of Ed’s Wilderness Systems Snow Clipper Pulk by WinterCampers.com
A pulk (from Finnish pulkka; Scandinavian for a low-slung sled) is used to carry supplies or transport a child over snow. In the right circumstances a pulk offers advantages over backpacking. It is an easy way to move a lot of gear; more gear than one can comfortably stash in a backpack. So if you are setting up a base camp, hauling supplies to a cabin or outfitting a scout troop, you might consider a pulk. The addition of a rigid harness system is what differentiates a sled from a pulk.
Ed Bouffard, a former instructor with the National Outdoor Leadership School, runs Ed’s Wilderness Systems LLC in St. Cloud, MN. Ed has been designing ski pulks since 1994. As his designs improved, he started selling to fellow winter campers.
Ed makes four pulk models ranging from $250-600: The Snow Clipper, the Great Outdoors Fiberglass Pulk, the Weekender Four foot fiberglass sled and the EWS Expedition Pulk. Ed also offers a free book (www.skipulk.com) on making your own pulk. The Pulk Book includes instructions for drilling holes and rigging fiberglass poles to a sled, attaching the poles to a hip belt, tagging on fins for tracking and stabilization, and using it in the wilderness. Pulk poles and hip belts are available for sale through his company’s website.
I had the opportunity to review a Snow Clipper including the poles, roto-molded sled, retractable fins and harness that attaches to any daypack. This review will illustrate the components of the Snow Clipper, present my expectations prior to the review and describe an initial experience using the Snow Clipper on a winter camping trip.
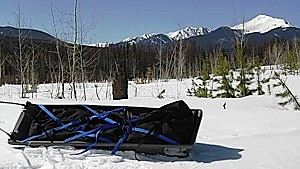
The Snow Clipper uses a rotomold process. Rotomolding creates a sled of uniform thickness and allows structure to be built into the sled. The result is a durable and rigid sled with shorter and narrower dimensions. Roto molding also allows built-in ski track runners, fittings to attach the poles and molded mounts for a set of retractable fins. The Snow Clipper unit is a durable, general purpose pulk intended for individual travelers during short expeditions and also group travel over several weeks when gear can be shared.
The Snow Clipper consists of three components: the sled, the poles and the hip belt.
The sled
The Snow Clipper is 56" by 18" by 6"- The cargo bay is 15 inches wide by 51" long but the bottom starts sloping up at 45". The Snow Clipper sled weighs about 10 lbs. The bow of the sled is angled to easily get over obstacles such as downed trees.
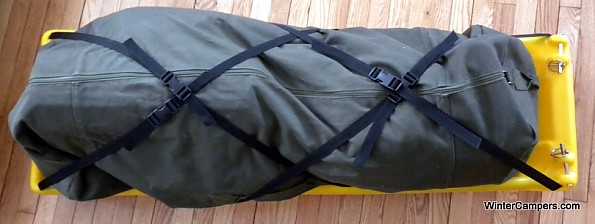
The sled has webbing compression straps which cross over the top of the sled to tie down gear and clip with buckles. The nylon webbing is secured to the rim of the sled and is sufficiently long to fit over a fully loaded bag with space to allow snowshoes or clothing to be held underneath.
There is a slot dividing the sled bay in half. You can slide in a ½” divider to separate the sled bay into two sections or slide in a back rest for a small child. I did not use the divider slot.
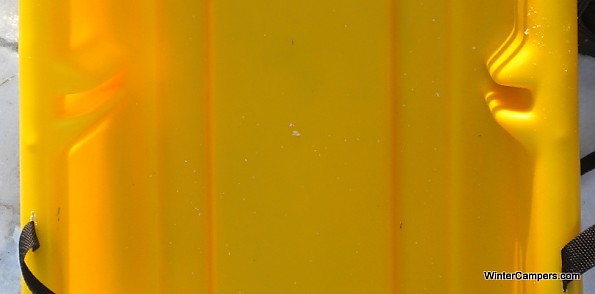
Underneath the sled are two molded runners that are sized and spaced for ski tracks.

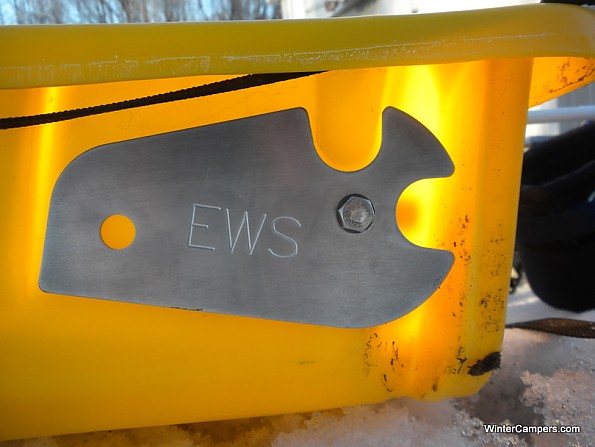
The sled has two rear mounted fins which prevent “fish tailing” while traversing side hills or making icy descents. The fins add unnecessary friction when not needed; so one can simply pop out of the way when not needed.
There are two attachment points on top front corners where the poles are clipped to the sled with a bolt and linchpin. The fit of the bolt and linchpin is snug and precise.
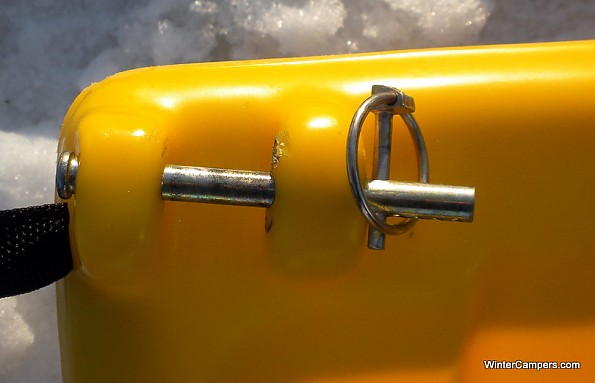
By making the attachment point on the top of the sled the poles can be easily folded.
The Poles
The poles are fiberglass wands which attach to the sled with removable bolts secured by linchpins. The poles provide the connection for pulling as well as lateral control. The poles can be used in parallel or crossed.

The Hip Belt
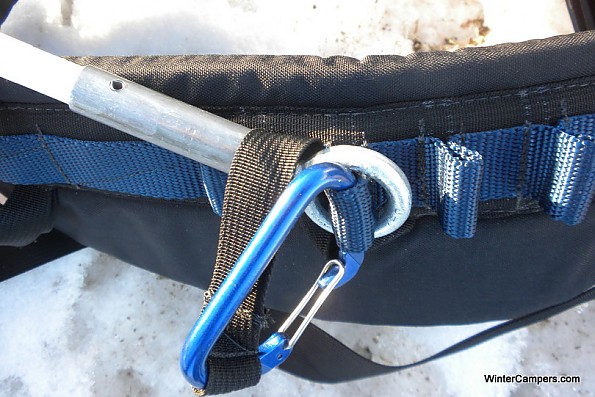
The poles clip into a wide padded hip belt, similar to a quality hip belt for a backpack via small carabineers. One just threads the eye of the pole with the webbing loop then clips the loop with the carabineer on the outside of the eye bolt to keep the pole end closer to the waist. There are multiple loops on the hip belt to permit adjusting the point of attachment. The harness belt is worn above the hip-bones and tightened enough to keep the belt from riding down. The hip belt comes with day-pack straps to attach to a daypack to help prevent the belt from sliding down your hips.
Expectations
We are all looking for ways to improve our outdoor experience and make it easier. I had two expectations going into this trip.
- I was expecting that I would be able to tow more gear with the pulk than I would normally take in a backpack. After all, they use them for expeditions, right? By the time I was done I had 49 lbs of gear (including ~8lbs of water). The entire unit weighed 64 lbs with 49 lbs of gear riding on a 10 lb sled pulled by 3 lb poles/hip belt.
- I anticipated being able to travel at the same speed as my companion who was carrying a backpack.
Finally I was uncertain about assembling the Snow Clipper, packing it for a trip and the learning curve for using it.
Lessons Learned Loading the sled
Loading the sled is a little different than loading a backpack. First, I used one large zippered duffel bag. In order to stay organized I used separate stuff sacks and smaller duffel bags for my clothing, cooking gear, food and sleeping bag. Secondly, there is just ALL THAT ROOM! Like having an over-sized backpack, if one has the space there is the temptation to fill it with items. I tried to load the sled with heavy gear towards the rear while trying to keep the weighted center of gravity as low as possible. I put my sleeping bag and lighter items in the bow of the sled.
Lessons Learned Towing the Pulk
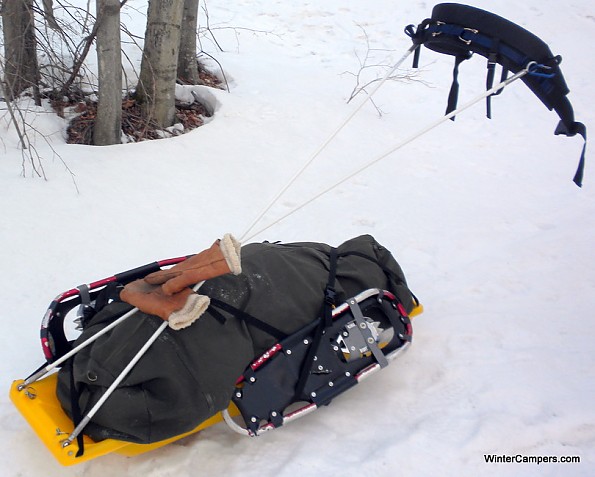
Once packed it only took moments to load and lash a duffel bag, attach the poles and fasten on the hip belt. The Snow Clipper came with an illustrated instruction sheet, however, readying the pulk was intuitive. I really only needed the instructions to confirm I had the poles correctly attached to the hip belt.
My initial venture with the pulk was a 5 mile round trip hike to the Gull Lake lean-to. The 1st portion followed a mostly level road bed used by snow-mobilers with compacted snow.
The 2nd portion involved ~160’ elevation gain up a rough and eroded trail. This was more akin to bushwhacking as we avoided the gullies formed by erosion and weaved around the trees adjoining the trail.
The snow was hard and crusty and initially I was apprehensive about the sled slipping sideways. However, slipping was rarely an issue. The sled tracked straight and the few times that it was unavoidable to traverse a side hill it was not difficult to keep forward motion with the sled.
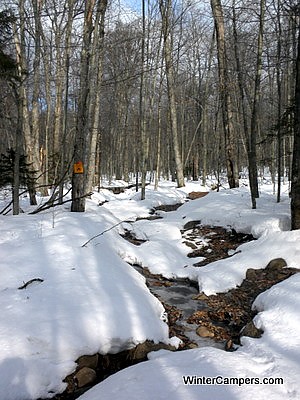
Only once, while crossing a stream bed, did the front of the sled get caught under a lip of crusted snow and require re-routing.
I didn’t encounter any problems going around trees or sharp corners but I was cognizant of the length. It was reminded me of driving a vehicle and towing a trailer. You know it’s there, you know it is going to follow you and you feel you better make allowances for maneuvering it. But I never got it hung up on trees or brush.
I preferred crossing the poles in the middle between the harness and the sled. While bushwhacking this configuration provided more of a delay in how the sled followed. It was easier to turn corners around trees and not worry that your trailing sled will run into it. It also works well in preventing a turnover to one direction since the bottom pole has to go through the top pole to turn.
Going downhill was a breeze – as long as there was good footing. The pulk stayed in control and never fishtailed behind me.
The belt was easy to unbuckle and drop during rest stops. It was quicker and easier to disconnect and connect to the pulk during rest stops than dropping and picking up a backpack.
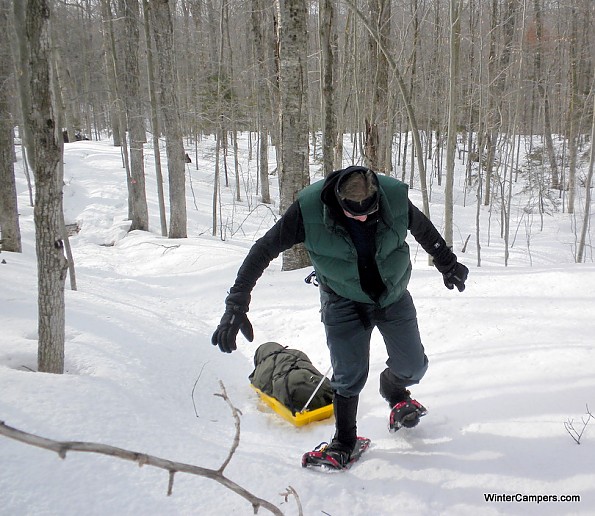
The difficulty was in going uphill. The combination of a heavily loaded sled and the hard packed crust made it real work to dig in the crampons on the snowshoes, lean forward and pull. It felt like I was using different leg muscles (calves and sides of my thighs) than I would normally use hiking.
When pulling a heavy load up steep inclines the waist belt tended to ride down my hips a bit. While the hip belt comes with day-pack straps to attach to a daypack I did not use a daypack on this trip. During my initial use I had to repeatedly snug up the harness as the nylon webbing stretched.
In terms of meeting expectations it is certainly possible to carry more gear in a pulk than in a backpack. If the trail conditions are right – level trails with fresh or packed snow – it is certainly feasible to transport gear in excess of what can be easily moved in a backpack. But hauling it up hill is a different matter. As my companion said “You wouldn’t think of hauling a 64 lb backpack up the hill, why do it with a pulk?”
In terms of matching my companion’s travel speed, with the exception of a few steep pitches, I believe this expectation is met.
So, would I recommend a pulk? Yes, if the trail is level and smooth. No, if there are hills to climb or if one is anticipating serious bushwhacking.
I look forward to using the Snow Clipper on winter camping trips with different conditions and providing more details.
Your Review
Where to Buy
You May Like
Specs
| Price |
MSRP: $230.00 |
| Includes |
full length poles, secure strap and harness bottom. |
| Dimensions |
56 x 18 by 6 inches (cargo bay is 15 inches wide at widest point and about 51 inches long, but the bottom starts sloping up at 45 inches) |
| Options |
|
|
Retractable fins - $20 |
|
|
Full harness - $40 |
|
|
Polyester water resistant Shurlast cover with a tough #10 coil zipper - $59 |
|
|
Compression cover - $19 |