CritterMap Backcountry Navigator for Android
 Reviewed by
OldCodgerMe
+84
 April 9, 2013
Topo map GPS navigation program for Android phones. Download maps in advance from various map sources, or custom source and use them in realtime on your phone while you hike. Add points-of-interest, waypoints. Log your actual routes, save and share them. Excellent product with a somewhat non-intuitive user interface, recommended for backcountry hikers.
Pros
- Full function navigation program without buying a separate handheld GPS unit
- High-resolution maps available (especially AccuTerra)
- Add waypoints as you hike, add notes, comments
- Works on a wide variety of Android phones
- Active developer who responds quickly to issues and continually evolves the capabilities
- Fast satellite location, satellite view
Cons
- No version for Apple IOS
- If used continually, will quickly suck down phone battery
- Many capabilities are buried in the menu structure
- Map management is somewhat kludgy
The Backcountry Navigator program for Android has been a really useful tool for me, which is why I thought I'd share my experience with it. It is by no means perfect, nor does it have as much raw capability as the best dedicated Nav devices. But for the dayhiker, the dogwalker, and the casual weekend backpacker, it might be exactly what you need.
The Backcountry Navigator program is cheap, and effective. It is available through the Google Play store, or at the Amazon app store. There's a free trial version, but the full version is about $10 at https://play.google.com/store/search?q=backcountry+navigator
Various map sources are available free, and there are also premium map sources available for an extra fee. I've been using the premium ($25) AccuTerra maps source, which have proven very accurate and useful. I've had the program now for almost two years, and have used it every week during that period.
Most of my weekly hiking is on several large tracts of open space within an hour of my home in Connecticut. These include town "open space" areas, such as the Ives Trail system around Danbury, CT, the Hudson Highlands trails and sections of the Appalachian Trail in New York, CT, and Massachusetts. I've also hiked with the BC Navigator program in various areas of Maine and around Ashland, North Carolina.
In each instance, I've downloaded the appropriate map tiles into the phone memory prior to hiking, and then used the mapping program to record my track, and for general navigation.
The CritterMap website has some helpful short tutorials and videos to get you started. I'll address three areas that I wish someone had told me about, to help me get up to speed with the program:
- Map source selection
- File management
- A typical trip
Map Source Selection:
Over the nearly two years I've been using the program, there have been a number of changes in map sources. Originally, I believe that there were several map publishers who provided free access/downloads for the developer to include in the program. Over time, some of these sources have gone away, and new ones have been added.
The various sources differ in terms of their recency (most of the USGS Topo maps date back several decades), their clarity (some are much easier to read than others), and in the type of display they offer (markings, contour intervals, points of interest, roads, and trails, etc.). Also, map coverage extends internationally. Although I have not yet had a chance to try map sources for Australia or Canada, these and many others exist and can be used with the program.
I believe that there is not one single "best" map source, so it is worth trying alternatives for the area you plan to hike, to find the source that will work best for you.
Currently there are 7 sources listed for the U.S., but this seems like a moving target. There have been other sources that I used with the program that are no longer available. I have not used or tried every one of the sources now available. The sources now available include some ability to overlay one map source upon another, which helps to realize the best features of both
- USGS Topo maps available from CalTopo, Microsoft Research Maps or ArcGIS, which look like the paper USGS maps that you might buy from an outdoor store. These have the advantage of being fairly compact files, so you can fit more area in the memory you have available on your phone. The CalTopo maps are 24K Topo Maps and are better quality (clearer) than the ArcGIS maps.
- USGS Color Aerials, which are based on digital images shot from above. You can download just the imagery, or there is a version with markup. These seem to be available from the USGS national map viewer, or via MapQuest. Some can be downloaded in small tile or large tile formats.
- AccuTerra single layer maps are part of the premium map package which costs extra. However, the AccuTerra maps are more recent, and have better detail for man-made objects such as buildings and roads. I've found it worthwhile in my more-developed backwoods venues to have the premium maps.
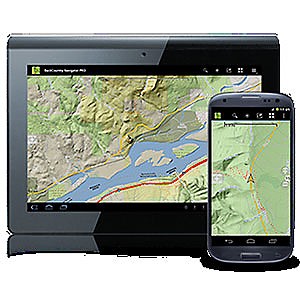
- Hybrid maps: The program recently introduced the capability to overlay the AccuTerra maps and the Aerial maps, which can be very useful. Certainly the maps look pretty. Here is one example, taken from the Crittermap website:

The top row shows standard Android notifications, along with the current time (not part of the program, but part of Android).
The second row is the main program menu, top level. It shows 5 icons called Map, a looking glass for "Search", A bombsite for location, a set of layers for map sources, and a triple dot on the far right for miscellaneous commands. Nearly all of the program's capabilities are nested beneath these icons. The layers Icon is where the map control commands hide, and they aren't all that great. They work fine, but are not all that intuitive to use. Fortunately, it's not something you have to do very often.
To select a map source, you tap the "layers" icon. That brings up a page which shows
- a Preview checkbox: This turns out to be a critical tool for map management (see below)
- The map layer source (with drop-down list of sources), which allows you to switch quickly between different "views" of the same area if you have downloaded multiple layers.
- Another drop-down for "Map Package" which allows you to bundle your maps together into a group with a different name (I have one for local and one for Maine hikes, and another for North Caroline hikes)
- Another dropdown menu for "More Map Sources" which is confusing compared to the map layer source button above
- Another dropdown menu for "Select Areas for Download"
- A button to pull up your download history, showing each download you've done, the source you used, when it occurred and how many tiles you downloaded. This list can be used to select and delete some of the stuff you've downloaded, but when I select some of the previous downloads, my version of the program crashes. Oops! a bug, I think.
There are several potential "gotcha's" when selecting a map source. The first is the amount of space that these files can consume. My first impulse when I got the program was to download all the maps for all the areas in which I normally hike. This turned out to be a very bad idea, for several reasons.
First, it is very time consuming to download maps, and the larger the area selected, the longer the download. You definitely want to do this over a wifi connection, and not when you are paying data rates on your phone.
Second, the maps will quickly consume all the available memory on your phone. And getting rid of maps that you don't need turns out to be a non-trivial exercise too.
Finally, if you choose one map source and decide you want to try another, you might have to start all over again. So it is a good idea to start with the smallest area you need, download and experiment/try different map sources until you get what you need.
One of the positives of the Android platform is that many of the phones utilize micro SD cards for storage. So one strategy is to get an extra micro-SD card for your maps. I found that my 16GB card filled up very quickly, but an upgrade to a 32GB card gave me access to most of the areas I need, as well as having space for all my music, my camera images, etc.
Let's assume you don't get carried away like I did, and you focus on a specific area where you will be hiking. Start by enabling the preview by tapping on the Map Layers icon, and then touch the checkbox enable the preview icon (probably on by default). Use the "back button" then search by touching the search icon, and enter the name of the area where you are going to be hiking.
For instance, I can type in "Hudson Highlands State Park." You may get a list, several of which are relevant, or in my case, the display will now center on Breakneck Ridge in the Hudson Highlands.
On the right-hand side of the display you'll see a faint "+" and "-" symbols. Touch one or the other to zoom in or out to encompass the area where you want a map. You can also use pinch motion or spread motion to zoom in or out.
Once you have the area on screen, touch the Map Layers icon again, then go to the bottom of the page that appears and select the dropdown box for "Select Ares for Download." This will take you back to your map, but adds a new icon bar at the top of the screen.
Use your finger to select the upper left of the area you want to map, then drag to the lower right. The screen will show a rectangle that encompasses the area that will be downloaded. Actually, it will download all the tiles that touch your rectangle, so you don't need to be super-precise. My fat finger was often to blame for selecting a smaller rectangle than I wanted, but eventually I figured out that I was getting the area I wanted.
If there's more that you want, you can use the icon bar at the top to touch the hand icon, which lets you move the display to a new area and then to touch the hand-in-box icon to continue selecting another rectangle. When you've selected the areas you want to download, you can select the down arrow to the right which will begin your download.
Where it gets tricky is if you want to get rid of some of the areas (such as when you are running out of memory on your phone). Ask me how I know this... The process to delete a map area is exactly the same as adding more tiles to your map. You have to use the select areas to download again, even though you are NOT downloading. Not exactly intuitive! Again, you use your finger to highlight the area to download.
But how can you tell what you have and don't have already downloaded? Well, before you can select areas to download, you should turn off the preview. The preview "fills in" the display with all of the surrounding tiles, even if they are not on your phone (assuming you have a data connection). To see what you actually have, you need to turn off the preview, in which case the surrounding tiles will be greyed out. Now you can see what tiles you have that you want to delete, and select them for removal from your device.
Once you've dragged a rectangle to show what to delete, you touch the far right-hand triangle, which will proceed to delete the selected map tiles. Whew!
Another potential gotcha here, this can take a long time, or at least it does on my Android phone. I had a huge problem when I left my phone in the midst of deleting and it ran out of battery before the operation was completed. Best if the phone stays plugged in while performing file operations!
Trip Files & File Management: A typical trip
So you're about to go for a hike. You've got your maps, you've got your fanny pack, your water, your rations, etc. and you're about to set foot on the trail. So you tap the icon for Backcountry Navigator and you'll get a nice display of a map, whatever location that was last shown.
First thing is to tap the target icon which gives you two options, to center on your location now, or to record a track. Tapping the first one will enable GPS (and start draining your battery faster while the GPS is active). If you're under heavy tree cover, it might not find you, so you might want to start the GPS before then, when you're in a spot that can "see" one or more GPS satellites.
Once it finds you, you can stick the phone in your pocket and whenever you want you can pull it out, light up the display and see where you are. If you tap the far left "Map" icon, you'll see a dropdown list which under NAV can give you a compass or a map bearing, and help you locate any waypoints you've loaded in.
But the feature I use most often is the tracking functionality. So after I've been located by GPS, I touch the target icon again, and start tracking. This will create a record of my path, and log my vertical ups and downs, the time spent, speed, lowest/highest altitude, etc. All that information is saved to a default file.
The next time I hike, all the information will be saved to the same file, unless I close the first file and start a new trip file. The menus for this are under the three dots on the right-hand side of the screen. I can close my previous trip, create a new, empty trip file, and some fancier stuff, like importing GPX or KMI information or sharing my trip data by exporting to a GPX file or KML file.
My first month of using the BC Navigator program, I ended up with a default file which had 30 different hikes in it. Later when I wanted to share, I found it difficult to disentagle all that information. So it is useful to start a new file each time you start a new hike. I wish someone had told me that before!
Overall, I'm very impressed with the Backcountry Navigator program and its capabilities. The program author has been very responsive to suggestions for improving it. When I had a problem with a map source that no longer worked, I had same-day response that helped me resolve it. The maps are beautiful on latest generation Android smartphones. The ability to add waypoints on the fly and use a variety of icons to indicate things like wild animal sightings, or environmental infractions is quite useful. The more I've used the program, the better I like it.
The only difficult parts about the program are those that I've shared above. Everything works very well, and I've never been stranded without knowing where I am. Of course, I always carry a spare battery for my phone, or on a weekend trip a solar charger. That said, I'd highly recommend this product for light recreational hiking use.
Source: bought it new
Price Paid: $35
![]() Reviewed by
Reviewed by
Jeff Erickson
+3
 January 24, 2015
Many people are going out and spending hundreds of dollars on a GPS, then at least a hundred more on mapping. I was one of them. This product works excellent for me and it is nice having a larger phone screen.
Pros
- Having this in one unit "your phone"
- Mapping is clear.
- Quite easy to learn and navigate through.
- Lots of support on the net.
- Having this in one unit "your phone"
I spend a lot of time out in the backcountry hiking, quading, dualsport riding, and fly fishing. So I purchased a handheld GPS online, spent $450 with mapping "sale" price. It was a frustrating joke! The program was very difficult to learn, the screen was very small. I ended up selling it for a third of what I paid.
I recently was looking online for another GPS, hoping to find something with a larger screen and user friendly. Prices are ridiculous for the units and mapping. Then I saw a review on Back Country Navigator. Read many reviews and for the most part they seem quite positive other than a few phones couldn't hold a signal. But it made sense, most people cary their phones with them all the time, nice large screen and people are familiar with them and for $13.99 Canadian, it's well worth a try.
I loaded it to my Samsung S3, did a little reading and YouTubing for setting up. Got on my dualsport bike and went for a ride through the trails. I was a little skeptical due to the tall trees I was riding through. You can't see the sky due to the tree canopy. Got back and had a look. It was perfect! Never missed a beat. All the trail was there, all the information was there. 18.9 ks, lowest and highest elevation, average speed and more.
What a great product.
Source: bought it new
Price Paid: $13.99