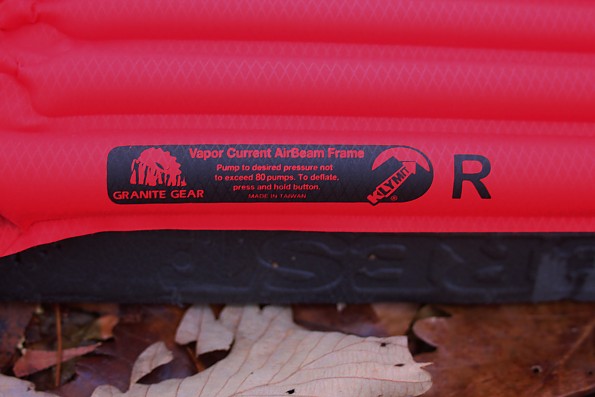
Granite Gear Vapor Current Airbeam Frame


 Reviewed by
trouthunter
+1,801
 January 12, 2014 (original Nov 30, 2013)
The 3.2 oz/ 90 gm inflatable Airbeam Frame replaces the H.D.P.E. (High Density Poly-Ethylene) frame sheet used in Granite Gear’s line of Vapor Current backpacks. It is designed to increase the pack's load capacity 5 lb / 2.25 kg, and reduce the weight of the backpack itself by replacing the 6 oz / 107 g plastic frame sheet. Available in three torso lengths, the Airbeam can also be used as a sleeping pad extender for additional comfort. This product can help ultralight backpackers reduce overall weight while adding a functional, multi-use piece of gear to their gear options.
Pros
- Half the weight of the HDPE plastic frame sheet — saves 3 oz / 85 g.
- Adds comfort and padding while increasing load capacity
- Can be used as a sleep pad extender, or rolled up as a pillow.
- Quality construction and includes repair kit.
- Included rubber inflation bulb makes it easy to inflate.
- You choose how much air pressure suits your needs
- Did not affect airflow between the pack and wearer
Cons
- Reduces pack volume slightly more than a HDPE frame sheet
- Extra parts to keep up with vs. HDPE frame sheet (bulb & repair kit).
- Can be punctured like any inflatable mat.
- Must be inflated with the bulb.
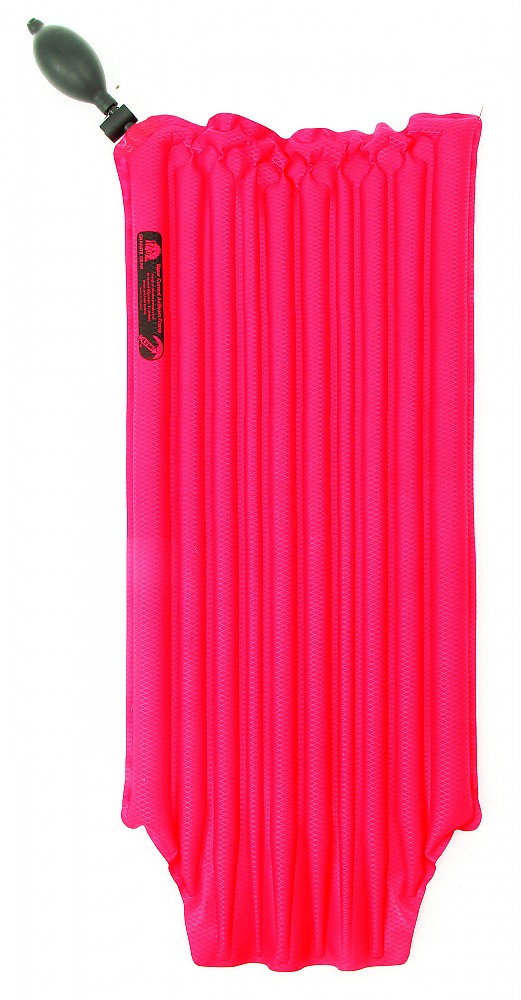
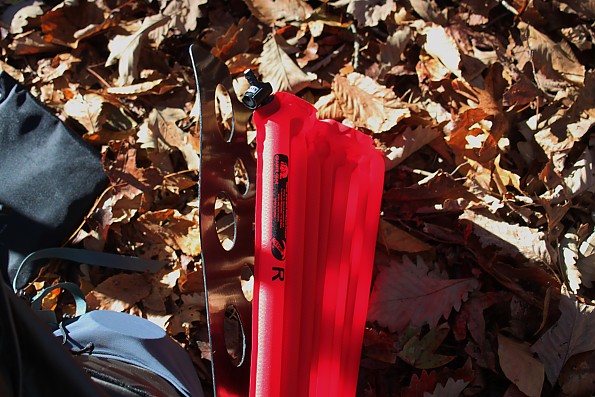
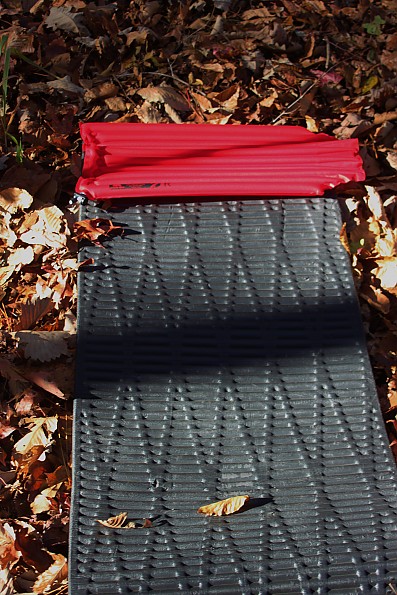
The red colored Airbeam - seen here pulled out for visibility.
Weight - 3.2 oz / 90 g with the inflation bulb attached.
I have been what I will call a “hybrid” backpacker for about ten years now. I own a mix of traditional, light, and ultra-light (UL) gear. Sometimes I am carrying a 50 lb. / 22.7 kg. backpack topped with field guides and camera equipment in a pack designed for those loads, and other times I go on fast & light trips with minimal gear in a smaller frameless pack. Like most light or UL backpackers I’m always looking for ways to lighten my load without sacrificing safety or functionality of my kit.
I was intrigued with the opportunity to test the Airbeam not only because the manufacturer claims it is designed to reduce weight and increase the packs load capacity, but also because it can function as a sleeping pad extender.
So let me explain the basic concept of this piece of gear. Many UL backpacks are made lighter in part by using a single, removable, plastic frame sheet instead of the aluminum stays and beefier suspensions found in most packs. This gives the UL pack enough rigidity to meet a certain load capacity.
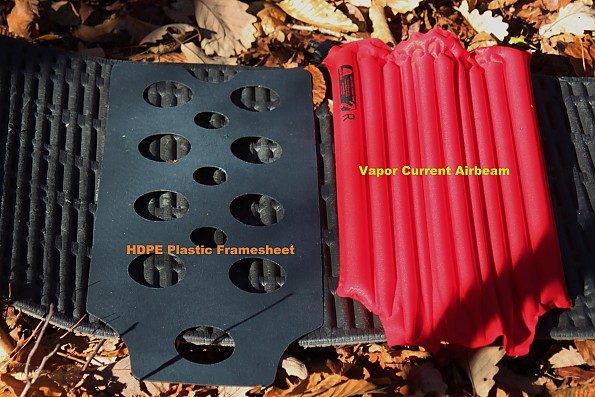
Left: The plastic frame sheet the pack came with
Right: The inflatable Airbeam
Here is a video overview of the Airbeam.
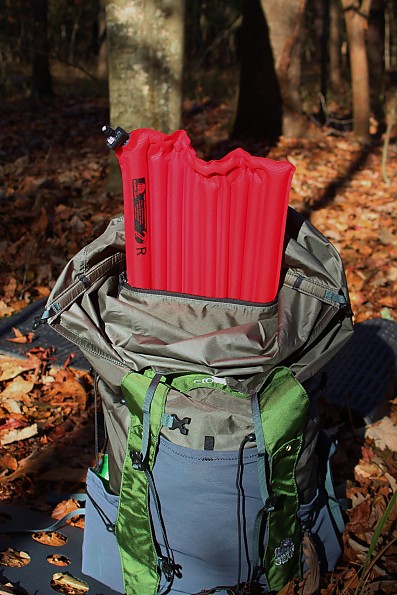
The Airbeam is designed to be a lightweight replacement for the plastic frame sheet the Vapor Current backpack comes with. I tested it with a Granite Gear Vapor Current Crown (60 liters) backpack and an old frameless Echoroba (about 45 liters) that I bought used 20 years ago.
The medium size Airbeam I tested weighs 3.2 oz / 90 g with the bulb attached. By using pressurized air in horizontal channels the semi-rigid Airbeam becomes the new “frame” increasing the backpacks load capacity by about 5 lbs. / 2.27 kg.
The Vapor Current Airbeam was designed in conjunction with Klymit, a company who makes inflatable sleeping pads, air beam frames, and other gear.
Although this particular Airbeam is made specifically for Granite Gear’s line of Vapor Current (VC) backpacks, I also tested it in an older Echoroba frameless pack I have had for many years.
It arrives.
I received the Airbeam in the mail and was pleased to see how small it was when deflated and packed inside its little zippered carry bag.

Also included were a repair kit, a rubber inflation bulb, and instructions printed on the Airbeam.
The whole package weighs 4.5 ozs / 130 gms.
The part mesh carry bag has enough extra room to store other small pieces of gear if you wish like a small led light, or extra batteries.
How to use the Airbeam
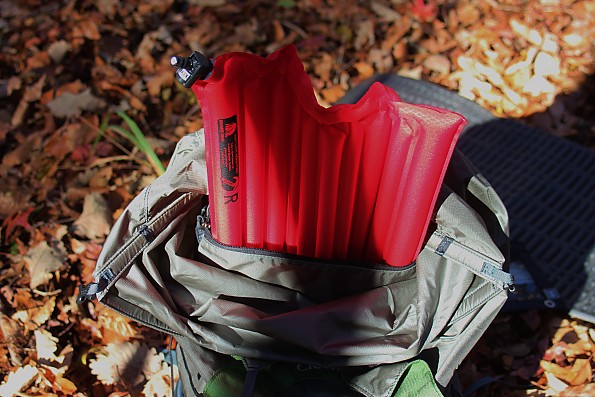
In order to use the Airbeam in a GG Vapor Current you must first remove your plastic frame sheet from the zippered sleeve in the backpack, and then you insert the inflated Airbeam in its place. You could inflate the Airbeam after putting it in the pack, but I see no advantage to that after trying it a couple times and struggling to get it positioned.
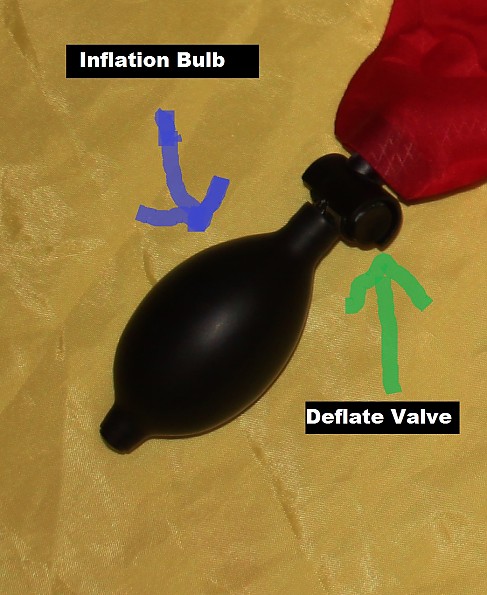
Inflation is pretty straight forward — firmly push the rubber bulb onto the inflation nipple with a twisting motion and give the bulb about 60 to 70 pumps. The Airbeam can not be inflated by mouth.
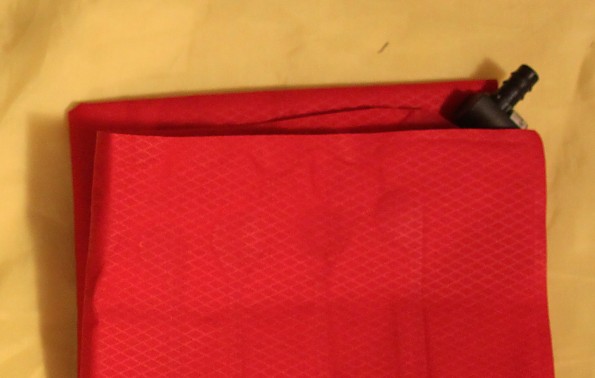
Here's the inflation nipple with the pad folded up.
The instructions say not to exceed 80 pumps. You can remove the rubber bulb, or just leave it in place. I prefer to leave it in place since it is easier to keep up with this way than a loose black bulb in a dark pack.
Once you have the Airbeam in place you can pack your gear just as you normally do provided you are not in the habit of packing sharp objects close to your back as this would pose a risk of puncture (both you and the Airbeam)!
You can leave the Airbeam inflated during your entire trip and use it as a sleeping pad extender, alone as a minimal sleeping pad, or even as a pillow by deflating it some and rolling it up inside a soft jacket.
When you wish to deflate the Airbeam you release the air pressure by pushing a small round spring-loaded button located just below the inflation nipple. The deflation button is recessed in a semi-circular plastic housing; this housing protects the button against damage, or accidental deflation.
Putting it to the functionality test
I tested this product on three separate trips, with two different backpacks, and with both a tent and a hammock. I tried it out in my back yard with my bivy as a minimalist sleeping pad for one night.
Okay, so the first thing I notice before even leaving the house is that the Airbeam is thicker than my plastic frame sheet.
The frame sheet is about 1/8 in. or 3.05 mm. and the Airbeam is about ¾ in. or 1.9 cm. thick. No biggie, but to be technical the Airbeam does take up more volume than the plastic frame sheet -this did not pose any problems for me getting all my gear in the pack, but it should be noted. After hiking a couple miles around my house and making some suspension adjustments I put the backpack in my truck so I’m ready for an early departure the next morning.
At 4:30 am I head off for a three day trip (the second of three testing this product) into a local wetland full of Cypress trees, Scrub Oak, Palmettos, Water Lily, and Bullfrogs (lots of frogs). I paddle a canoe for the first mile and a half over to a 53,400 acre conservation area where I set off on foot after hiding the canoe. My pack weight is 32.4 lbs / 14.7 kg. Not exactly ultra-light but I added a book and a camera, plus some extra water to really see how this pack does with the new Airbeam. Granite Gear says the Airbeam boosts the weight capacity of the pack 5 lbs. / 2.26 kg.
I tried the same gear load with the plastic frame sheet and with the Airbeam; the pack feels better with the Airbeam. To be honest it’s hard to tell if the Airbeam boosts the pack’s weight capacity structurally more than the plastic frame sheet, or if the pack is just more comfortable due to the cushion of the inflatable Airbeam, maybe a little of both. As I stop for lunch I also check to see if the Airbeam has lost any pressure, or if it has moved out of place - everything seems to be fine so I hike on.
Around 5:00 pm the sun is starting to set so I look for a place to camp.

Since the Airbeam can also be used as a sleeping pad, I will be sleeping in a small one man tent to test that option; this means I have to find higher ground that is free of cypress knees and mud - it’s not easy in this ecosystem. Around 7:00 pm I have pitched camp and have started supper in the dark, which just comes with the shorter days. After cooking I place my mostly empty pack against a tree to lean back on while I eat my grilled sausage & crab jambalaya. Once again I find the additional cushioning of the Airbeam useful, this time as a chair back.
While canoeing back to the boat landing at the end of my trip I ponder how much flotation the inflatable Airbeam adds to my backpack should I capsize the canoe. It has to add some I think, but I don’t feel like testing my theory at the moment. Maybe that is something I can add to this review at a later date and under more controlled conditions than the windy lake I was on at the time.
Using the Airbeam as a sleep pad
When I decided it was time to get some sleep I pulled the Airbeam out of my pack and placed it on top of my RidgeRest pad and lay down on it.
As a pad extender.
My impression is that it does provide extra comfort even though it’s fairly small at 10 x 23 in. / 25.4 x 58.4 cm. I tried it long ways without the RidgeRest and that worked for me as a minimalist pad inside a bivy.
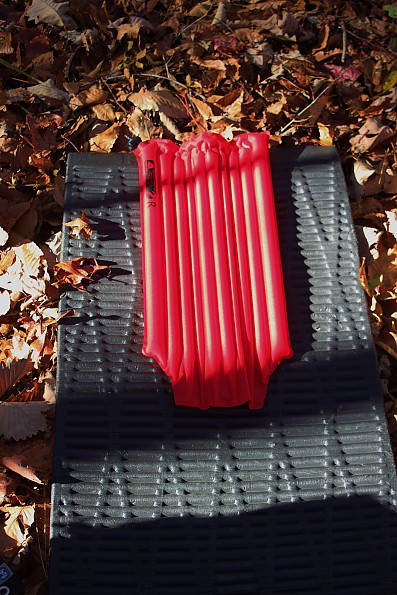
Used on top of a pad long ways - I also used it without a pad in a bivy long ways like this.
I’m 5’ 6” and 150 lbs / 68 kg. For larger people with wide shoulders the pad could be turned cross ways (as a pad extender) for extra support under the middle back and shoulder blades.
I tested the Airbeam on three different trips, so on the last trip I carried my hammock instead of a tent to see if the Airbeam could be useful in the hammock.
I didn’t find it very useful as a pad in the hammock, it’s just too small plus it’s not insulated — the main reason for a pad in a hammock. It could be placed under the feet but I think CCF, Insultex, or Reflectix would work much better. I did find it useful as a pillow by letting about half the air out and rolling it up inside a soft fleece jacket.
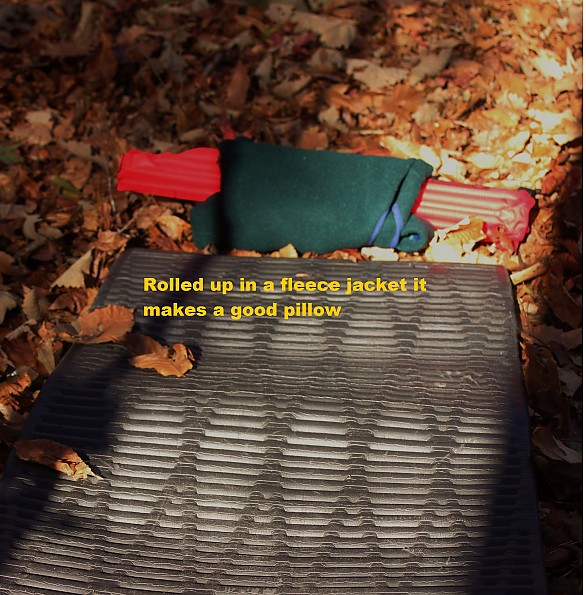
That worked pretty well especially for side sleeping.
Construction quality
The Airbeam is made from a tough lightweight fabric, not some kind of cheap vinyl.

It seems similar to the material used in the Exped mats I have. The removable inflation bulb is thick and easy to squeeze although it does require some effort to get onto the inflation nipple. The deflation valve has a good crisp feel, not sticky or loose. Even after an hour in my freezer at 18°F / -8°C the valve felt fine and worked as it had all along.
I didn’t encounter any inflation problems or failures during testing.
Overall I found the Airbeam to be:
- More laterally flexible and comfortable than my HDPE plastic frame sheet.
- Multi-purpose – it also functions as a sleeping pad extender or topper, a pillow, or a backrest with my pack against a tree.
- Good initial quality and performed as promised.
- Installed inside the pack, the Airbeam didn’t seem to affect the air circulation between the pack and the wearer.
- Very useful for adding structure and comfort when installed in my older Echoroba frameless backpack.
- The pack was slightly more prone to “barreling” if I over stuffed the pack than it was with the plastic frame sheet.
- I found it difficult to get every last bit of air out of it, the spring loaded deflation button requires constant pressure from a finger to remain open. I had to roll & squeeze, then press the button to let air out, and repeat until empty. It’s not like the kind of valve you unscrew to open and screw back to close.
Testing Conditions
All testing of this product took place in the freshwater marshes, and cypress swamps of coastal South Carolina on three separate multi-day trips.
My pack loads varied from 32 lbs. to 42 lbs. / 14.5 kg. to 19 kg. depending on the gear I carried and how much food and water I was carrying.
In total I logged about 56 miles using the Airbeam Frame; I occasionally swapped out the Airbeam with my HDPE plastic frame sheet - which I also carried - so I could get an accurate feel for how each affected the pack suspension, and how the pack handled the load with each.
The backpacks I used where the Granite Gear Vapor Current Crown (60 liters), and an old frameless Echoroba (about 45 liters) that I bought used twenty years ago.
When testing the Airbeam as a pad or pillow I used a one man tent and a hammock as well as a bivy. In the tent I also had a Cascade Designs CCF Ridgerest pad.

Source: received for testing via the Trailspace Review Corps
(Sample provided by Klymit for testing and review)