Jetboil Maintenance Kit


 Reviewed by
DLK37086
+786
 October 6, 2015
There isn't much to say about a product like this. If you need it, it's a great thing. If you don't need it, then there is nothing to say about it! I recommend this to anyone using a Jetboil stove. At the very least, have one of these around "just in case".
Pros
- Inexpensive
- Durable (if used properly and care is taken with it)
- Simple to install
Cons
- Could be fragile (if used improperly or if not taken care of)
While I agree with the other reviewer that you should always have a spare in case you break one... I do not believe that is justification for giving a product a 2 ½ star rating... Are you rating the product, the part that failed, the process of repair, the part that you replaced, or the fact that you had to use a replacement part?
I mean, if you are angry that you had to replace a part, do you take it out on the part? And doesn't that end up misleading others?
So, anyway... while I was sitting here considering a review for this product, I ended up asking myself "How do you review a replacement part?"
Seriously- think about it...
"Yup, it broke. I replaced it. It worked."
Bam.
Done.
Really??
So I started thinking about what it means to "review" something.
And, also, what the purpose of a review is.
WHY do we review? Certainly it's not for OUR own benefit.
Do we not write reviews for the benefit of the reader? Surely!
That naturally led to thinking about the meaning of the word "review".
And I realized, of course, that there are several meanings!
In the context of Trailspace.com, we are used to thinking of the word "review" in the following manner;
- critique
- evaluation
- a critical article or report
- a general survey of something, especially in words
- a report or account of something
- to discuss in a critical review
- write a critical report upon
- to look back upon
- view retrospectively
- to present a survey of in speech or writing
But what about looking at the word "review" in this manner;
- an exercise designed or intended for study
- a second or repeated view of something
- to go over (lessons, studies, work, etc.) in review
- to view, look at, or look over again
- the process of going over a subject again in study or recitation in order to fix it in the memory or summarize the facts
Well now, that brings a whole new perspective to the "review" process, does it not?
So, rather than write a typical "review" (critique), I decided to attempt to write a "review" (survey) that would be more useful by combining the "critique" type of review, with the "study" type of review. This, I thought, might actually present something more useful to the reader than simply saying "It worked. 4 stars. Thanks."
So here it goes...
I purchased three (3) Jetboil PCS systems back in 2009. I have regularly used two (2) of them ever since then. In that time, I have only had to replace one (1) igniter. That igniter failure was not due to a design flaw, or a manufacturing defect. It was caused by user carelessness.
That's right–ME. I accidentally broke the igniter while performing normal maintenance and cleaning.
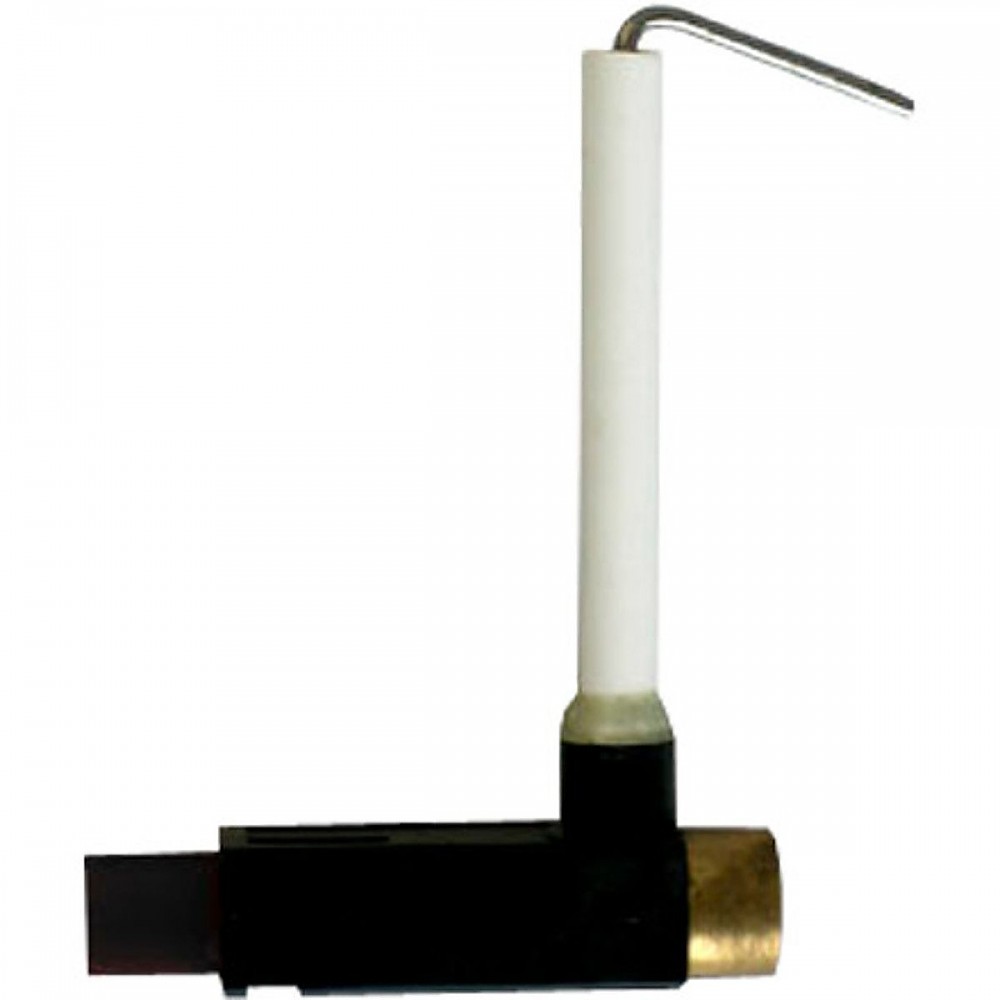
For clarification, for the purpose of this review, "maintenance kit" and "igniter" should be thought of, and will be used, interchangeably. This is mainly because...
... back when I purchased my Jetboils, the "Maintenance Kit" was just an igniter.
They were (and still are) cheap, so I bought two (2) of them "just in case".
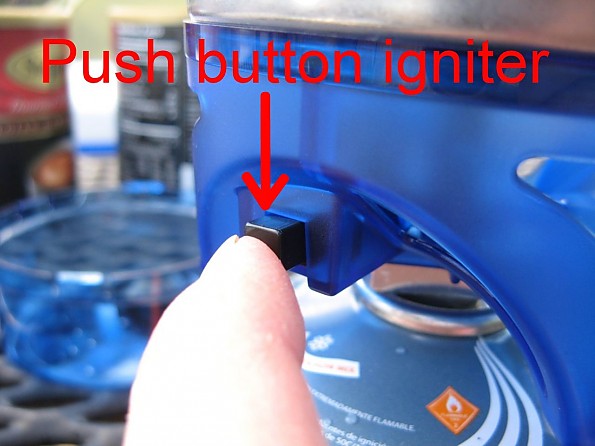
For those not familiar, the igniter is the part with the button that you push, to light your stove.
The igniter contacts the mix tube/burner tube at its base.
When you push the button, an electric charge is sent through the mix tube/burner tube, AND the insulated igniter wire...
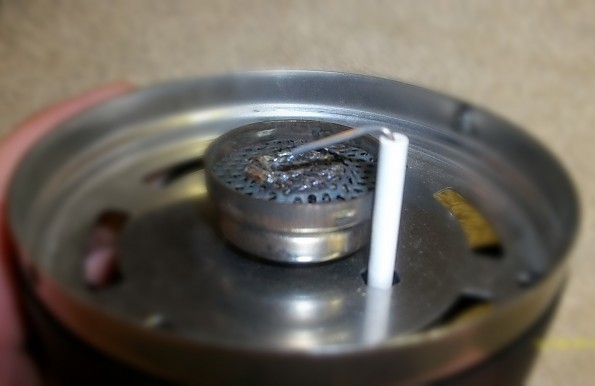
... up through the base plate to the burner head, where, with the proper alignment and gap, a spark is generated.
This is the exact same concept as the spark plugs in your vehicle.
When this process fails, it can be due to a couple of things. I've noticed that if...
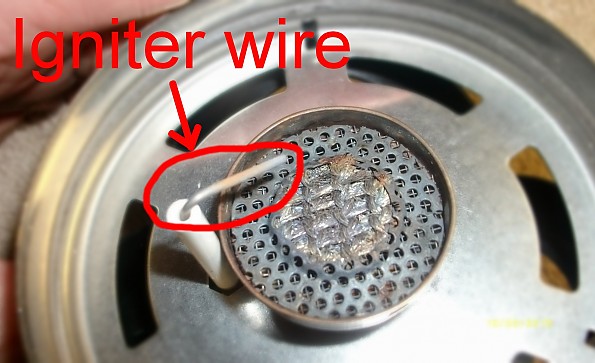
... the igniter wire is bent, twisted, or otherwise moved- or if it is excessively dirty—then the spark, or "ignition"—will not occur.
Ignition failure can also be caused by a bad igniter.
But let's look at these in the order of difficulty, from the easiest first, to the more complex last.
First let's take a look at cleaning and/or adjustment.
SAFETY- Before starting any cleaning or maintenance, use common sense! Be sure the stove is NOT attached to a gas canister!
As for cleaning a dirty igniter wire, I typically use a small piece of emery cloth just to "polish" it up a little. It doesn't take much—just get it slightly shiny. This is not something you should need to do often.
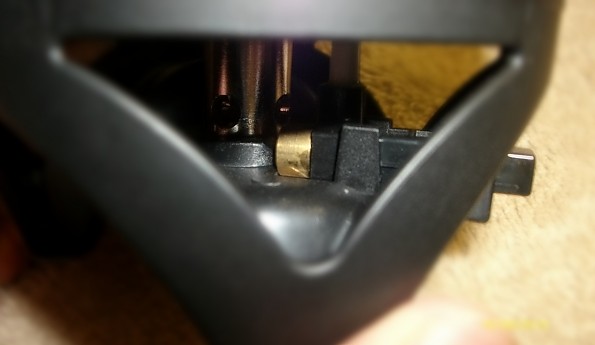
As for adjustment, the official documentation from Jetboil says the following about ignition failure:
"Ignition failure: Make fine adjustments to the igniter wire with pliers so that tip is 3-6 mm above burner head. If igniter fails to spark, replace with new igniter or use matches or a lighter."

Also note the direction the igniter wire points in relation to the burner head. It does not point at the center, nor does it point at the edge. It points slightly away from the edge. Be sure to get this correct.
If you are getting intermittent spark, then keep making fine adjustments until the spark occurs every time you push the button.
If the above steps still produce NO spark, then it is time to replace the igniter.
The first step is to unscrew...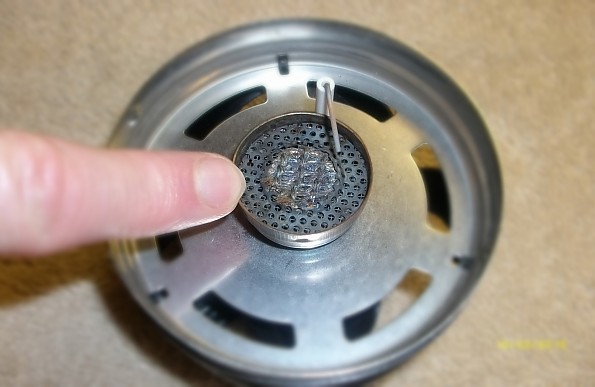
... the burner head in a counter-clockwise direction, until...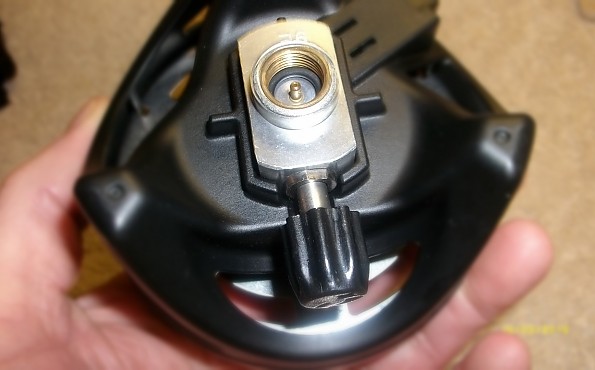
... the valve assembly...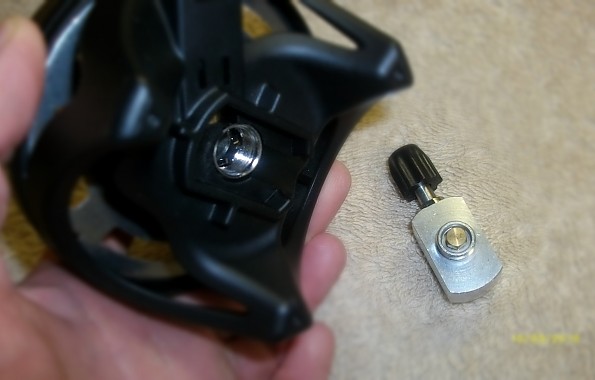
... is removed like so.
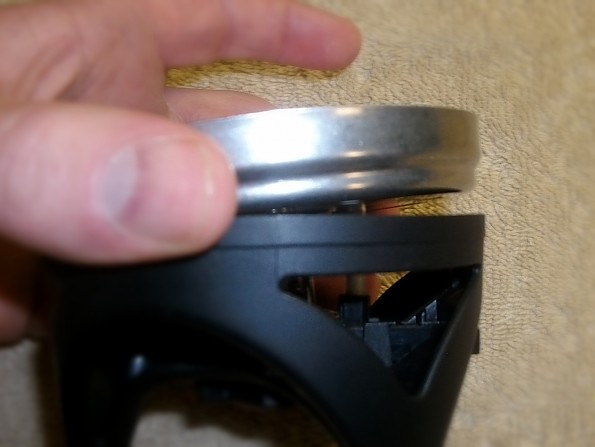
You will notice that the steel base plate is now separated from the plastic shroud (DO NOT pull up on the base plate). Being careful not to let the tip of the igniter wire catch on the lip of the burner head, ROTATE the base plate in a clockwise direction until...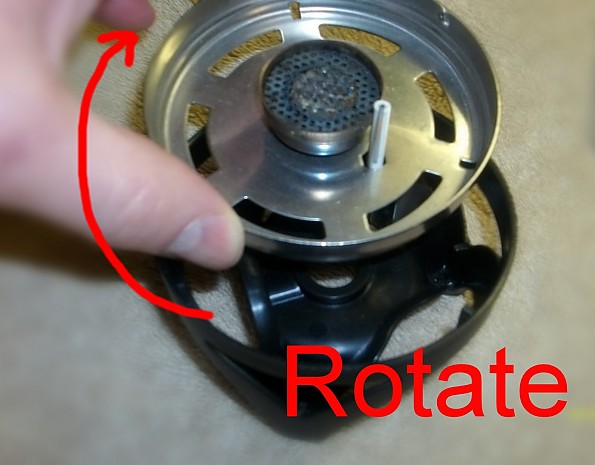
... it looks like this.
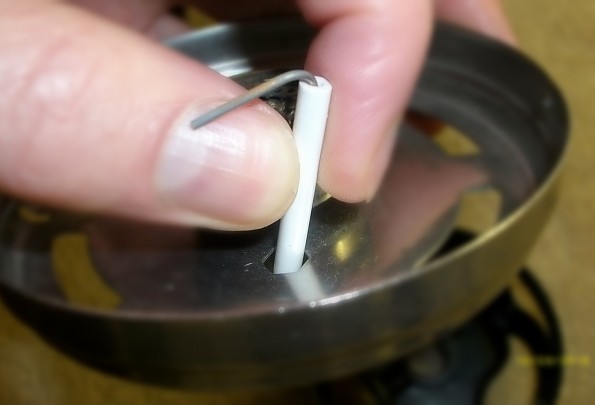
This is the insulator. This is the piece that most people damage. Be very careful with this at all times. If there is a crack in the insulator, the electric charge will not travel to the tip of the igniter wire, but will instead "short" itself on the base plate.
Lightly grasp the insulator as shown, and simultaneously tilt the base plate and igniter...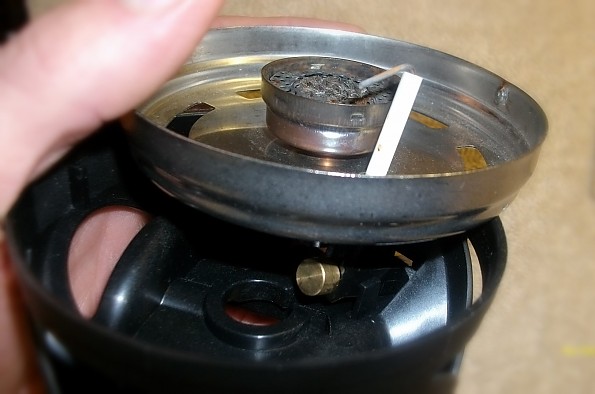
... like this...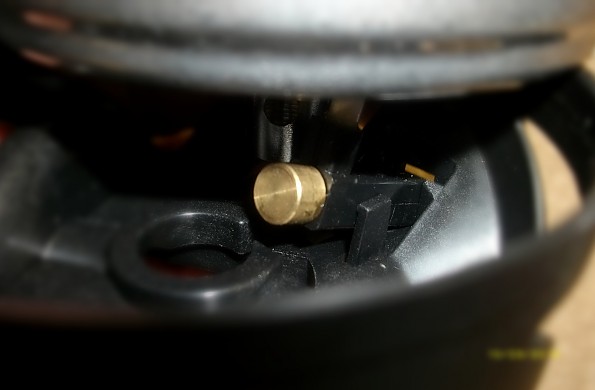
... until the igniter body is angled upward, and free from its hold down/locking tabs.
At this point, while still holding the base plate and insulator with one hand, use a finger of your other hand to push in on the igniter button as if you were trying to start your stove. Push the igniter all the way into the shroud, and lift the base plate and igniter assembly...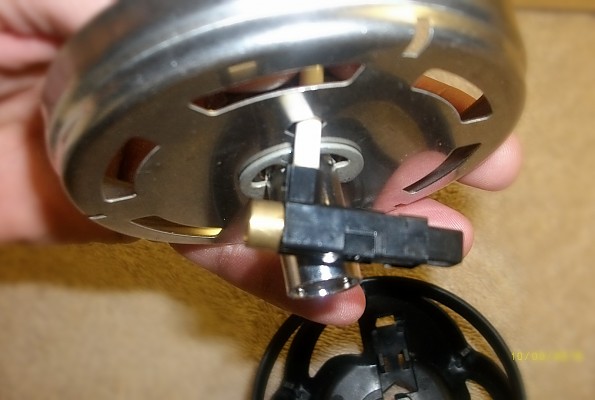
... up and away from the shroud.
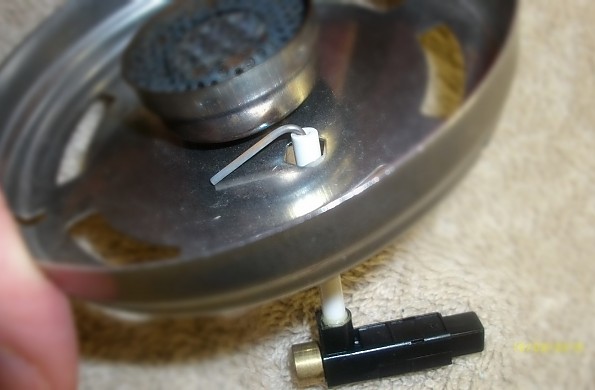
Gently guide the igniter down through the hole, out the bottom of the base plate. When the igniter wire reaches the base plate...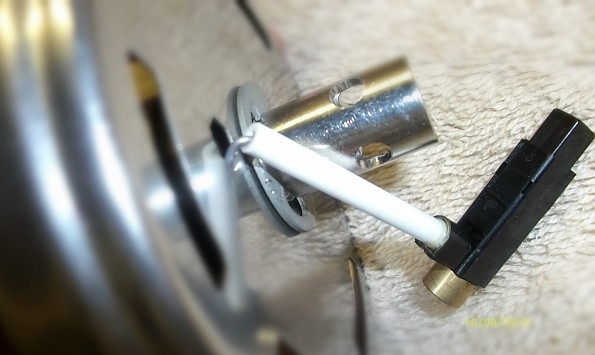
... tilt the igniter so the wire can be pulled...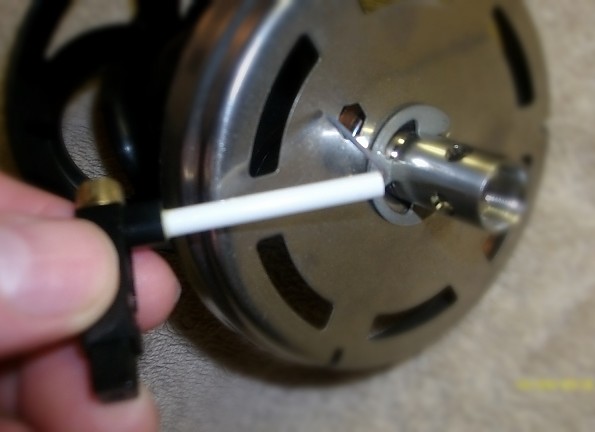
... the rest of the way out of the base plate.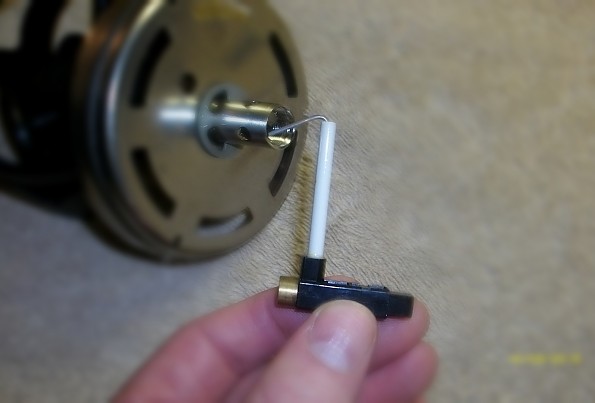
Congratulations! You have now removed the igniter.
Assembly is the reverse of disassembly (and is actually easier).
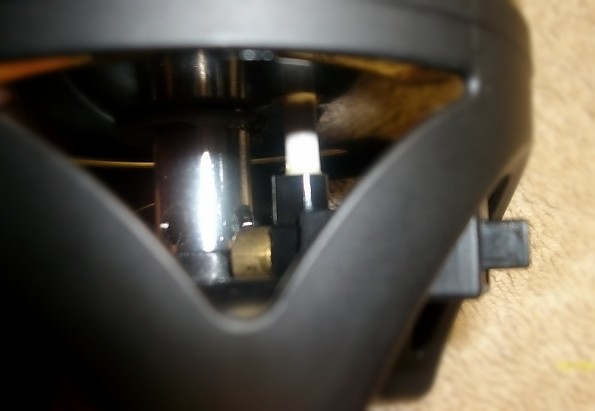
Once you have installed the igniter, you should always double-check the...
... fit and spacing ...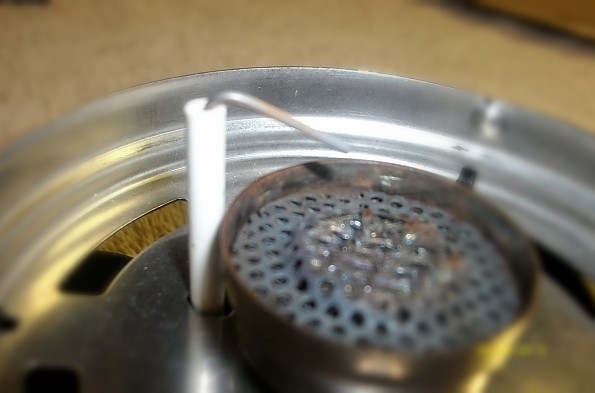
... angle ...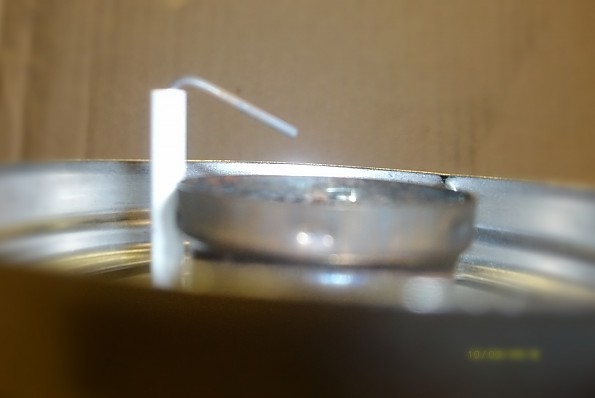
... and gap.
When you are confident that all is as it should be, and it looks ...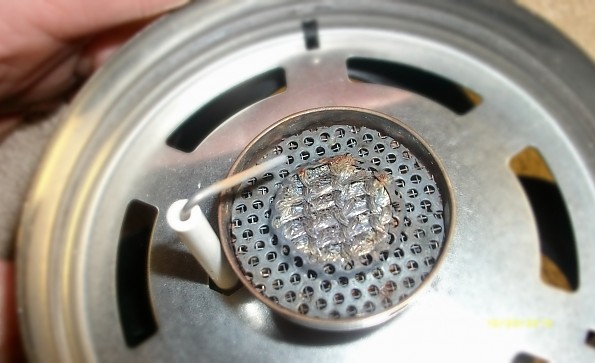
... like this, then push the igniter button, and you should get a consistent spark.
If there is no spark, or it is intermittent, then go through the igniter wire adjustment procedures above until you get a good, consistent spark.
Once you have a good spark, then attach a gas canister (please do this outside!), open the valve, push the igniter button until ...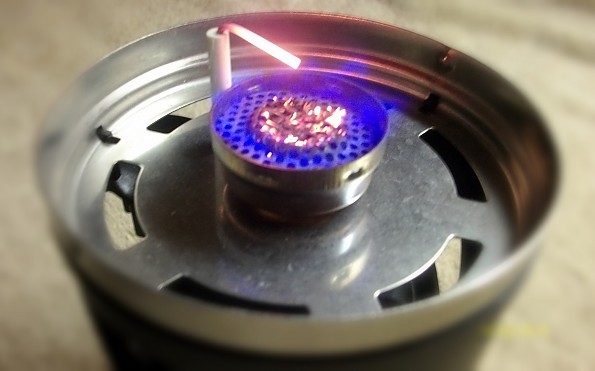
... you have a working stove!
If you still do not get spark, then please box up all of your outdoor gear and send it to me. In return, I will reimburse you for shipping costs, and send you crayons and coloring books. This will be a safe new hobby for you. ;-)
But seriously... I'm no genius, and this is only the second time I have ever done this—neither time with any instructions. Now if I can do all of this one-handed while taking pictures, without instructions, then anyone can do it!
And there you have it. I did not originally intend for this to be a "how-to" clinic, but... oh well.
You now have no excuse for not having a Jetboil stove that will light with the push of a button!
(unless of course you have a Zip, which doesn't include, nor is compatible with, an igniter)
I hope that this "review" has been, or will be, beneficial to you in your outdoor endeavors!
Oh wait, one more tip... If you don't already have one, get yourself a Jetboil Fuel Can Stabilizer (and see my review of it) and carefully store it ...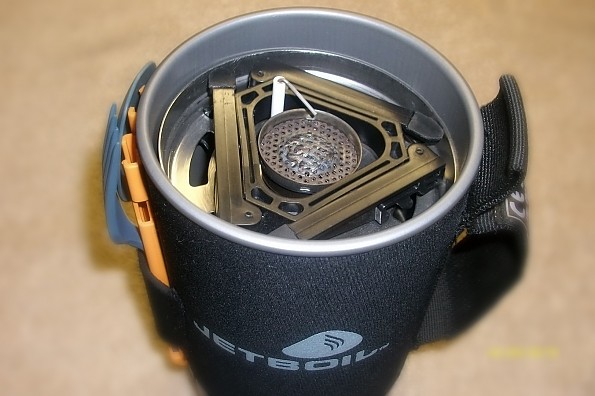
... like this. It should help protect the igniter.
Good luck and get out there!
Source: bought it new
Price Paid: About $6
![]() Reviewed by
Reviewed by
TheDavid
+55
 September 1, 2012
Always have a spare at home.
Pros
- Inexpensive
Cons
- Fragile
- Exposed when installed in stove
I have broken one on my stove a few years ago.
Source: bought it new
Price Paid: $15
Your Review
Where to Buy
You May Like
Specs
| Price |
MSRP: $5.95 Historic Range: $0.83-$9.99 Reviewers Paid: $6.00-$15.00 |