Tarptent Rainshadow 2


![]() Reviewed by
Reviewed by
EtdBob
+189
 March 13, 2014
How do they make such a big tent so light?
Pros
- Amazingly light. Lighter than many solo tents!
- Very spacious, a true three-man tent or a portable palace for two.
- Very easy to set up. Easier and faster than most double wall freestanding tents, and less stakes!
- Dryer to setup in a storm, no separate rain fly.
- Totally bug proof.
- Biggest vestibule I've ever seen, great for cooking under in stormy weather.
- Condensation is not an issue.
- Surprisingly storm worthy.
Cons
- Non-freestanding. Lose one of the two main stakes and down comes the tent.
- No door. Not as much privacy as a traditional tent.
- Not as bomb proof as some double wall freestanding tents and maybe best used as a two-season shelter.
- No way to hang up a lamp or clothesline inside the tent.
- Not seam sealed, must do this yourself.
- The usual extra snug Tarp Tent stuff sack.
- Harder to clean out. You can't pick it up and shake it out as you can a freestanding tent.
- If used for a base camp for several day you'll have to do without one of your trekking poles or take the tent down.
Starting in 2010 I went looking for ways to drop pack weight. The heaviest item I was carrying was a 6-1/2 pound Timberline tent, so I figured I'd start right there!
After some false starts I got lucky and found a used TarpTent Rainshadow II for a reasonable price.
I was long familiar with using tarps for backpacking shelters, but I was admittedly somewhat skeptical about the practicality of this shelter at first because it seemed somewhat flimsy and I was worried about the dreaded "spray" that is said may penetrate such tents in hard rain.
Thus it was with some trepidation that I ponied up my 200 clams. After all, if a tent leaks when you need it most, what good is it?
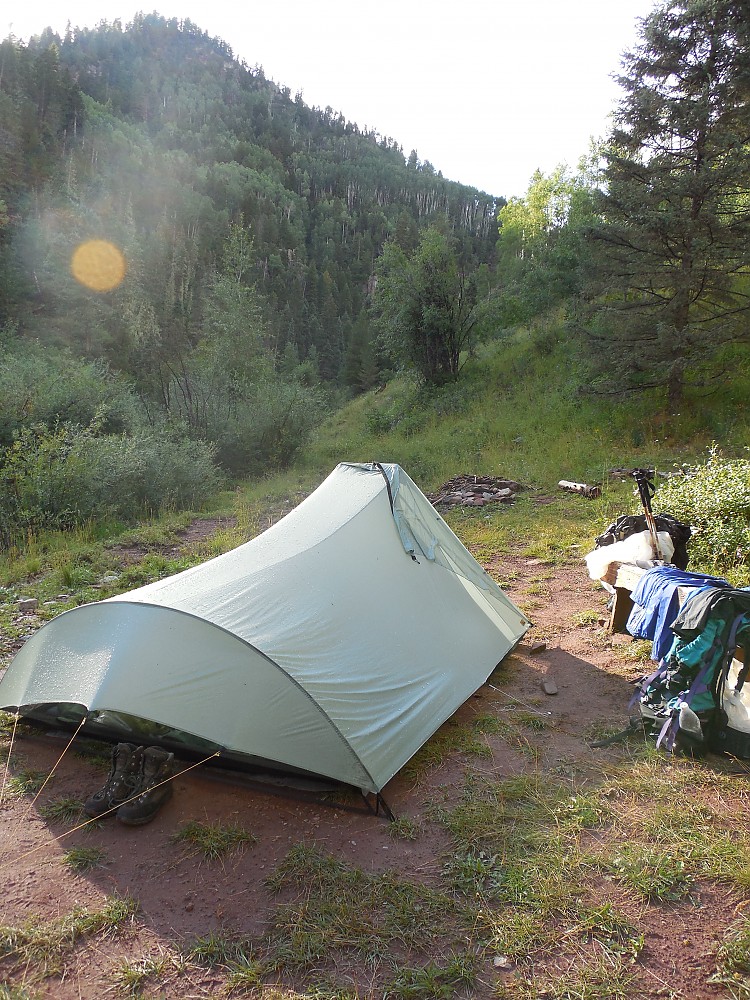
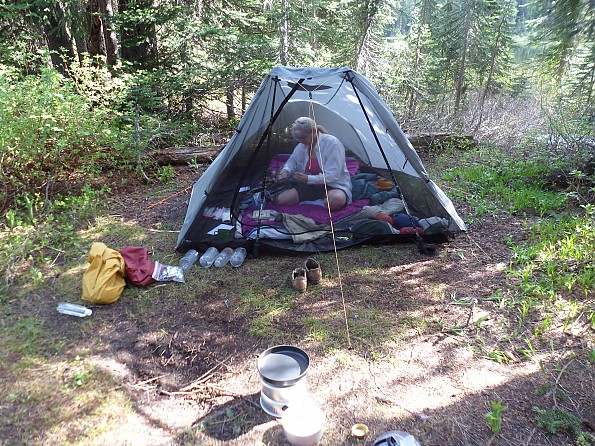
I set it up in my front yard several times to learn about the tent and introduce my wife to it (See honey? We’re going to be sleeping in that!).
I believe this practice is essential with any new tent, and besides I wanted to seam seal it myself.
The very first time I ever set it up. Simple, but still learning how to get the floor tight.
I was amazed at the light weight and space from the start. It has all the room two people and all their gear could ever want and then some.
It is listed as a three-man tent and I feel that is an honest rating.
Only 43 ounces? This is less than half the weight of the tent I had been carrying, and it uses less stakes to boot!
This tent is very easy to set up. It uses a long multi-sectioned pole for the back arch, a trekking pole or two in front and just four stakes for the basic setup. It can be setup using one pole or two in the front. I have found that one pole is entirely sufficient and seems to leave more clear space to get in and out.
The front and back stakes are the critical. If these pull out, down comes the tent. The two other stakes are used to pull out the front corners. That’s it!
The tent does have two side tie–outs in the middle that are not ordinarily used. Get string, tie ‘em to these tie out points, and carry two extra stakes.
If you get any kind of high winds hitting the side of the tent, you’ll probably wish you had used these side tie outs. Two stakes and string is about an extra ounce, and with this tent you can afford the weight!
I believe the use of these side tie outs will greatly reduce the chance of getting rain blown in the sides of the tent through the mesh, because you can pull the sides out so they overhang the side significantly, and in practice I always use them.
I also seam sealed the tent. This is essential with Tarp Tent products. To save cost they don’t do this at the factory, and I couldn’t be sure the previous owners had done a thorough job of it.
I don’t mind, it is a good way to familiarize yourself with the tent. Seam sealing is done with Silicone sealant thinned white gasoline, and simply painted on the seams. Don’t scrimp, do it right or you’ll get leaky seams!
Some folk recommend painting a few stripes of this sealant mix on the floor – snail tracks – to prevent sleeping pad migration on the silnylon floor. I didn’t and haven’t had any difficulties with nocturnal pad migration.
My wife and I always carry an eight inch one ounce aluminum snow stake for use as a potty trowel. Now it serves double duty as a magnum tent stake for use in loose soil.
In the photo below we camped in sandy soil at a lake shore. The extra-long and wide snow stake firmly anchored the front cord, and I used two of the ordinary stakes supplies with the tent to nail down the back cord.
After several trips I stopped using a ground sheet with this tent. This saves an additional few ounces of weight but also saves setup and take down hassle. I am happy to report that the silnylon floor has held up perfectly well so far on more than a dozen nights use in various terrain. Tarp Tent says ground sheets are not usually needed and I believe them.
This is a big tent and at first I was worried about finding sufficient space to pitch it, but as I came to know it better such thoughts have faded away.
One time the only dry-ish flat spot I could find wasn’t quite big enough. The ground in front of the tent was muddy and sloped down. No problem, I simply pitched the tent right up against a small fallen log, ran the back cord over the log and tied it off to the base of a small bush.
Tying the front or back cords off to a bush is a great way to solidly anchor them if the soil is loose and you don’t have a big snow stake handy, and of course you don't need clear space for them. The front and back of the tent can be right up against trees, bushes or what-not. Simply tie off to them.
Another time we had hiked long and hard one day, and found ourselves nowhere near an established camp site at the end of the day. We simply moved off the trail to an area under mature trees with no undergrowth and with our boots scuffed, kick and built up a flattish area just big enough for our two sleeping pads side by side and pitched the tent over that.
The tent itself was not at all level, but the little dished out area in the center was good enough to sleep in. Thus, like a true tarp you need not find a level spot big enough for the whole thing, just big enough for your bodies to occupy.
The floor is connected to the canopy only by mesh, and you have plenty of leeway to play with.
You cannot hang the tent over obstacles and bushes as you can with a true tarp though.
Looks level but it ain't. One corner of the tent is up off the ground and the low end sags. So what? Where we slept in the middle was fine.
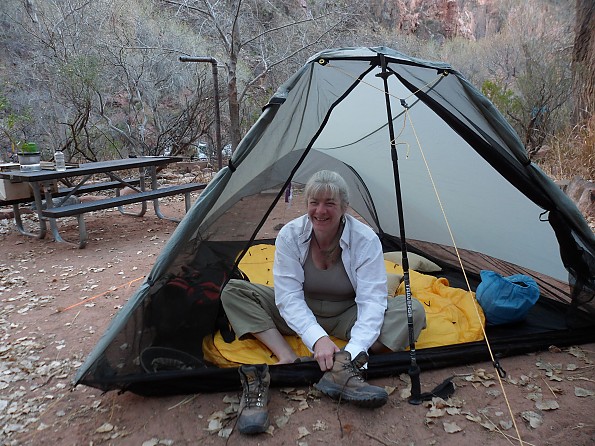
This shelter is somewhere between a tarp and a regular tent when it comes to privacy. Ordinarily this is of no concern to us, but on a recent trip to the Grand Canyon we found ourselves at a crowded camp ground. No matter, just face the tent in a private direction.

This tent has one door, unlike some fancy tents with two doors. We don’t mind as there is more than enough clear space for two people to use the one door without having to climb over each other. Lots of elbow room.
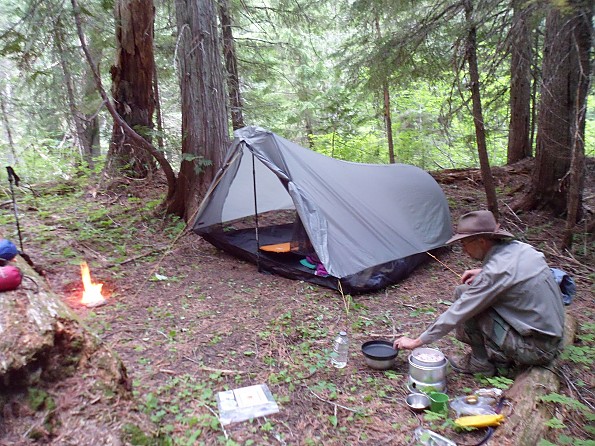
Last summer we spent two nights camped in an exposed location at 6,000 feet at Fault Lake Idaho, and one night a terrible storm blew in.
The performance of the tent in that nasty storm did a whole lot to boost our confidence in this tent. The high winds and rain hit the tent broadside, and the tent was pitched in an exposed spot on a ledge above the lake. This was the worst position this tent could have been set up in. We did ship a little water blown in the exposed side, but we and all our gear was bone dry. The silnylon floor with no ground cloth did not soak through, and the canopy did not mist in the heavy, wind driven, all night rain. This tent is serious shelter.
That morning I discovered the vestibule of the tent is plenty big enough to cook in, as I fed my wife and myself, then scurried out into the storm to feed the three other people we were with who were camped nearby. This is a big vestibule!
Condensation has not been an issue with us. I think maybe because it has so much square footage compared to the enclosed volume?
I have never had a stake pull loose, but then I well know the integrity of all non-freestanding tents depends upon how well the primary stakes are set, and I pitch accordingly. If in doubt I use our magnum snow stake or simply tie off to a bush.
This tent has become our standard backpacking shelter and has contributed greatly to our new lower pack weights, which is a good thing. It takes up little space in the pack ( but a bigger stuff sack might be nice ) and is simple enough to set it up that after a long days hike when I an fatigued I don’t have to fuss setting it up.
It is even made in America, unlike the bulk of tents you see in the back woods these days, and most importantly of all, it really is a sturdy and dependable shelter.
Source: bought it used
Price Paid: 200 sawbucks
![]() Reviewed by
Reviewed by
howardt
+120
 May 1, 2015 (original Jul 4, 2013)
Very roomy, very easy to set up, very lightweight.
Pros
- Light
- Roomy
- Easy to set up
- Well ventilated
- Durable
Cons
- Big footprint (the downside of roomy)
- Threading the arch pole is a learned skill
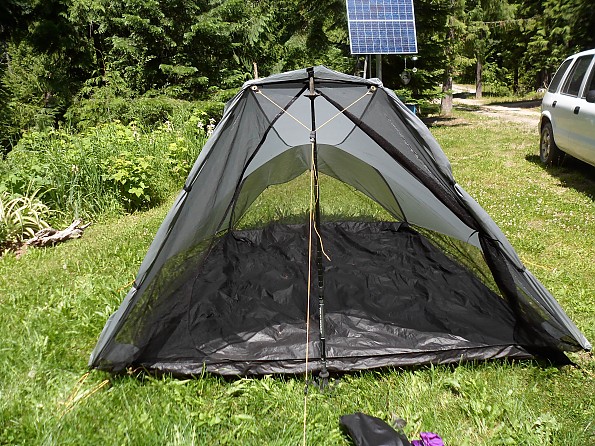
So we got the tent and me and the two boys set it up quickly and easily in the yard. It looked big, and when we got in to sleep, it was!
Easy to make taut, the lack of regular corner stakes makes it very quick — essentially the floor is suspended from the tarp. It seemed like it would be easy to get frustrated putting the arch pole through the sleeve. We had luck putting the sleeve on the arch pole and then un-bunching it to the other end.
Since the forcast rains didn't come, we don't yet know how it handles rain. Our questions mainly concern the eaves, where the mesh connecting the tarp to the floor is sewn to the tarp right at the edge of the tarp. The floor is well inside the tarp, so as long as the rain doesn't run back down the mesh it should work well.
It's big! Very comfortable for three sleepers, and room for people to sit up. I'm 6'4" and had no problems with the length or the height.
The big front window and mesh all around yield a great airy feel. It was a hot night, but the breeze through the tent was cooling. It isn't air conditioned though; we got out in the morning because the sun was starting to heat it up.
The tent went back in the bag easily!
Update:
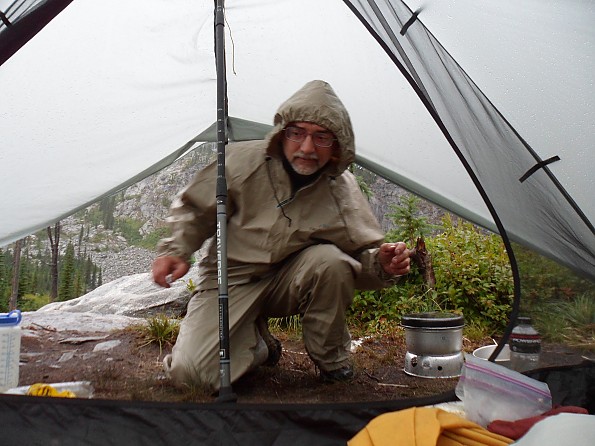
OK! We've come back from a 19-day car trip/backpacking trip and it did rain! Still a very easy tent to set up and pack back up. Still very roomy for three tall people. Learned how to keep the edges of the floor up and how to set the edges of the fly lower in the rain. It does work to keep things dry! Just don't get freaked out by some water blowing/dripping in through the mesh on all four sides.
Our only bad night would have been a bad night in most three-season tents. It was a huge thunderstorm in western Nebraska that blew the tent pegs out and the tent down.
Another update:
Three of us hiked the Colorado Trail last summer (July of 2014) and this was our tent. Thirty-four nights, lots of rain, and my appreciation of the tent just grew and grew.
Two of us are over 6 feet, and space was never an issue. We generally kept our stuff out of the tent, but when we set it up in a hurry in the afternoon to get out of the rain, we could fit in with our stuff piled in the end of the tent.
Often packed up wet, no problems fitting in the sack — rolled it up around the front strut. It did develop a few small seam leaks where our sealing wore out, but nothing came unsewn. The only wear was on the front line, which started to slip in the tensioner.
All in all, a very competent tent, and very pleasing to look at or look out from.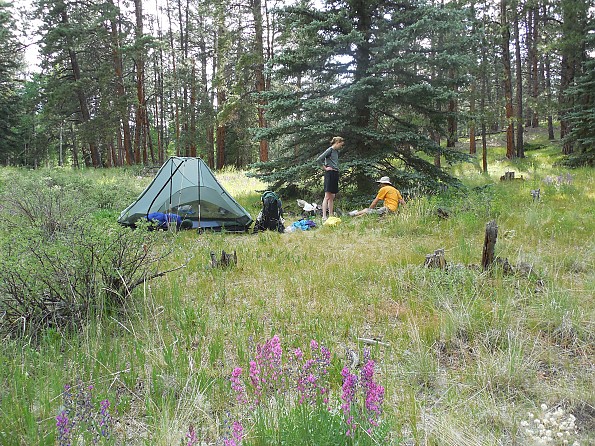
Third evening of the hike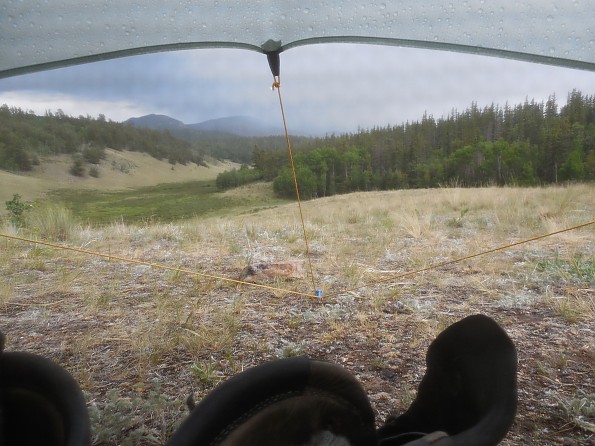
view of a shower out the foot of the tent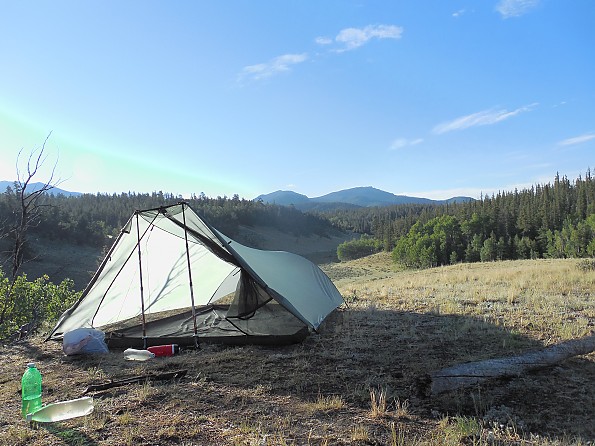
next morning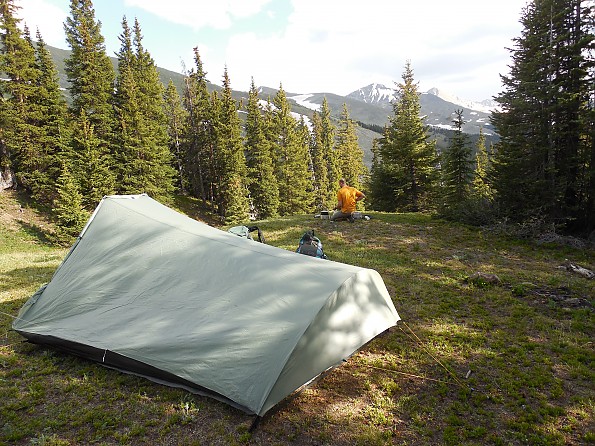
On the way down from the 10 mile range.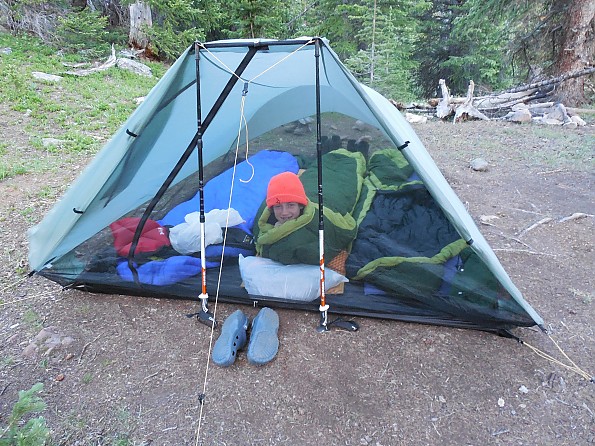
Past Copper Mountain
No tent, that's us on a side trip up Mt. Elbert.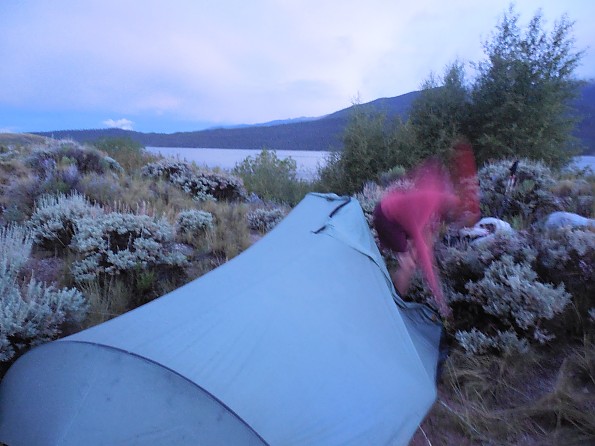
Setting up in the rain by Twin Lakes.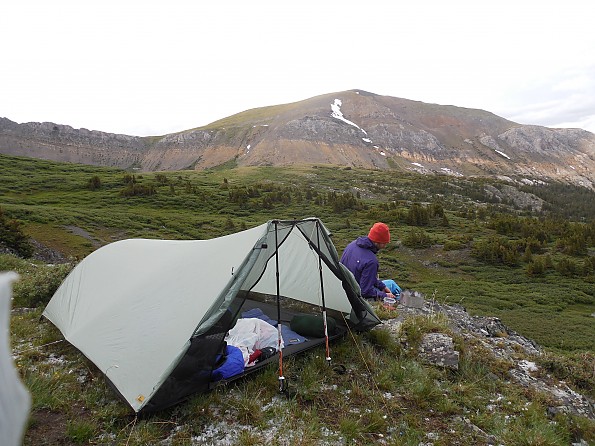
Past Cottonwood Pass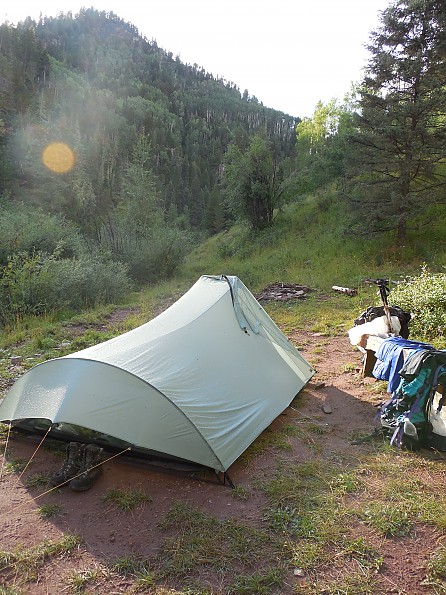
Last night on the trail, set up in the rain, cleared up for the picture.
Source: bought it new
Price Paid: $285
 Reviewed by
Dave MacLeay
+355
 October 23, 2007
Weighing in at just two and a half pounds and offering 50 square feet of very livable space, the Tarptent Rainshadow 2 by Henry Shires is a veritable palace. Don’t let the “2” in the name fool you: most manufacturers would call a tent this size a three-person.
The design is straightforward: a waterproof silnylon tarp is supported by a single aluminum hoop at one end and two trekking poles at the other. A sewn-in full-coverage insect with zippered door net hangs from the tarp and attaches to the optional floor.
Like most of Shires’ Tarptent designs, the Rainshadow is available with or without a floor. We opted for the floored version. Once you factor in the weight of an additional ground cloth, the weight savings of the floorless model are negligible.
Unlike pure tarp designs, the Rainshadow 2 incorporates two poles: a hoop in the rear and a small "strut" at the top of the front door. Both poles “open up” the tent, providing more than adequate headroom and creating a sizable screened opening to promote cross-ventilation.
Condensation is a concern in any single-wall shelter, but we haven't had any problems with the Rainshadow 2. The tent has a built-in front beak that can be pitched fairly low to create a small vestibule and provide shelter from blowing rain or tied back to the body of the tent to allow for maximum ventilation. In extremely humid conditions, Shires recommends leaving the screen unzipped and tied back to achieve adequate ventilation. We haven’t needed to do this, but there is a noticeable increase in airflow when the door is unzipped.
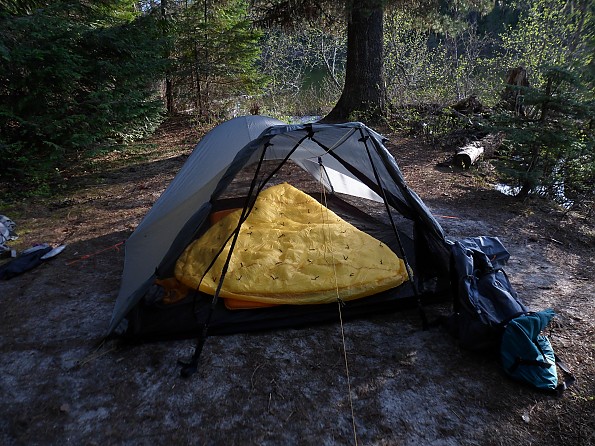
During a night of constant rain this summer, we had neither leaks nor condensation. The Rainshadow's optional floor is cleverly designed. In dry conditions it can lay flat for maximum ventilation. But when conditions get wet the corners can be easily clipped to the canopy to create a bathtub floor.
With a little experimenting, it's also possible to pitch the sides of the tent low to the ground for protection or high for ventilation. The bottom of the tent canopy is several inches wider and longer than the floor, so even with a high pitch there is adequate protection from non-blowing rain. In wind-driven rain a low/tighter pitch is necessary.
The Rainshadow 2 is not freestanding, but pitches easily with just five stakes. (Lightweight Easton aluminum nail-type stakes are included.) The rear hoop design requires just a single stake to the rear of the tent, and all the other guy points can be easily accessed from the front door for any necessary adjustments during the night. The inclusion of lightweight reflective guy lines (Kelty Triptease Lightline) is a nice touch.
My only qualm with the Rainshadow 2 is that it can be rather difficult to stow. The Rainshadow’s stuff sack can at times seem maddeningly undersized, with slippery silnylon popping back out as quickly as its stuffed in. The sewn-in front strut also demands careful handling in order to fit in the stuff sack without putting undue stress on nearby seams. The tent originally came nicely folded and rolled, but I’ve not been able to duplicate that.
At two-and-a-half pounds, about a third the weight of comparably-sized double-wall tents, the Tarptent Rainshadow 2 is a great way to lighten up in summer and milder three-season conditions.
Design: tarp-tent with swen-in bug netting and bathtub floor
Sleeps: 3
Ease of Setup: just 5 stakes and and either 2 or 3 poles make for a quick, but not free-standing, setup
Weight: 42 oz
Price Paid: $255
 Reviewed by
Kevin Sweere
+143
April 26, 2015
Excellent ultralight, waterproof, fast to erect tent. Used ~dozen times so far on backpacking trips and Boy Scout 'trailer' camps. No complaints.
Pros
- 3-person for less weight than many 1-man tents
- Waterproof, tub floor (ground sheet only for sharp things)
- Fast to erect
Cons
- Manual needs detail on how to tie top line
- Website needs purchase option to buy it seam-sealed
- Care in setup needed to stay dry in heavy rain, pond o' water
- Needs a large, spacious place to hang open and dry
Sets up faster than almost all other adult Scouter's tents (and the 6 other tents I own too.)
Weighs far less and costs about the same as those others too.
Very fine netting keeps the bugs out.
Spacious enough for dad and son to sleep and store all gear inside. (It would be too tight w/ three adults + gear inside.)
Recommend a large piece of window film (polycro) for ground cloth (wanted for dirt, mud, punctures, abrasion... not needed for rain or puddles like most other tents).
Lots of cord pulls allow fine tuning ... but works well without 'em. (It was 6 months before I realized they were there.)
Unlike other tents, users need to think about ventilation. You quickly realize how much water you give off overnight. The manual's instructions are good; websites on single-wall tent usage better, and best if you just remember to leave open the top vent and netting whenever possible.
I do mean water and vapor proof — extremely so. This can make drying it out a bit tougher — need to hang it inside for a few days.
Fits into stuff sack even when wet + muddy ground cloth.
Supposedly you can buy it seam-sealed. I wish the website mentioned that option. I seam-sealed and painted silicon-caulk stripes on floor. Not too bad, but you need a full day for it to dry well.
Gave it 4.5 ... because for me, something needs to impress me for a decade to earn 5 stars. I only had it 2 so far.
I'd definitely buy it again. (And there are extremely few products that I say that about.)
Source: bought it new
Price Paid: website price
![]() Reviewed by
Reviewed by
395'r
+12
 May 13, 2011
Caution read before buying from Tarptent!!
I own a Rainshadow 2 and used it on the JMT for 3 weeks. The tent worked great in the dry high altitudes of the Sierra Nevada Mtns with little condensation problems. I like the roominess of the tent but after only 3 weeks the stitching on many of the stays and pole attach sections started coming apart after several field repairs we were able to complete the hike.
I sent the tent back in for repair to Tarptent and to my despair I found that Tarptent took almost a year to repair it! After sending multiple emails to Tarptent they finally responded after I threatened to come by there shop in person to talk to someone. They stated that they had some kind of weather incident and that their shop was damaged and they could no longer find my tent.
Low and behold they finally agreed to send me a new replacement tent but what arrived was my old tent and a message stating that they found the old tent in a corner of the shop. The tent had been returned with two large 10" rips to the bottom and I had identified the areas of repair needed but only half of them were re-stitched.
I again emailed Tarptent to see what could be worked out and they have at this time still failed to respond they did although send me a tube of silicone and some patch material which I believe is an unacceptable way to handle the repair.
I had heard good things about Tarptent so I am not sure if this is an isolated issue but there lack of communication and fairness to my issue should be considered before buying one of their products.
Price Paid: $250
Your Review
Where to Buy
You May Like
Specs
| Price |
MSRP: $265.00 Reviewers Paid: $200.00-$285.00 |
| Weight - complete |
40 ounces (1135 grams) |
| Sleeps |
3 |
| Stakes (included) |
4 |
| Apex Height |
48 inches (122 cm) - adjustable |
| Floor Width |
78/66 inches (expands to 86/74 inches) |
| Floor Length |
84 inches (expands to 92) |