Power Practical The PowerPot
The PowerPot has been discontinued. If you're looking for something new, check out the best pots and pans for 2024.


 Reviewed by
TheRambler
+2,830
 January 18, 2013
True innovation, leave those batteries at home! Fire+Water=Electricity. That is the company motto of Power Pot, and they certainly delivered with this product. I could not be happier with this product as it does everything they say it will do with no fuss, no unexpected fiddling, or tinkering involved. The Power Pot gives you a surefire way of generating power on the trail. This is a must have for anyone looking for a long term sustainable way to keep devices charged whether on the trail, or at home during a power outage, and everything in between. The Power Pot is capable of charging any device that can normally be charged by a USB connection.
Pros
- Charges electronic devices via USB connection
- Delivers 5W(Watts) of power / 1A(Amp) @ 5V(Volts)
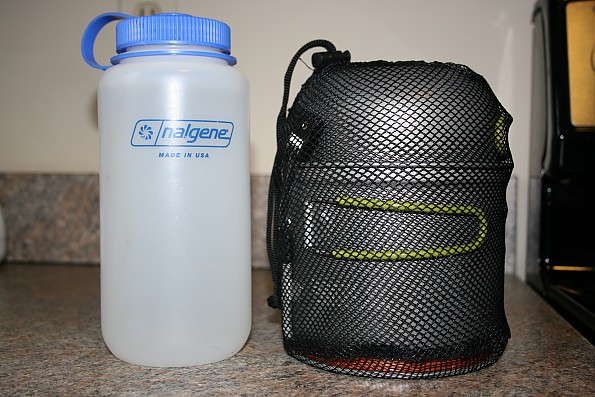
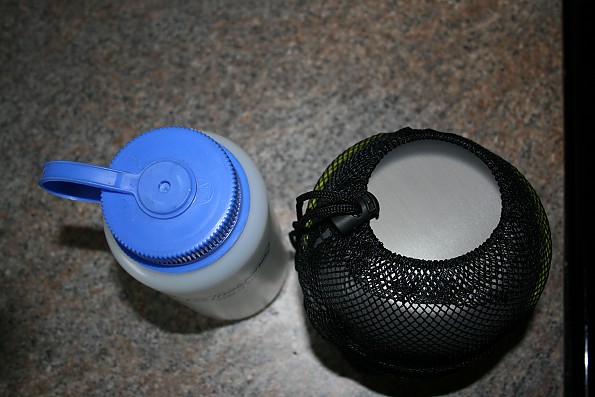
- 1.4L capacity for pot and .59L for bowl/lid
- Hard anodized aluminum(HAA) construction
- Heat and fire resistant cable
- Water does not have to be boiling to generate power
- Heat water for a meal and charge your devices at the same time
- Allows you to leave those spare batteries at home
Cons
- Must have a heat source to generate power
- Not recommended to actually cook foods in the Power Pot
- Heavier than a normal backpacking pot. Weighs 12.1oz for just the Power Pot, and 18.2oz with the lid and cable.
- Slightly increased boil times
- High price tag at $149 MSRP
I was excited to test the Power Pot and compare its functionality to the Biolite Camp Stove which I reviewed previously. Overall I am extremely impressed with the Power Pot. You can charge any device that uses a standard USB connection by simply applying an appropriate heat source to the bottom, and putting at least 2 cups of water in the pot.
What’s in the box/Construction:
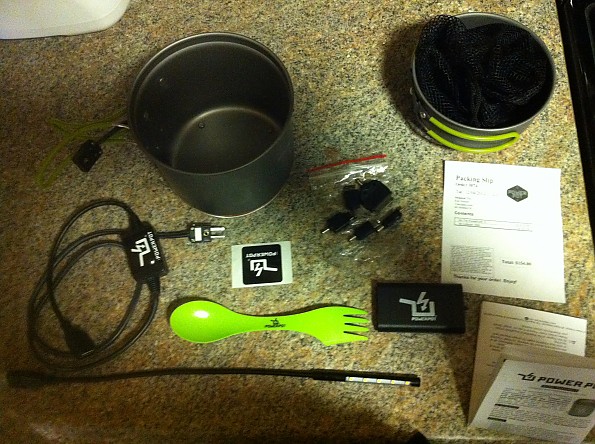
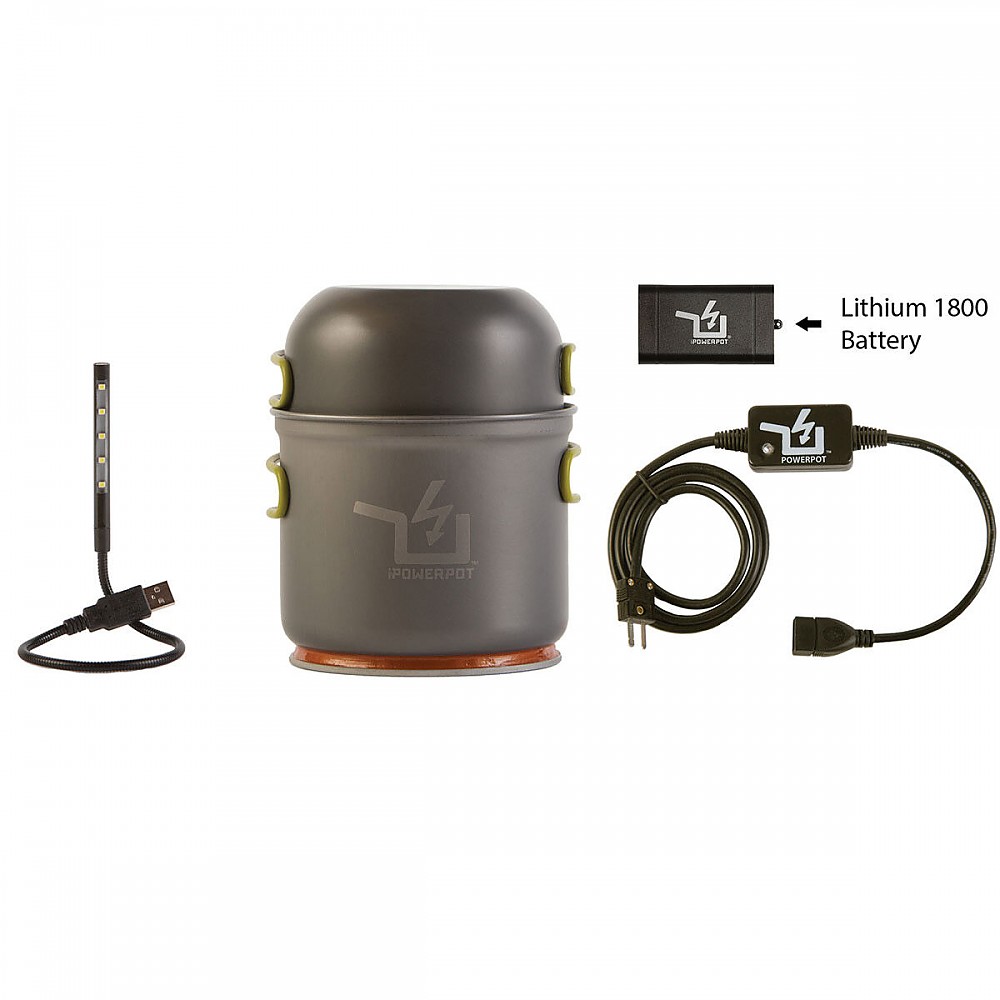
All items included with a Power Pot purchase with the exception of the battery pack and baggie of connectors.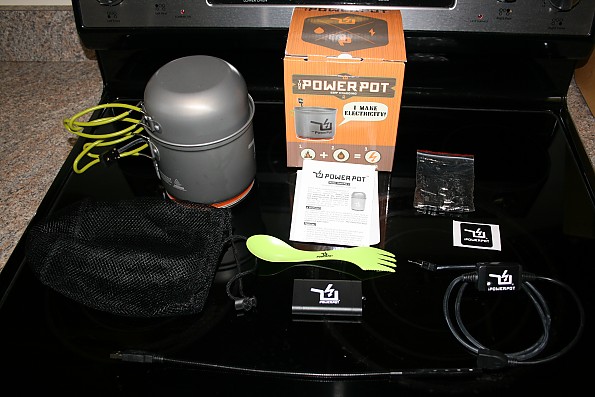
The package includes the Power Pot itself, a bowl/lid, a 3 foot heat/fire resistant charging cable, a lexan spoon/fork, and a USB 5 LED flexible light.
The Power Pot and lid are made of HAA/ hard anodized aluminum, and appear to be well made. Both the pot and lid have foldable silicon coated handles that neatly wrap around the pot body when not in use. The bowl/lid fits snugly onto the inside rim of the Power Pot. The TEG (thermal electric generator) portion of the Power Pot is connected to the bottom of the pot by a resin compound. A fire/heat resistant cable comes out of the TEG section through a metal sleeve and transitions out of the sleeve just below the pots foldable handles and terminates with a 2 prong female socket.
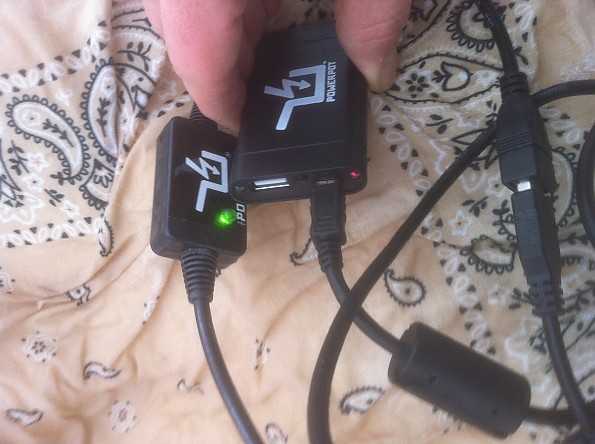
The charging cable is a heavy duty three foot heat/fire resistant cable with a voltage regulator, one end of the cable has a 2 prong male plug that connects to the female socket on the pot, and on the opposite end has a female USB port. The voltage regulator has a green LED that illuminates when the unit is ready to begin charging devices.
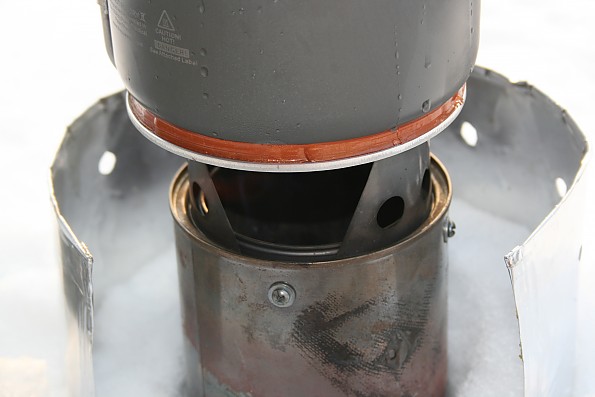
TEG portion of the Power Pot
You can see metal sleeve, and where cable from pot connects to the 3 foot charging cable.
Theory of Thermal Electric Generators:
I don’t want to bore anyone to death with a technical lecture, but did feel it prudent to point out a few basic theories of operation. The better you understand your gear, the better equipped you will be to take full advantage of what it has to offer.
TEG devices work on a thermal heat transfer in which electricity is created due to a difference of potential. In the case of the Power Pot the difference of potential between a fire and water is extreme. Since water can only reach the boiling point or 212°F, it will never be hotter than the heat source under the pot. The greater the potential between the two temperatures the more powerful and efficient the TEG will function. The heat transferring through the TEG to the water inside the pot creates electricity, the details of which I will spare you!
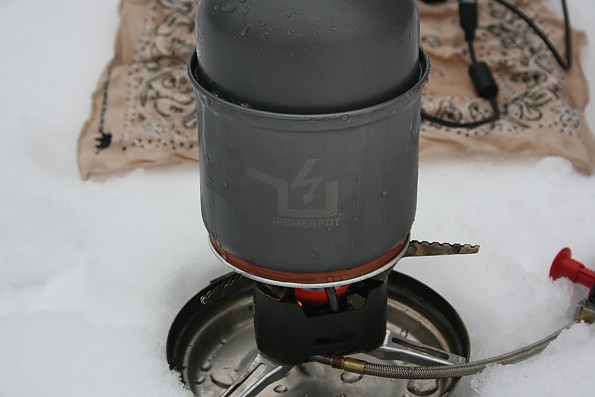
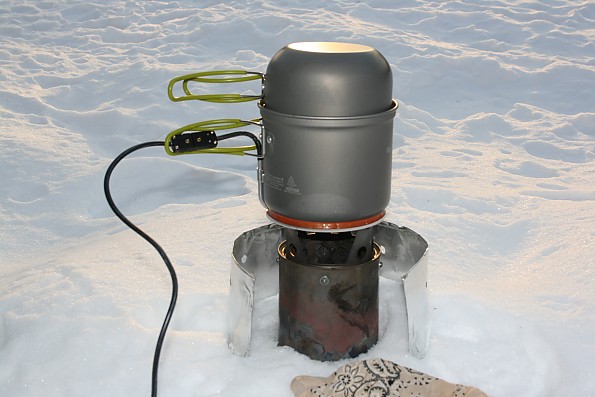
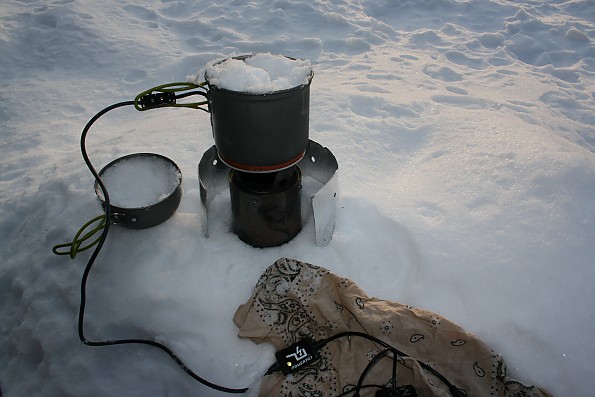
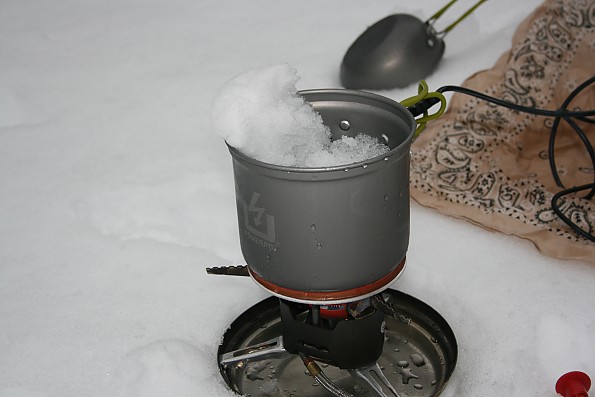
So understanding the basics you should be able to see how the Power Pot can generate power even if the water is not boiling, in fact the colder the water is the better the Power Pot performs. This makes it ideally suited for generating power while melting snow.
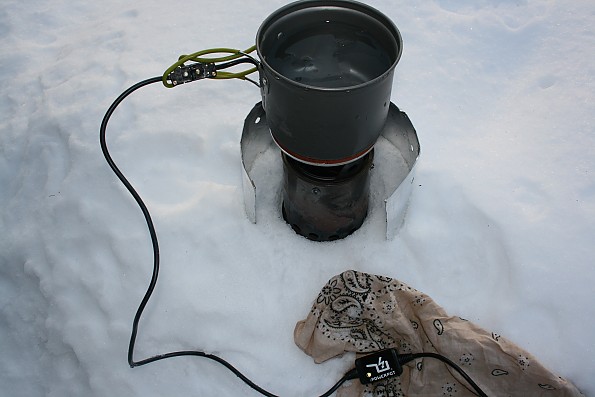
You can see water is still icy and the green LED is illuminated.
Operation:
The Power Pot is very straightforward and user friendly to operate. All you need to use the Power Pot is a heat source, be it a camp stove, alcohol stove, a home stove, a fire, or even candles, some water, and your electronic device of choice and its usb charging cable. Your heat source does however need to be capable of boiling the amount of water you have in the pot, for example a tea candle under the Power Pot will not generate power when there is 4 cups of water in the pot.
The Power Pot will begin to output power within 60 seconds, the stronger the heat source the less time it will take. When the Power Pot is ready to use for charging devices the green LED on the voltage regulator will illuminate. You then simply plug the charging cable into the Power Pot, and plug your device into the USB port and as long as you keep heat applied to the power pot, and water inside of it, it will keep outputting power.
I found that with a canister, white gas, or home stove the Power Pot will begin outputting power in less than 10-15 seconds. On an alcohol stove, it will be between 30-60 seconds, and on a fire it is completely variable between 15-90 seconds depending on the fire’s intensity.
It is essential that you stay aware of the amount of water inside of the Power Pot. The water inside the pot acts as a heat sink for the TEG which is generating the power. If the Power Pot boils dry or the water level is too low it can cause permanent damage to the Power Pot. A minimum of 2 cups of liquid is strongly recommended.
There are some tradeoffs between the Power Pot and a normal backpacking pot. Due to the construction of the Power Pot, the TEG module is using some of the heat from the stove and due to the materials there is not as an efficient of a heat transfer, resulting in an increased boil time. I found that the Power Pot takes anywhere from 10-30% longer to reach a boil when compared to other pots with similar size and diameter on the same stove.
I found that it is much easier to connect the charging cable to the pot prior to placing it on a heat source. It is possible to connect it while on a stove etc, but the first time I tried to connect it I accidentally tipped over the power pot and my wood stove/alcohol burner(thankfully the fuel is captive in a wicking medium!), therefore I recommend connecting the cable prior to placing the pot on a heat source/stove.
Charging:
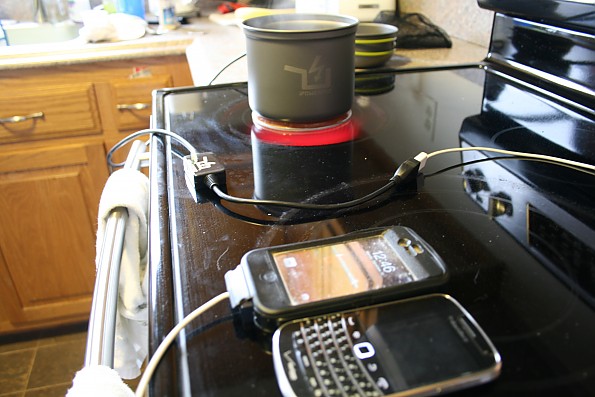
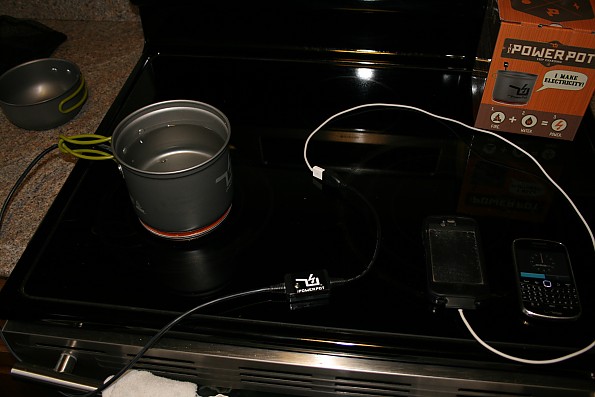
Using the Power Pot to charge electronic devices is as easy as turning on your stove, brewing a cup of tea, and plugging in your device. I tested charging a wide array of devices with the Power Pot. I found I was able to charge an Iphone 4, Blackberry Bold, Garmin Rhino, New Trent 9900mah battery pack, Power Pot 1800mah battery pack, Light and Motion Solite 150 headlamp, CR123 2 battery USB charger.
Through the course of my extensive testing I can honestly say without any hesitation that the Power Pot will charge your devices at the same rate as having them plugged into a normal power source (AC wall outlet, computer USB port etc).
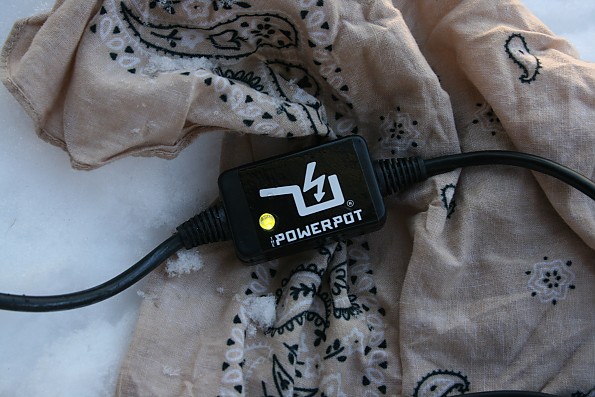
Green LED on the voltage regular
Completely dead phone
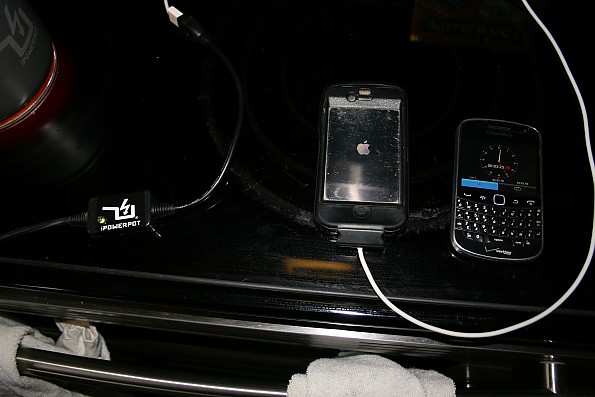
iPhone self booting at 1m 25s
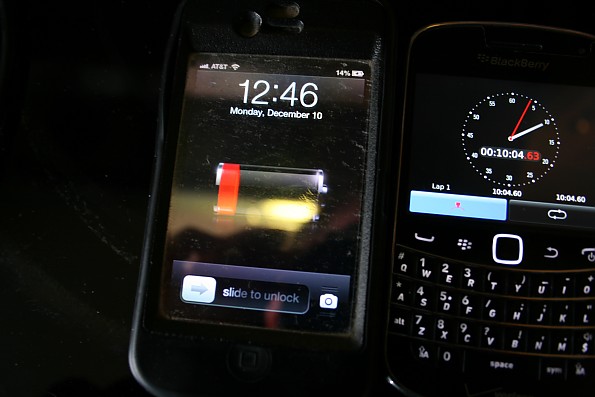
iPhone at 14% after 10m 4s

25% after 22m 15s
Charging a Light and Motion Solite 150 headlamp
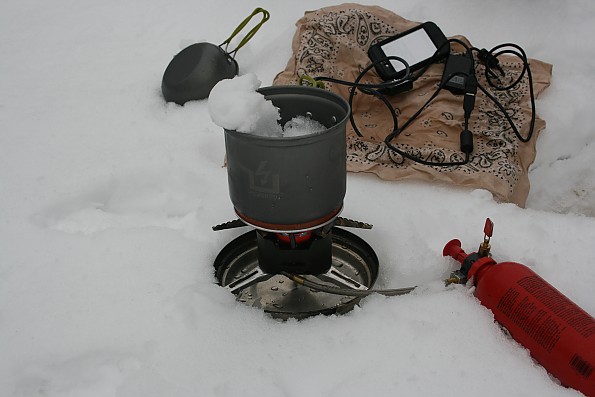
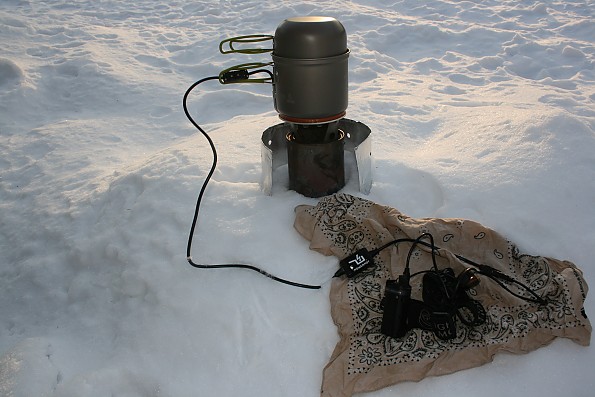
Melting snow and charging the 1800mah battery pack and iPhone at the same time.
Optional Charging Accessories:
Several optional accessories are available for the Power Pot. There is an 1800mah lithium ion battery pack, and a 12v DC voltage regulator. I was able to test the battery pack, along with the Power Pot I recieved. The battery pack is the same size (capacity) battery as my iPhone 4 and will charge my iPhone 4 from 0-100% one time. It takes approximately 3 hours to charge the battery pack from 0-100%. You are able to charge the battery and a device connected to the battery at the same time.
The battery pack also has a built in LED light which provides a nice backup light source. A small bag of industry standard connectors and a cable come with the battery pack so that you can use it as a multi use item and leave your device specific cables at home to save weight. ****Please note that Power Pot did not send me the cable that goes with these connectors so I was unable to test/review it****
I did not receive, and was not testing the 12v regulator, but this is available for purchase. This regulator would allow you to charge higher power draw devices, such as a car cigarette lighter plug style device.
1800mah battery pack, red LED when charging

5 LED flex light included with Power Pot
Cooking:
The Power Pot is designed to be primarily used with water. In fact the manufacturer does not recommend using the Power Pot for anything but water, but states that thick items such as stews, thick sauces etc can potentially damage the Power Pot and are not suitable to be used. The instructions state that thick items like this should be made in the bowl/lid.
You can do things like make tea, coffee, hot chocolate, and even pasta (without sauce) in the Power Pot. When making an item like pasta ensure that you have as much water as possible in the Power Pot. You can definitely make things inside the Power Pot, but they need to be primarily liquid in nature. If you wish to make a pasta dish with a sauce, then boil the pasta as normal and then take the pot off of the stove and add your sauce etc.
Remember that the thicker the consistency and more mass there is inside the pot the less effective the water inside the pot is at transferring the heat out of the TEG and the potential for damage is there if there is not enough water.
Boil times: Averaged over 15 burns per stove type
Stove 2 Cups 4 cups 1.4L
Alcohol stove 8m 13s 13m 45s 21m 33s
MSR XGK EX 2m 45s 7m 37s 12m 1s
Wood stove 4m 22s 9m 11s 15m 3s
1000W electric range 3m 18s 6m 9s 10m 27s
*The closer you match the width of the pot to the flame pattern of your stove the better the performance.
*Even though boil times are increased, you are able to charge devices almost immediately after placing the Power Pot on the stove.
It took about 22m to melt 1.4L of snow with the alcohol companion burner.
It took about 9m to melt 1.4L of water(from snow) with the MSR XGK.
Limitations and other points to be aware of:
Some of these I have already mentioned, but I felt it prudent to lay them out in their own section as well.
- Do NOT operate the Power Pot without water in the pot, this will cause permanent irreparable damage. A minimum amount of 2 cups is recommended.
- The Power Pot is NOT designed for actual cooking. That means no heating olive oil for sautéing , no searing meats, no cooking of any thick consistency item such as stews or pasta sauce etc.
- The heat/fire resistant cable is just that, RESISTANT. It will still burn/melt if exposed to direct flame or other high intensity heat source.
- Avoid allowing water entering the connections while the Power Pot is in use. The manufacturer did not mention anything about this, but I highly suspect damage can be done to the unit or cable/voltage regulator if rain, snow, or water in any form gets into the cable and shorts out the positive and negative terminals.
- The Power Pot is susceptible to shock/impact damage. Dropping or allowing the power pot to fall or otherwise cause a hard impact on the unit can potentially damage the unit.
Conclusion:
This is a solidly built, reliable piece of gear that does exactly what it claims to do with no strings attached. I highly recommend the Power Pot for anyone needing a way to charge electronic devices when normal means are not available.
The Power Pot is ideal for long backpacking trips, power outages at home, disaster use, and even third world use. A multi use item at its finest; use it to boil water for your meals, make hot beverages, cook pasta, and charge devices on the trail on the go or at home in an emergency. The Power Pot will give you power when you need, where you need it, guaranteed.
Source: received for testing via the Trailspace Review Corps
(Sample provided by Power Pot for testing and review)
![]() Reviewed by
Reviewed by
swensor
+26
February 5, 2013
Bought one on their Kickstarter last year, and boy was it worth the wait! I'm getting pretty respectable charge times with a simple MSR stove and boiling water! Best new piece of gear I got in 2012 :)
Pros
- Surprisingly fast charge times
- Lightweight, dual-purpose, fits easily in your day pack or overnight setup
- USB. Enough said, it charges whatever you throw at it
Cons
- Bit of a learning curve, you have to use it correctly or the output suffers
- Didn't work with my iPod until I used the PowerPot's charging connectors
The Power Pot came up on Kickstarter last year, and quickly hit its funding goal. I was really excited to try the device out. The company said they had overwhelming demand and ended up shipping the unit at the end of summer. But it was totally worth the wait! During my first test I added a cup or so of water, and put it on a mid-sized flame on my home stove. It bumped my iphone up 30% in about an hour. Seemed allright, but not quite the speed I was hoping for.
Then I read the instruction manual :)
Turns out, if you use the right kind of flame and focus it on the bottom of the pot, fill it to the brim with cold water, you get TONS of power! Now I can milk this baby for all it's worth! I can add a full ~40% to my charge level in a half hour!
Granted this is a niche product, only suitable for backpackers who like to get down, and people concerned about rolling power outages and emergency preparedness. It's also going to be a huge hit in the 3rd world where people don't have regular access to power. For those inclined, check this bad boy out!
Source: bought it new
Price Paid: $150
Your Review
You May Like
Specs
| without lid | with lid | ||
|---|---|---|---|
| Price |
MSRP: $149.00 Historic Range: $71.99-$189.00 Reviewers Paid: $150.00 |
||
| Weight | 12.1 oz / 343 g | 18.2 oz / 516 g | |
| Capacity |
1.4 liter / 46 oz |
||
| Dimensions | 4.5" x 5.5" | 4.5" x 8" | |
| Generator Output |
5 W Maximum, 1 Amp max at 5 V (DC), USB 2.0 port |
||