Zpacks Solplex


 Reviewed by
Twig
REVIEW CORPS
+9,190
 June 15, 2018
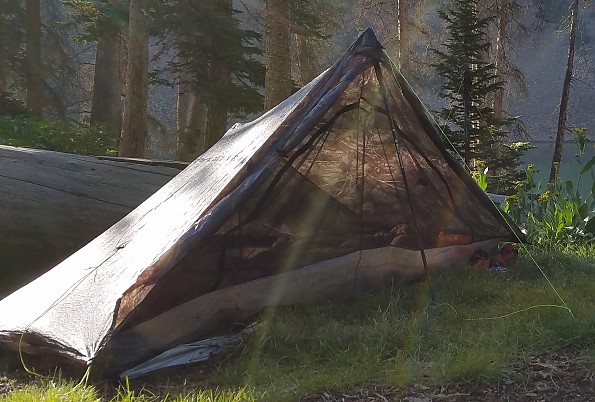
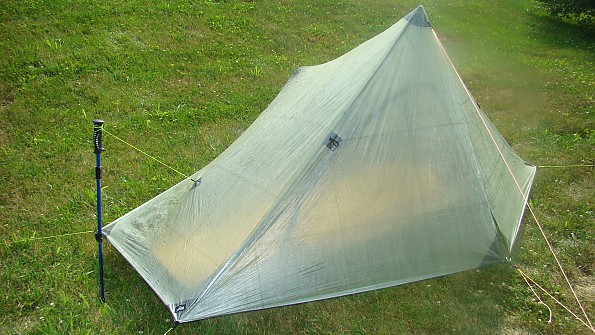
The Solplex is the most functional and spacious tent at around 1 pound. It has been my #1 favorite piece of gear for several years and my treasured home for two thru-hikes, going on three. If you are seeking a truly ultralight but full-protection shelter, this is it.
Pros
- Ultralight but complete and liveable shelter
- Made of DCF
- Handmade locally in the USA
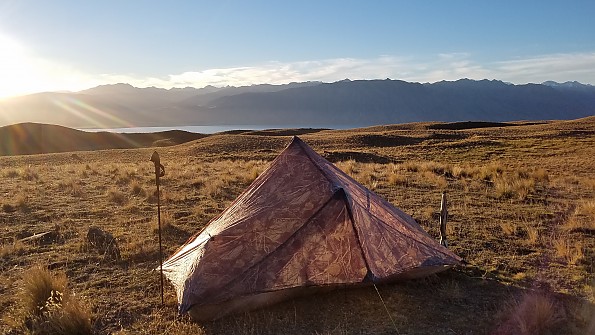
- Available in highly-stealthy camo color
- Excellent design and build
Cons
- Price
- Need 2 trekking poles or to buy substitute carbon poles
- Non-freestanding, though this can be solved with a kit
- Condensation issues common to all single-wall tents
- Very airy…not good in extreme cold conditions
Conditions: I purchased my Solplex spring of 2016. I have slept in it over 100 nights and it has been in my pack the length of New Zealand’s Te Araroa, the Colorado Trail, and approximately 10 days on both the Appalachian and Florida Trails, a combined distance of over 2,800 miles. It will also be my shelter during my thru-hike of the Pacific Crest Trail, this summer, 2018.
A word about the company and customer service: Zpacks is one of the pioneers of ultralight equipment. The company was founded in 2005 by Joe Valesko, a fellow thru-hiker that got his start simply by making his own gear for himself and others. Zpacks specializes in DCF (Dyneema Composite Fabric, formerly called cuben fiber) materials. They also incorporate other minimalist features like small zippers, line-locs, and tie-outs. They offer the full gamut in specialized shelters, sleeping bags/quilts, backpacks, and clothing.
I was introduced to the brand while hiking with an ambassador, Steve, in 2014. I was very dubious of his odd, spaceship-like tent (the Hexamid), but couldn't help being intrigued.
 Zpacks Hexamid, one of their first tent designs. It uses only 1 pole and has a mesh floor.
As I began planning my first couple long-distance hikes, I noticed that the name Zpacks popped up everywhere in the blogs and gear lists. In my research, I became interested in the Solplex, but I wanted to see it in person.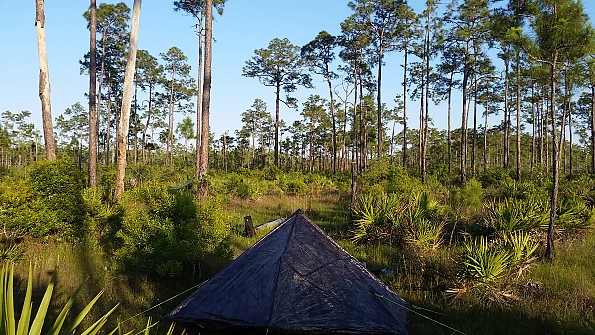
The Zpacks factory is located in West Melbourne, Florida, and since I live in Miami, a visit was feasible. I emailed them and they replied right away, accommodating my request. I met with Matt, who took the time out of his Saturday to demo a 'floor model' camo-color Solplex that had a minor cosmetic blemish. (When the color is printed on the material, there are sometimes wrinkles in the fabric that result in un-painted streaks.
They covered one small area with camo tape, which is why my particular tent appears to have an extra seam on one side). Zpacks gave me a nice discount on this tent and also threw in a set of 8 titanium shepherd hook stakes and a 32" carbon pole for free. I have been a happy customer ever since.
Tent Overview: I’ve included a few specifics, here but the Zpacks website has every piece of information possible, so it’s not worth repeating it all. They also have a nice “Overview Video” to demonstrate all the features.
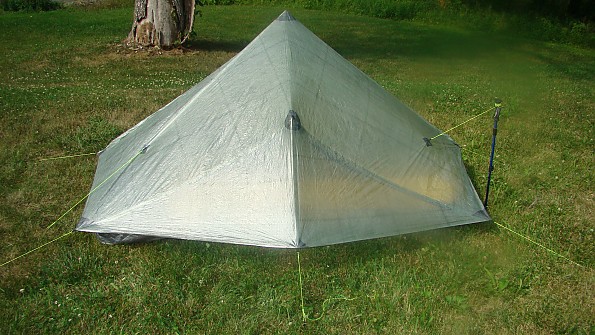
- Peak height: 48"
- Rear height: 32"
- Floor length: 7.5'
- Floor width: 30"
 Two poles (trekking poles or Zpacks carbon poles, both purchased separately): 48" and 32"
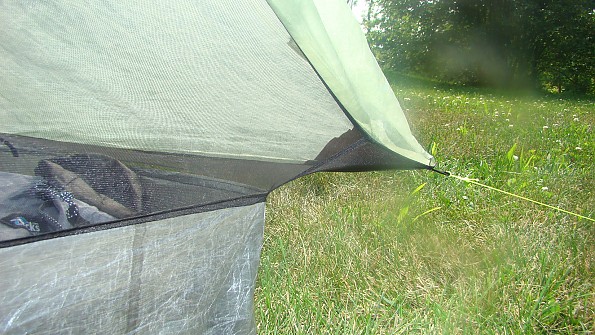
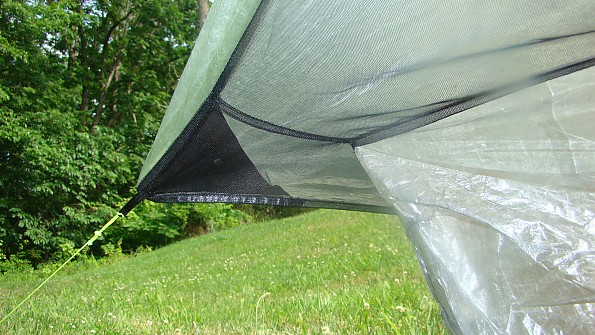
Eight tie-outs: 4 corners, 1 center front pole, 1 center rear pole, 2 side-walls. (6 tie-outs minimum)
All tie-outs have Line loc 3 adjusters, except for the center rear pole.
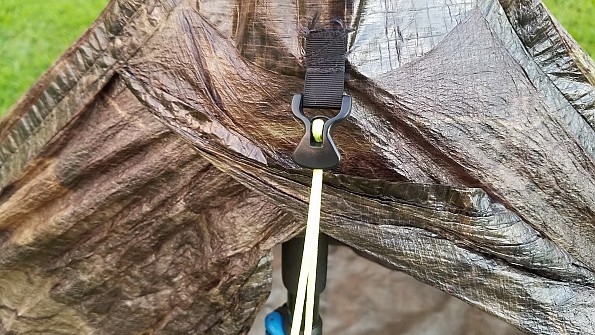
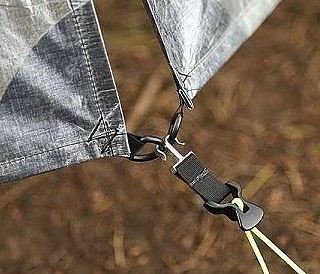
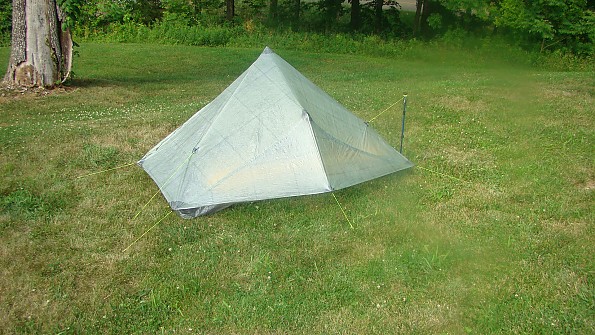
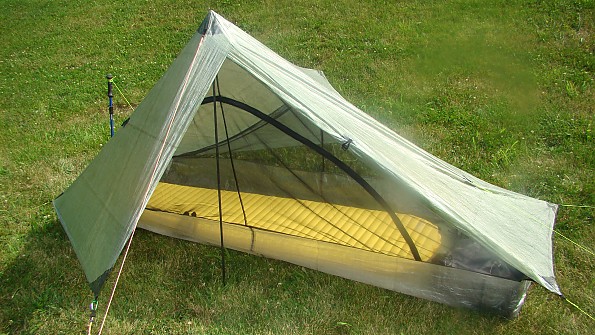
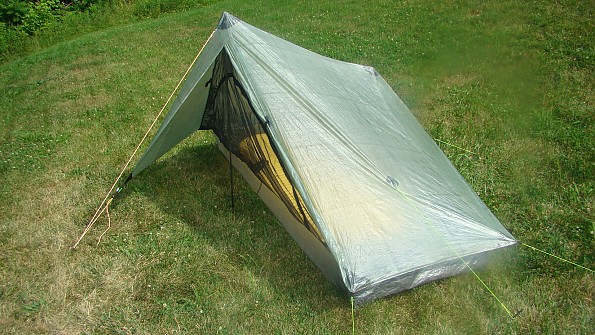
There are two independent Storm Doors that form a front vestibule. These can be rolled and secured open with toggles.

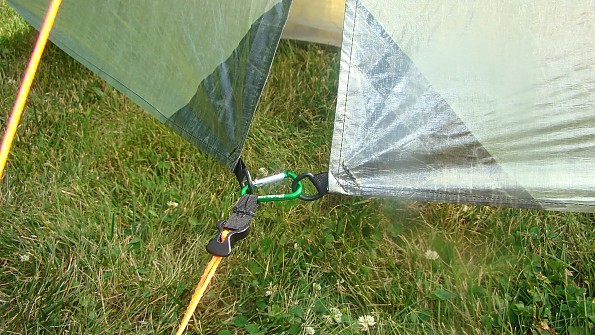
The doors attach to a hook and Line loc tie-out (see pictures, the latter two are from the Zpacks' website and one shows a slightly updated version). An additional toggle can be used to secure the flaps together.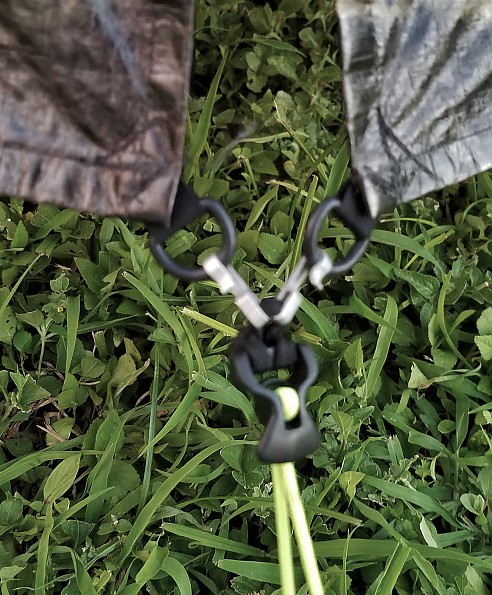
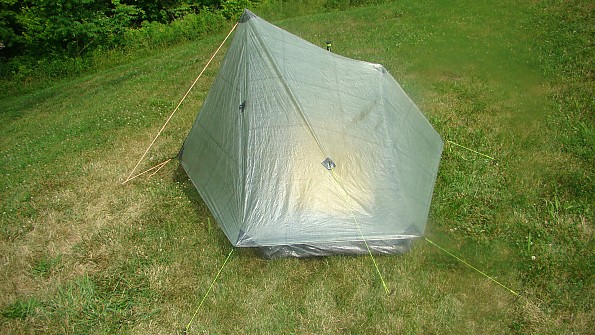
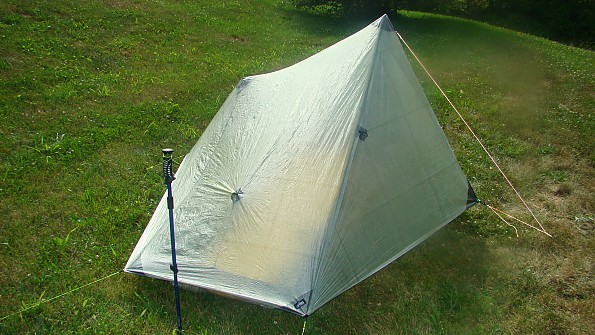
 Colors: Olive (silver) and Camo. (The blue-ish material pictured above appears to no longer be offered). The Camo print adds about 1 oz but I highly recommend it!
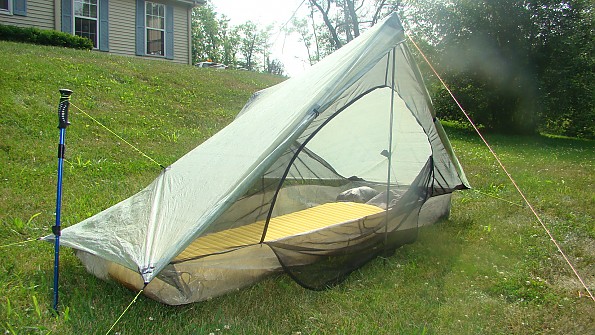
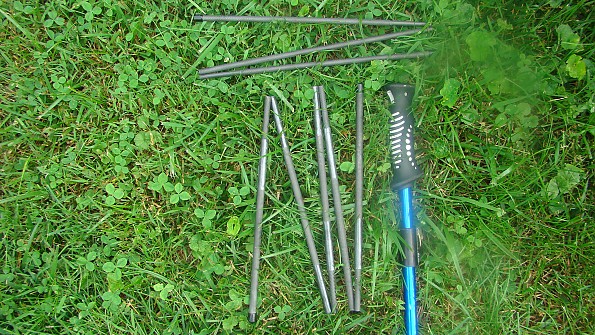
Weight of my Camo-color tent plus stuff sack, trekking pole cup, 8 stakes, stake stuff sack, and the 32" carbon pole: 20 oz (does not include weight of the 1 trekking pole, pictured below)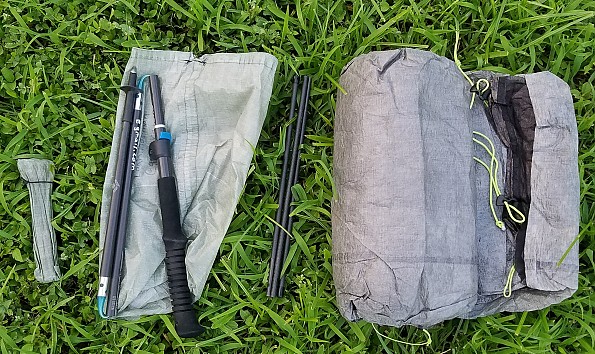
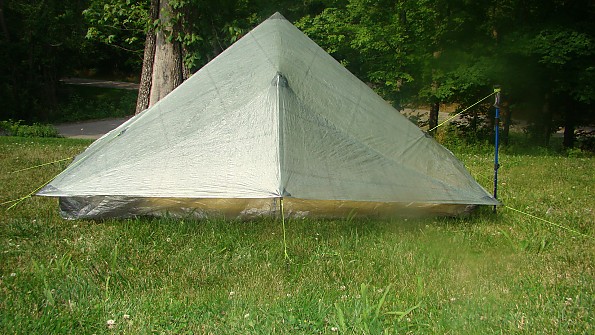
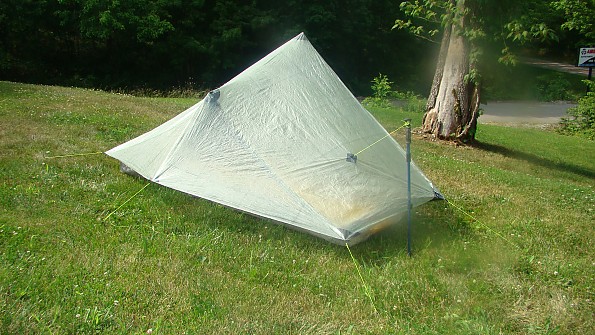
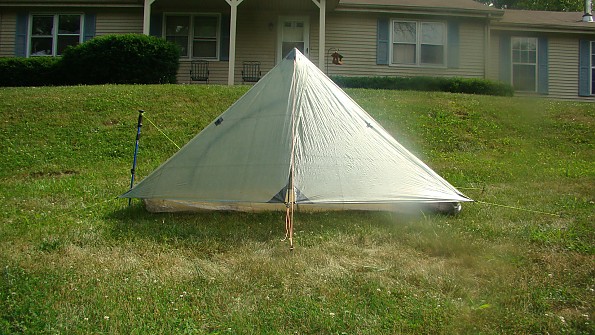
Setup: For a free-standing, ultralight tent, the Solplex is one of the easiest and least-fiddly tents to pitch. Granted, I have had a lot of practice at it by now, but even a beginner should get the hang of it within a few tries. I know this because I met a lady at the very first campsite on Te Araroa who also had a camo-color Solplex (only time I have ever met anyone with my exact same tent). It was her first night pitching it and she had never even watched the video or read the instructions. She figured it out no problem.
The Solplex is all one piece, so there is no fuss in aligning a fly, groundsheet, etc. The two poles go directly from the ground to the peaks, so there is also no wrestling, bending, or inserting of poles into sleeves and grommets. I don’t even use a footprint, so setup is as simple as the tent body, poles, and stakes.
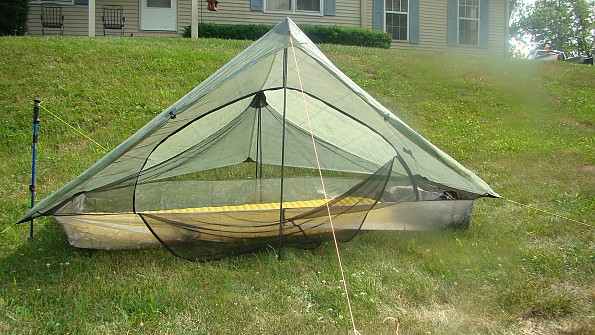
The best way to see how this tent sets up is to watch the “Solplex Set Up Video” on Zpacks' website. You’ll get a sense of how relatively easy and intuitive it is. The video demonstrates staking out the four corners, then staking the front pole, followed by the rear pole, and lastly staking the wall end tie-outs. With practice, it should take less than five minutes to get a good pitch.
More time is often spent on site selection and preparation. Given the very small footprint of the Solplex, even this is a breeze. I basically lie down on the ground and use my body length to determine if a site is large enough, flat, and if there are any obstructions that might cause a problem.
Interestingly, the prescribed sequence of stake-out points has changed since I purchased my tent. Previously, when Joe himself was the guy in the video, the instructions called for staking out the front corners first, then the poles, then the rear corners. I’ve followed the old sequence for the past two years but tried the new sequence for the first time the other day and it seemed to work just as well and is a fair bit simpler.
I emailed Zpacks to inquire which is considered the correct method and Joe replied back that either way works. If you’re interested in the original sequence (still the written instructions on the website), read through the steps below. Frankly, I think the old method/written instructions make setup sound much more complicated than it is, but some people (like me) prefer very detailed, precise information.
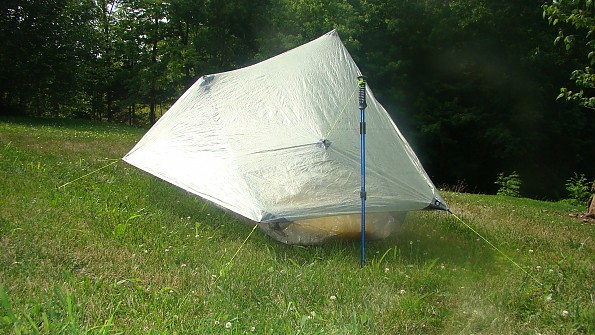
- Adjust your front trekking pole to around 48 inches (122 cm), and the back trekking pole to around 32 inches (81 cm).
- Stake out one of the front corners.
- Un-clip the doors from the front guy line or it will throw off your measurement. Pull the opposite front corner guy line tight. Come back about 8 inches (20 cm) and stake. The distance you come back determines the peak height.
- Insert the front trekking pole outside the screen with the handle at the peak and the tip in the ground. If you angle the pole slightly it will stay standing up easier.
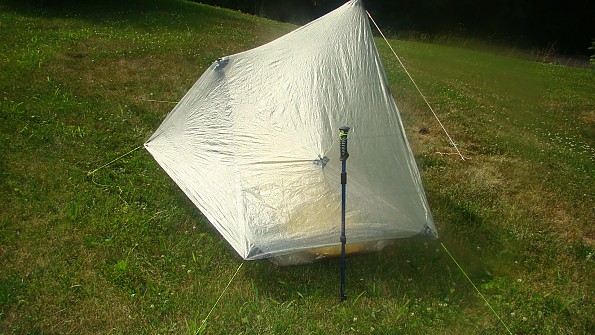
- Stake out the front center guy line. The front corners of the tent should be about 6-8 inches (18cm) off the ground.
- Insert the 32 inch back trekking pole such that the handle is at the back peak between the tarp and the screen. The tip will be on the ground. Stake out the rear center guy line.
- Stake out the back two corner guy lines, and the two wall guy lines. If the walls of the tent are not smooth enough, try adjusting the position of the back trekking pole, or adjust the corner guy lines.
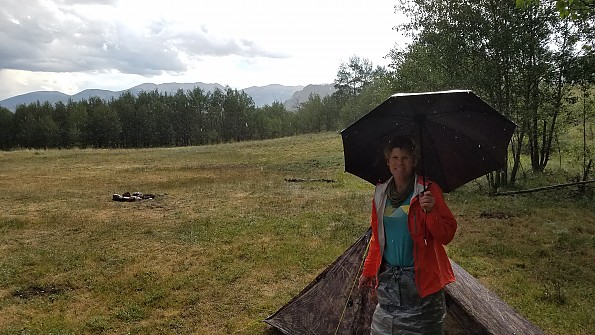
Another crucial attribute of note here (but often overlooked) is that I can set up the tent while it’s raining, with little to no water getting inside. It’s nice to have the luxury to wait until the rain stops, but there will come a time when one is forced to either set up or to break-down in inclement weather.
Stability: I have been very satisfied with this tent’s stability. It has certainly faced some challenges…numerous thunderstorms, hail, and gusty winds. Notably, it has even withstood an ex-tropical cyclone. On this occasion, I was camped outside a farm, where the wind was strong enough to blow a nearby chicken coop over, but not my tent! (Don’t worry, the chickens were ok!)
On another occasion, wind knocked out power to the Visitor’s Center in Arthur’s Pass, New Zealand. During these times, I was kept awake and quite terrified by the tent walls thrashing all night, but it held up and sustained no damage. I usually take care to seek sheltered pitches, avoiding areas that are completely open, except in fair conditions. But by now, I’m quite confident in this tent’s ability to hold up to those occasional and unexpected winds that can whip up out of nowhere.
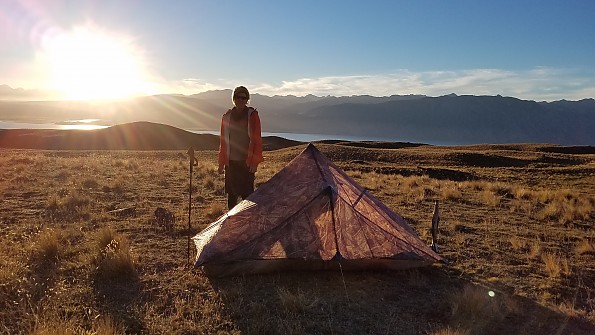
 A very exposed site above Lake Tekapo, NZ, but fortunately under fair conditions!
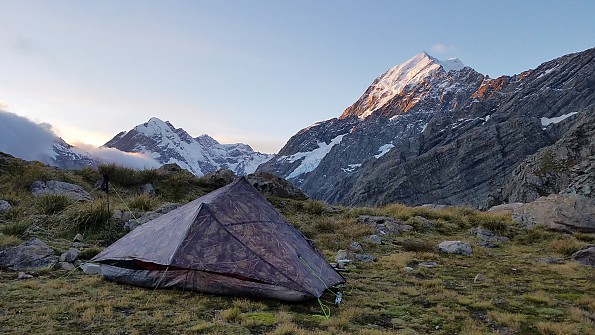
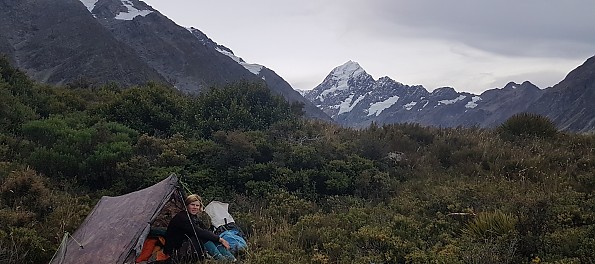
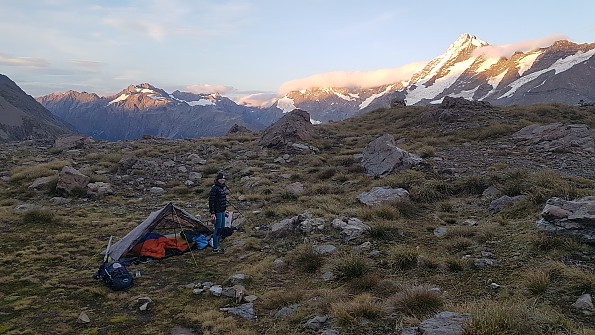 Alpine camping near Ball Pass, Mt Cook, NZ. Again, in fair conditions.
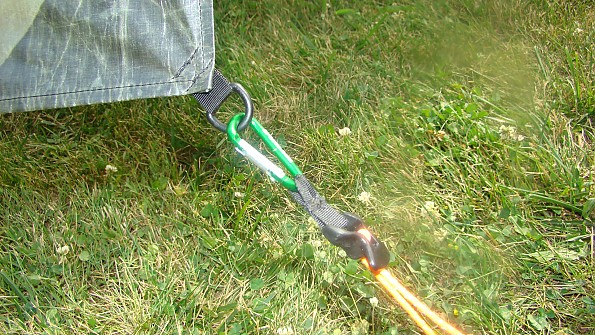
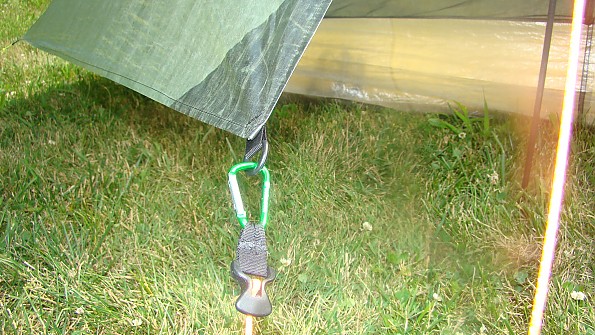
A non-freestanding tent does require proper anchoring in order to be stable. This depends on the substrate and type of stakes used. Over the course of a thru-hike, the substrate can vary drastically. Even one 10' site can have soft substrate on one end and cement-like substrate on the other. That is why I use several different types of stakes.
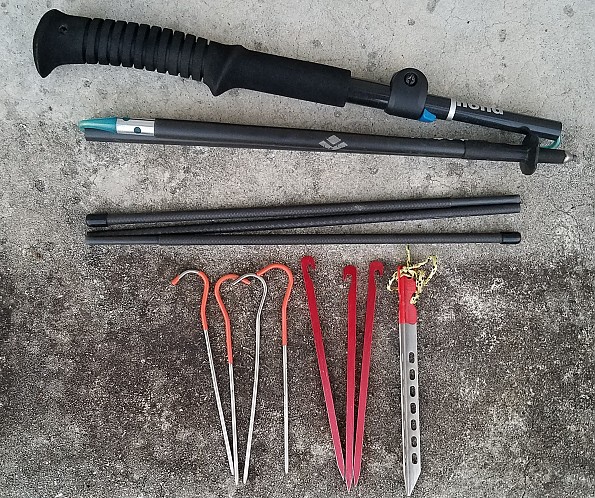
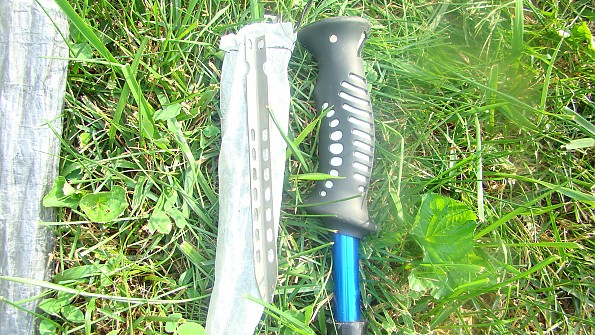
Generally, I tie-out the front pole (most critical structural point) with a titanium V-stake (best holding power). I then use MSR aluminum needle stakes for the rear pole and front two corners. Lastly, I use Zpacks’ 6" Ultralight Titanium Stakes (shepherd hooks=most ultralight but least holding power) for the rear corners and wall tie-outs. I sometimes change this order, depending on the wind direction and substrate. I have also used rocks and tree branches for tie-out anchors and extra support. (A word of caution: in the past, I incorporated carbon stakes, but found that these snap far too easily…at least titanium and aluminum usually just bend and can be reformed.)
Weather Resistance: This is the #1 reason to have a tent made of DCF. In my opinion, it can't be beaten for its weight and water-proof properties. DCF performs much like a blue plastic tarp. Water beads on the surface, while the material itself does not absorb water or get stretched out of shape. By wiping the surface with a pack towel or giving the tent a good shake, it can almost be completely dried. Likewise, inside condensation is easily dealt with in the same manner.
Another key point is that water does not seep through the material if something on the inside is touching the wall of the tent. When living inside a one-person, single-wall tent, something is always touching a wall. I have been in the hardest of downpours, to the extent that sheets of water were running off the canopy, but I have never noted any water getting through the canopy. It is really quite impressive to see how the material shrugs off water.
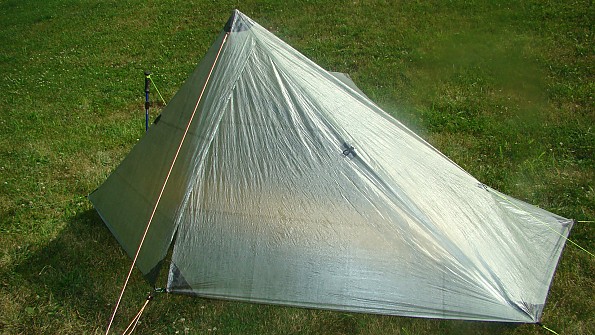
The design of the Solplex also performs well in keeping the elements out. The canopy overhangs the interior just enough to provide complete protection. The only time water has sneaked in is from splashing off the ground and/or being blown over the 8" high bathtub floor…it takes a very unusually heavy rain (like a cyclone) for this to happen. I ended up with about a teaspoon of water pooling in one of the corners, which I easily wiped up with a pack towel.
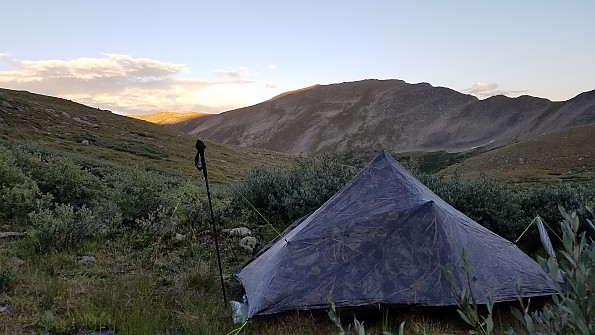
 All sealed up during a typical Colorado afternoon thunderstorm
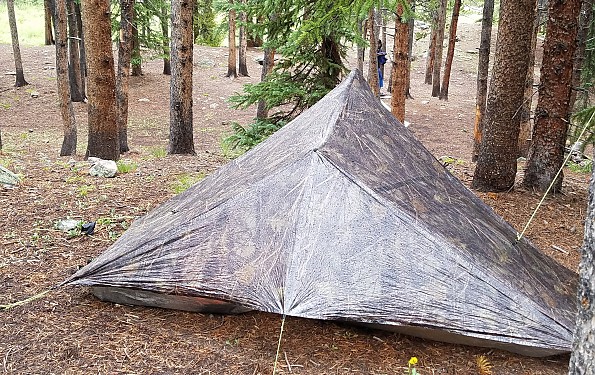
In a light rain, the storm doors are not even needed, as the front beak protrudes about four inches over the door. I have left the doors rolled up probably 90% of nights, secure in the knowledge that if it did start raining, the overhang would protect my stuff long enough for me to properly deploy the doors. Many a time, I would just go back to sleep, deeming the rain not enough to worry about. I leave my shoes just on the outside of the tent and they are the only thing that has ever gotten slightly wet, yet they are still mostly protected by the overhang.
I also love that the two doors can be deployed independently of each other. Often only one is needed, while the other can be left rolled up for easy exits/entrances and ventilation. This is also an ideal configuration for cooking my meals in the rain. One door provides ample coverage for sitting halfway in the tent, while also leaving an open space to safely run a small camp stove, in reach of the tent.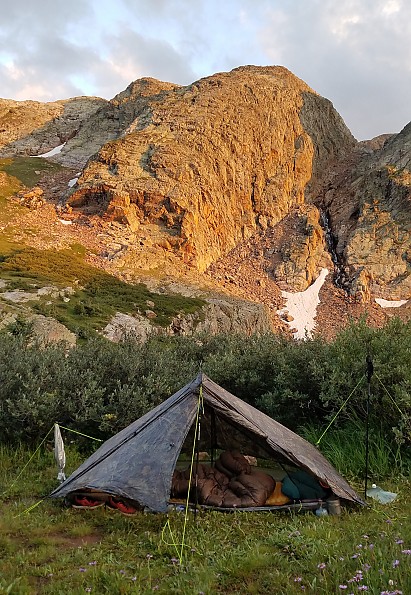
Lastly, packing a wet tent in the morning is very unpleasant, and I don’t often have the luxury of waiting around for the sun to come up to dry things out. With a DCF shelter, this isn’t so bad because the wet is just surface moisture and the weight is negligible. When I stop for lunch in the sun, it takes only five minutes to dry most of the tent. The only parts that take longer are the guy lines. I’ve hiked with lots of friends that have silnylon tents and they are usually sold on DCF once they see how much faster my tent dries.
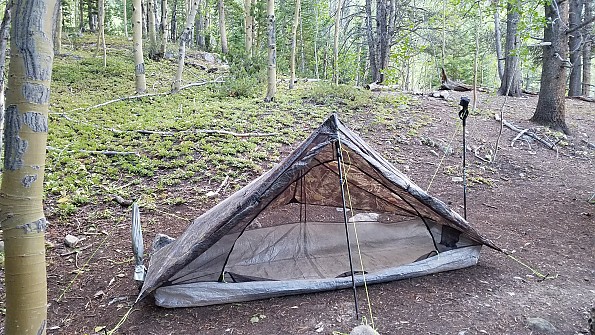
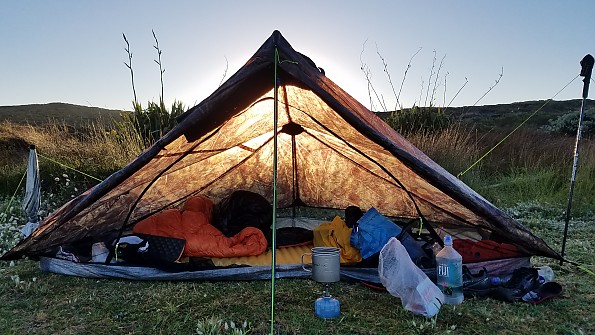
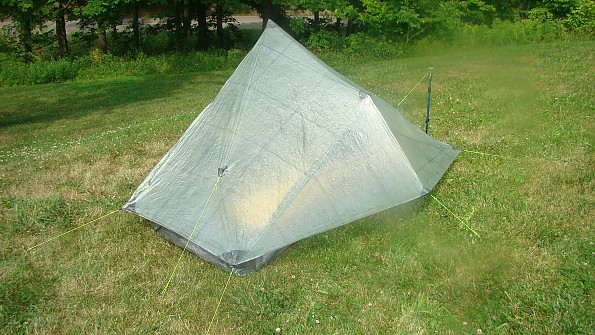
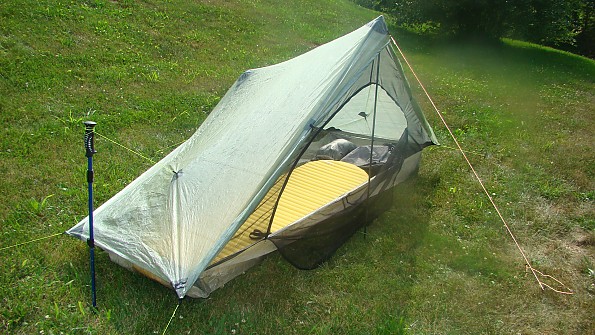
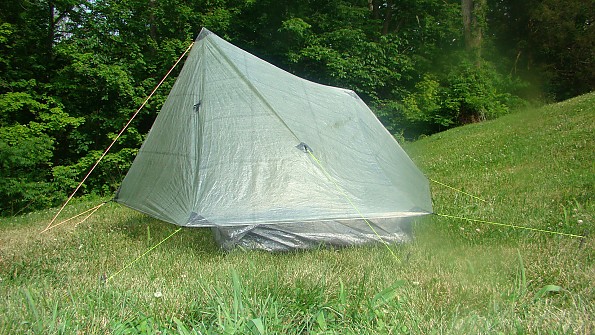
Ventilation: The Solplex is a very well-ventilated tent. On cold, breezy nights, it can almost feel too well-ventilated. The design is basically a tarp and bathtub floor, sandwiching a healthy dose of fine mesh. The tarp stops about 6" to 10" above the ground, leaving plenty of room for air to flow under the vestibules and inside.
When the storm doors are rolled up, the entire front face is open to the air. If bugs aren’t present, I’ll often just leave the screen door down completely. Either way, I have a full view towards the front and it feels like I’m sleeping under the stars. I have never felt such a connected-ness with my surroundings. In previous tents, I felt cut off from the world. In the Solplex, I feel like I’m part of it.
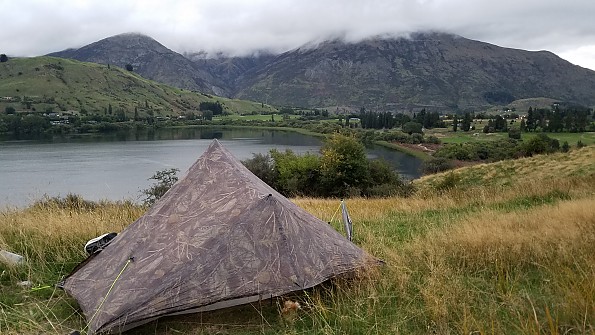
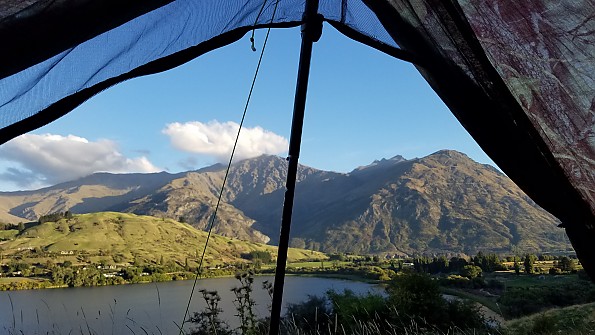 A room with a view of the Remarkables Range, NZ
As for condensation, I have found that this is more a factor of site selection, having less to do with how well-ventilated a tent is. When conditions are right, condensation is a fact of life in a single-wall tent. But dealing with it has never been easier. The Solplex walls comprise a pretty small surface area that can easily be wiped down with a pack towel. I sometimes have to do this several times a night but it has never really affected me or my stuff. My quilt has a good DWR coating on the foot, so while it sometimes gets damp from coming in contact with condensation, it doesn’t soak in.
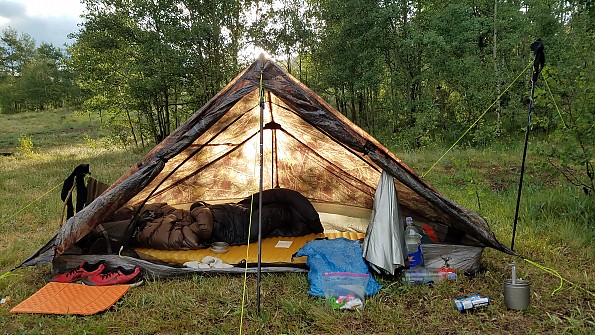
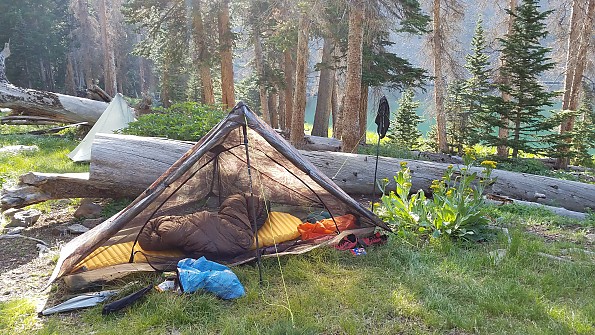
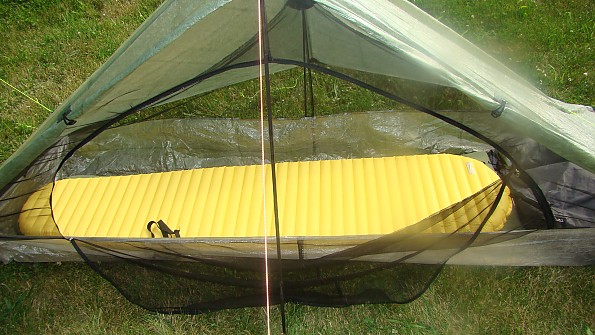
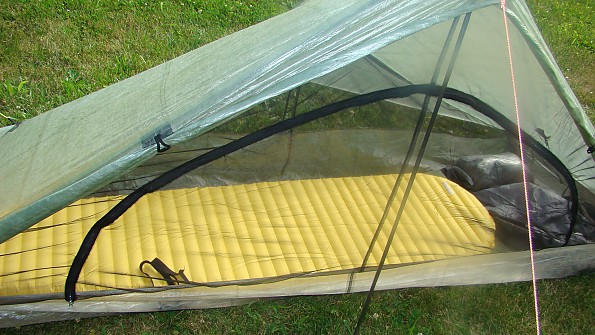
Room & Storage: The Solplex is an amazingly roomy tent at 1 pound, especially compared to other shelters its weight class, which merely offer a prone space to squeeze into and crash. The Solplex is not a bivy tent…it actually has liveable space. For starters, I don't have to crawl or worm my way into the tent. I can just sit down on one end and swing my feet in. I am also able sit upright, change clothes, do stretches, lounge, read, cook, and eat inside my tent (obviously the latter two aren’t advisable in bear-country).
 A relaxing evening overlooking Mt Cook, NZ.
I can easily fit myself and all my gear inside, including my backpack (which I use as head support). In a pinch, it is even possible to squeeze two people into the Solplex, provided they don’t mind being close and the screen door is left open so as not to put too much strain on the zippers. I am an average size at 5'9" but my friend who is 6'2" has tried my tent and said he felt comfortable in it. Zpacks makes three other larger plex tents, for those that want more room or to fit additional persons.
The Solplex is also not any bigger than I need it to be. The reason I chose it over the two-person Duplex was not because of its marginally lighter weight or cost, but rather the size of the footprint. The room needed to set up the Solplex is so minimal, I have yet to encounter a situation where I couldn’t find a spot big enough. If need be, it can be pitched right on top of a trail…fortunately I’ve never been desperate enough to do this, as it’s not in following LNT principles. It’s just nice to know I have options.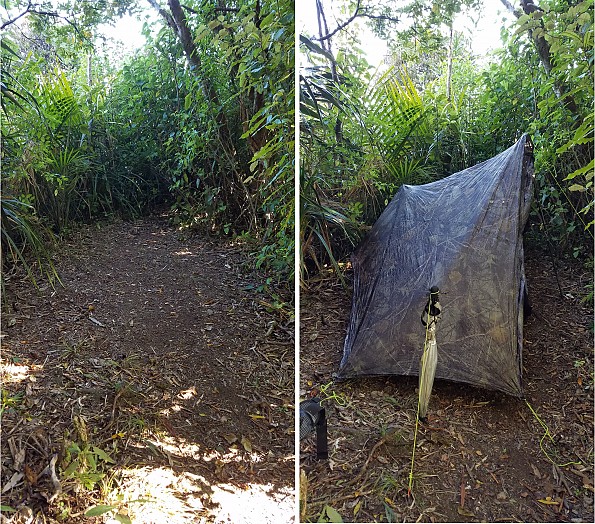 This narrow space would be a challenge for most tents but the Solplex squeezes right in.
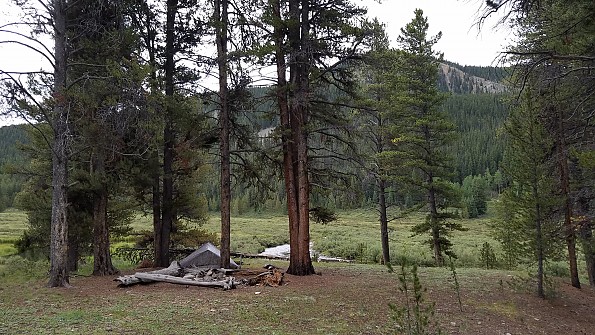
 Under some low trees, no problem.
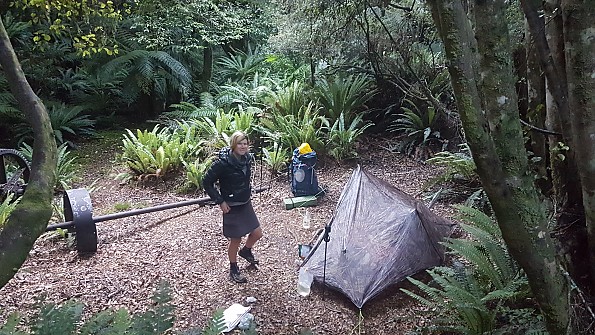
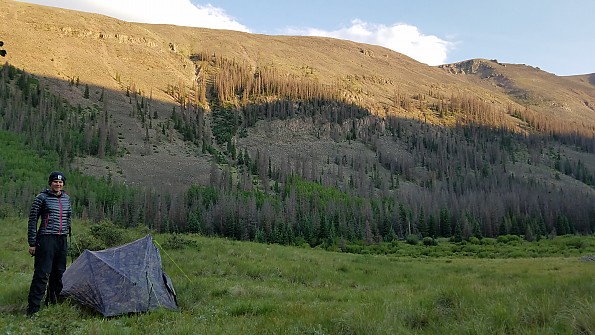 The Solplex looks small when I'm standing next to it, in the wide open spaces of the Rockies.
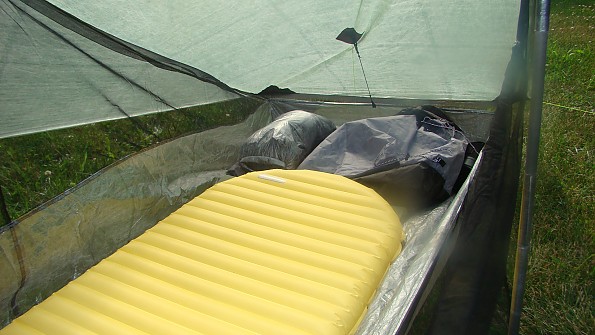
There are two 8" x 8" mesh pockets for storage, one at the head and foot, which I use on occasion for things like chapstick, my phone, and my headlamp. Because of the small area and bathtub floor, it is impossible to lose things for very long inside this tent. In fact, I love having my few items distributed so close around me. Each has its specific place around my head and feet so that in the dark, I don’t even have to turn on my headlamp to find things.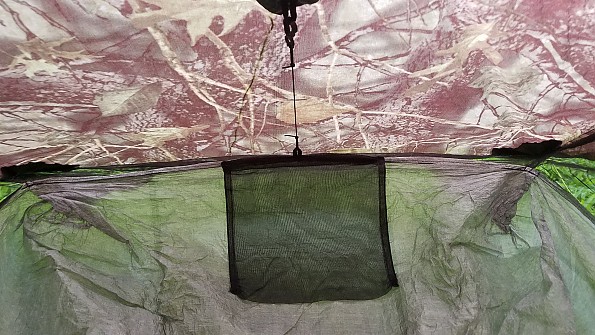
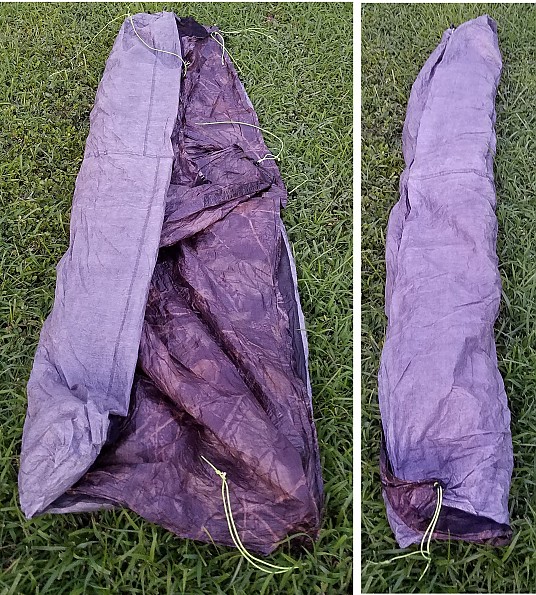
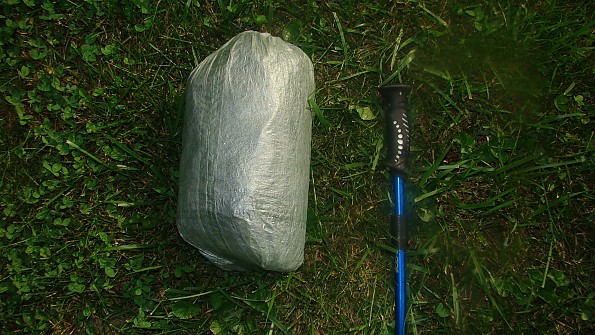
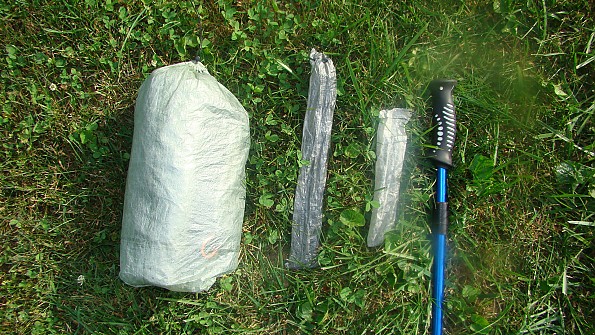
Packability: The Solplex stows quickly and efficiently. I simply remove all the hardware, laying the tent flat in the shape of the footprint. I make one fold from the front side, then another fold from the back. The outside floor ends up encapsulating and protecting the canopy and interior mesh. Then I make a sushi roll, with the stakes and carbon pole in the middle.
I’m not usually a fan of stuff sacks but I do use the provided 0.3 oz, 7x13" DCF sack to keep any wetness packaged inside. It’s not advisable to stuff DCF into a sack or to compress it. It’s therefore often bulkier than silnylon. Given the small size of the Solplex, it’s still plenty compact.
Ease of Use: The Solplex is such a simple design, but at the same time, ingenious. It just works…a concept that is more of a feeling or a knowing, after having such an intimate relationship with the tent over the years. I have played with a lot of other innovative designs in shelters, none of which made such an impression on me. The combination of the materials, dimensions, and open front with dual storm flaps come together in perfect harmony.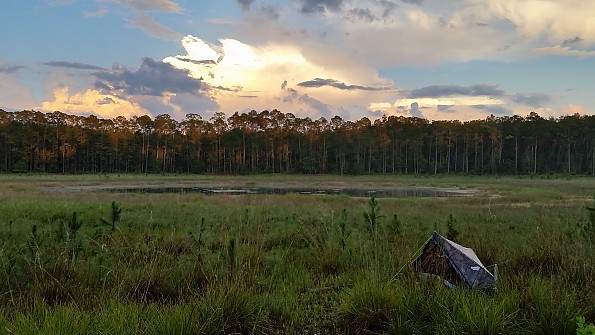
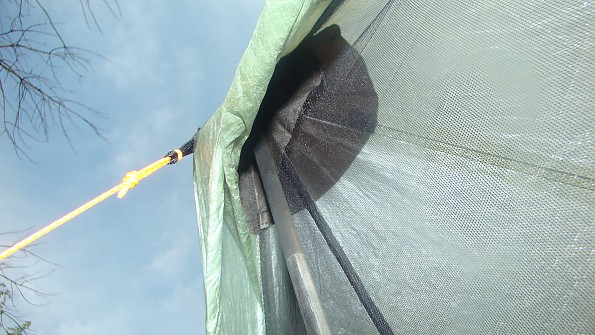
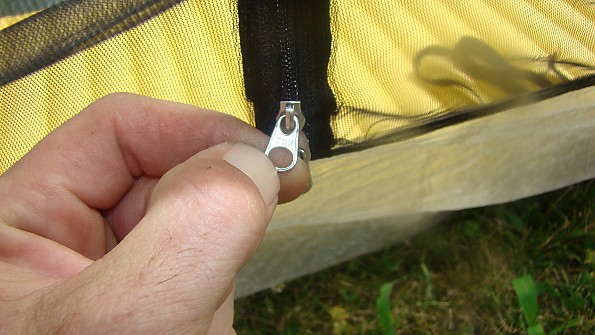
Aside from the ease of setup, there are few working parts on this tent. Namely, there is the rainbow zipper with two zipper pulls and an assortment of line locs, toggles and hooks. The zippers slide well, except for sometimes at the very top of the arch.
Occasionally I don't get the height and/or shape right, which seems to put stress on the center seam and door peak. This results in some distortion at the top of the rainbow zipper, causing me to have to use two hands to get the zippers to track across the top arch…one to zip and one to hold the tracks closer together (this can be seen somewhat in the below picture, where the door is not zipped all the way).
I asked Zpacks about this and they suggested lowering the front pole height to between 46" and 48". Joe also asked me to mention that they have redone the screens to offer more slack, avoiding this issue.
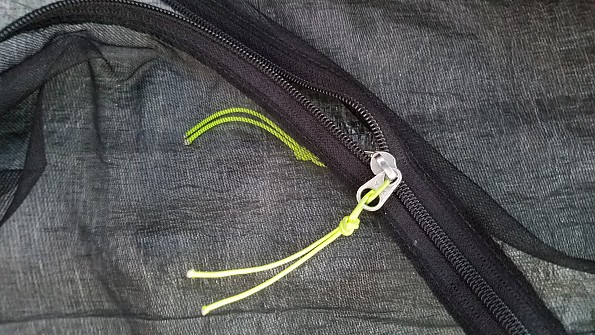 Ultralight zippers and fine mesh.
Another feature that may take some getting used to is the hook and ring system on the storm doors. The rings simply clip into the hooks and the line loc adjusts the tension. I find that it usually takes two hands to fasten or undo the rings from the hooks and it can seem fumbly in the dark or cold. Zpacks appears to have improved this design, based on pictures from their website.
Features: Zpacks tents do not come with stakes or poles. This may be a surprise to those that are more familiar with mass-produced, off-the-shelf tents but it is not unusual with the ultralight cottage manufacturers. Many, like me, prefer to choose from a variety of ultralight stakes rather than use the stock ones that come with a tent. Of course, Zpacks sells a variety of ultralight stakes on their website.
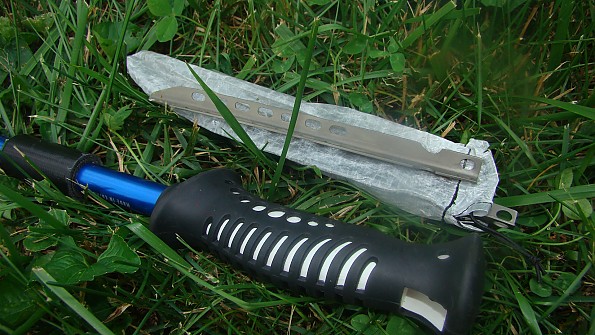
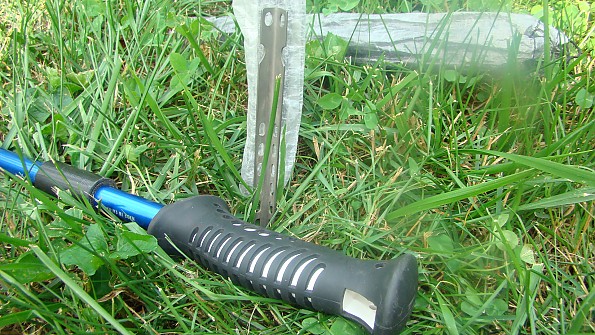
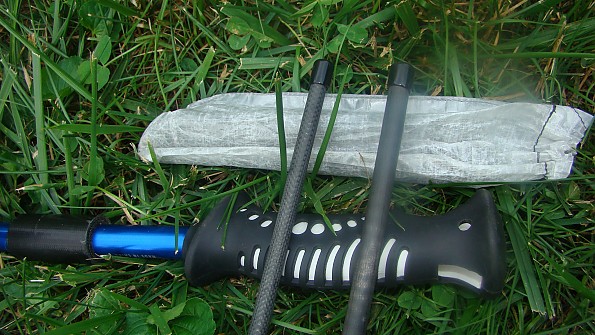
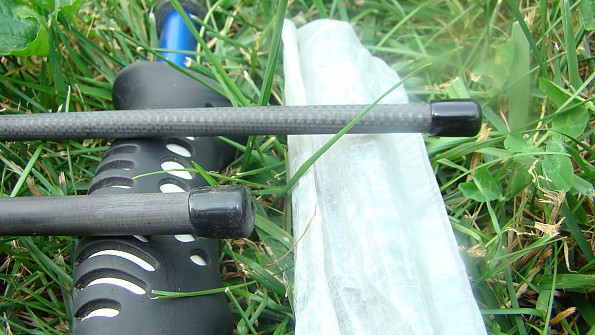
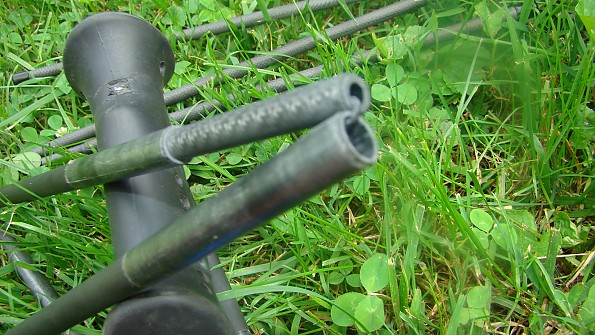
As for the poles, the tent is designed to utilize the trekking poles that you presumably already have and carry. But of course, Zpacks also sells substitute carbon poles and even a “Flex Tent Upgrade” which are carbon poles that turn the Solplex and Duplex into freestanding tents. I have not tried or seen anyone with the Flex poles yet, so I can’t comment on them. But I do use the 32" rear carbon pole, which weighs 0.9 oz, folds to 12", and costs $15. I really think it’s worth getting one.
In my case, my Black Diamond Distance FLZ z-poles can adjust to 48" but not to 32". The benefit of using only one trekking pole for the front and a Zpacks carbon pole for the rear is that my other trekking pole is available to be used as a side-wall lift and for day hiking while the tent is still pitched. I have been very impressed with the durability of the carbon pole. It is so small and light, it feels like it could easily snap in half, yet is has withstood some very high stresses.
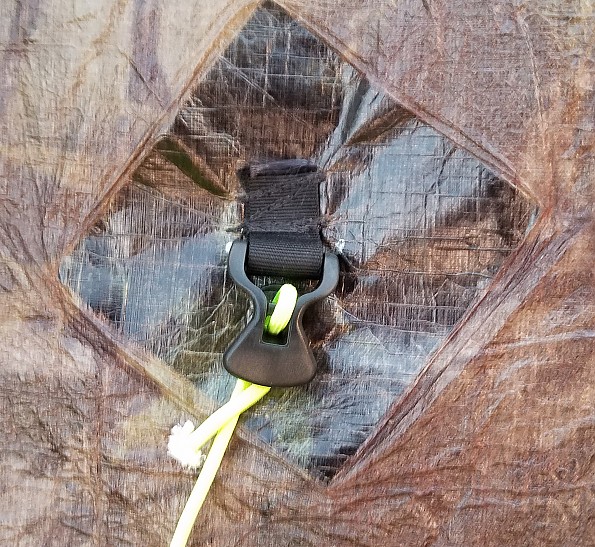
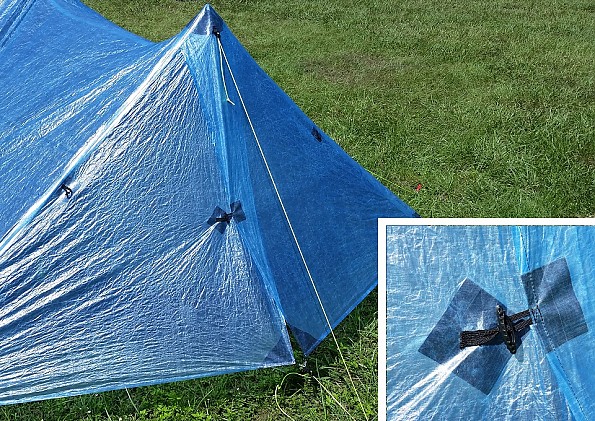
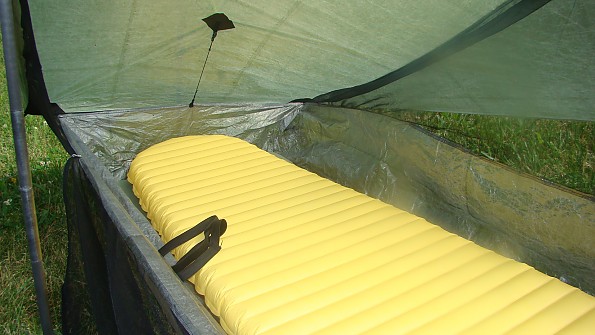
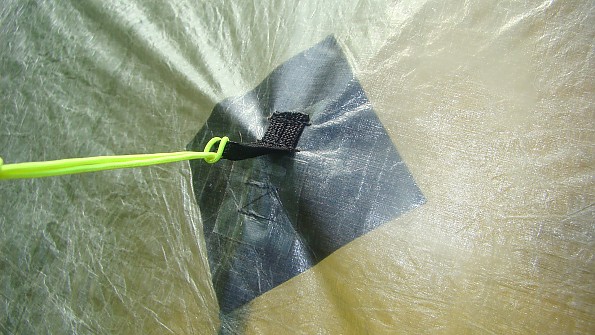
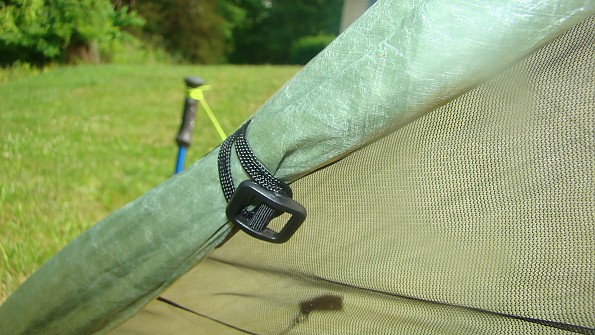
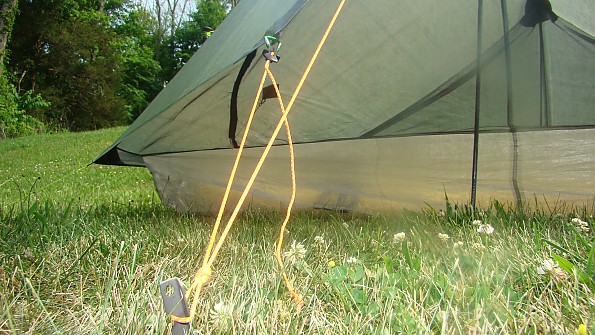
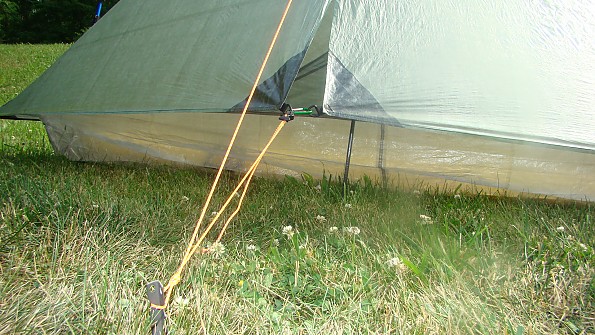
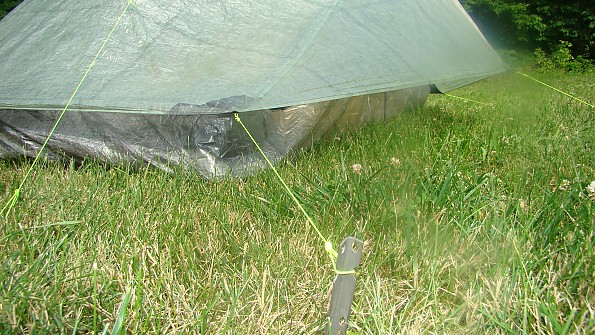
Zpacks sells many other accessories and replacement parts. One of my favorites is the $5 Trekking Pole Cup. This 0.09 oz piece of DCF has loops for attaching to a tie-out. The cup lays over the top of a trekking pole, which effectively pulls the tie-out higher off the ground. I use just one of these (plus my second trekking pole) for the head-end of my tent. It helps me orient the tent more easily when setting up and gives me ample headroom.
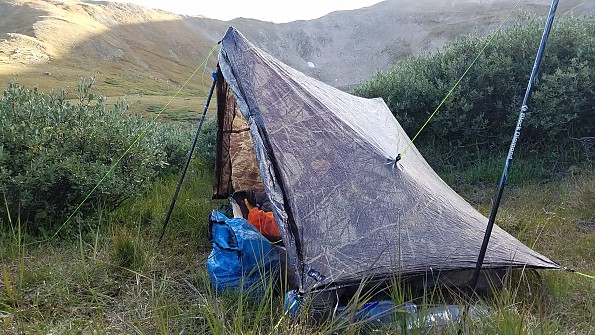 The trekking pole cup in use...notice how taut it pulls the sidewall. The cup is the small black square in the picture below.
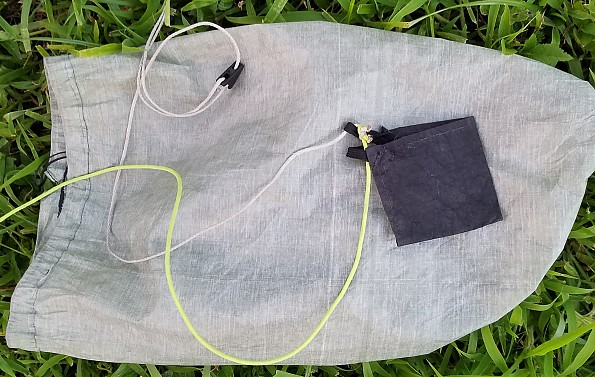
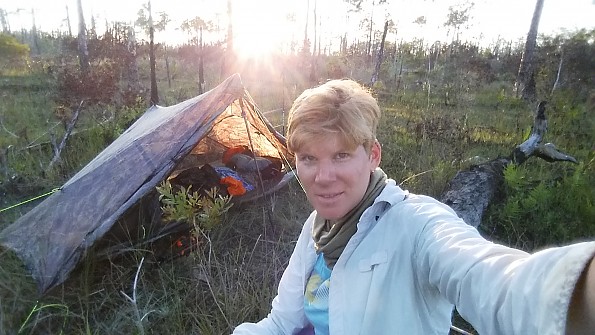
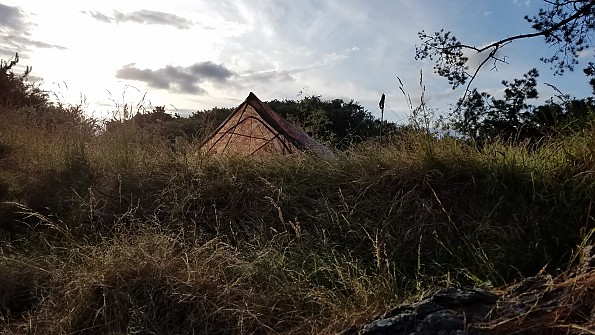
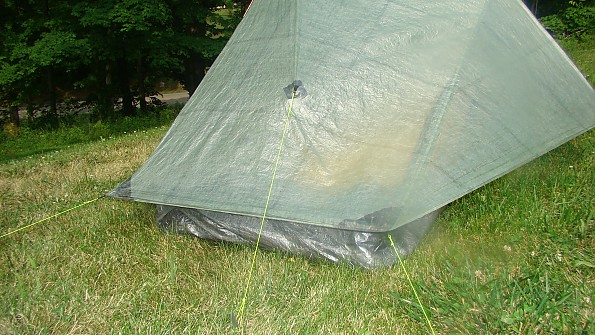
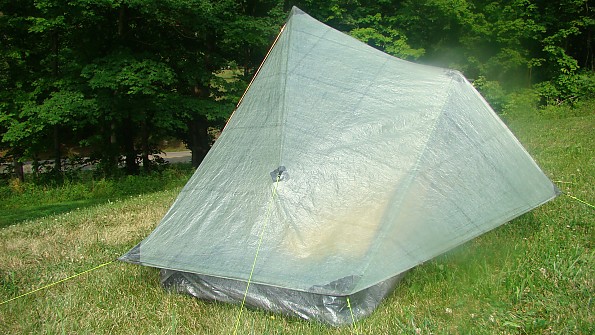
Camo-color option: Where else can you buy a camo-colored tent? I know that this feature may seem trivial or gimmicky to some, but it is one of the most treasured attributes on my Solplex. Before purchasing, I had decided that I would pay the extra $30 (plus 1 oz weight penalty) for the camo color material, so I guess it was destiny that the one ‘floor model’ they had in stock met this criteria.
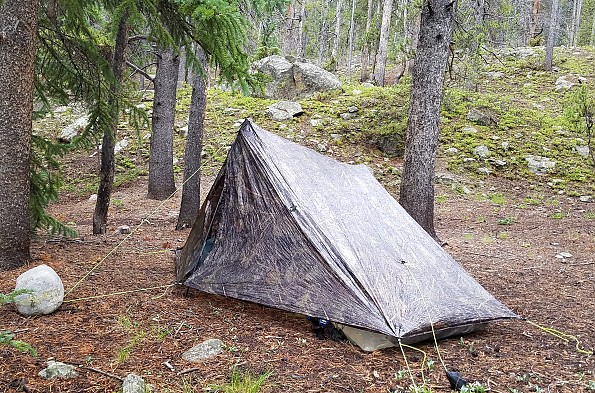
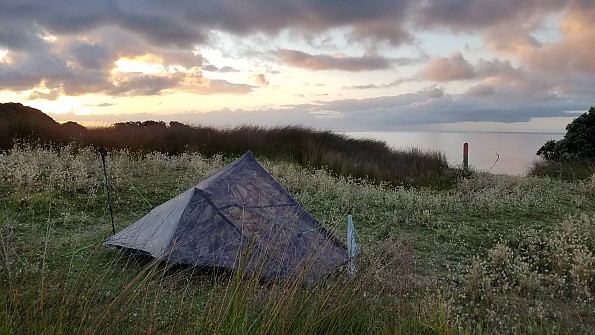
But let me be clear…I do not own a single other item in camo! I do not care about stalking animals or looking cool. But as an often single, female hiker, I value my privacy and discreetness. This tent gives me the confidence of going unnoticed, or at the very least, not drawing attention to myself. The pattern also makes the tent less see-through, a common criticism of the stock olive (silver-ish) DCF color. Further, from a LNT perspective, I think ALL tents should be designed to blend in and be of earth-tone colors.
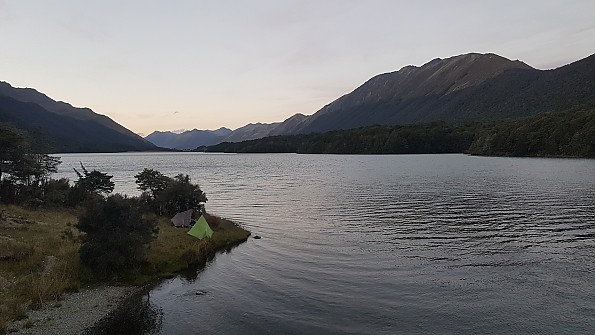 A peaceful lakeside setting but it's obvious which tent blends in better. Granted, the green tent is not as obnoxious as most.
The ability of the camo Solplex to disappear into the outdoors is quite impressive, especially compared to the blue and olive DCF colors and even more so, the likes of big-brand, neon orange tents. I have many pictures with my tent pitched next to others demonstrating just how less obtrusive it is. The small size and unusual color also lead people to think it’s a one-off, inexpensive, home-made, trash-bag jalopy.
Again, the less attention I can draw to myself, the better. The only downside is that the tent becomes nearly impossible to find in the dark without the benefit of some reflective line. Others have also tripped over it before, so I have to be careful to pitch far away from major thoroughfares. I am one of those that relish in the most secluded sites anyways, so my Solplex matches my personality perfectly.
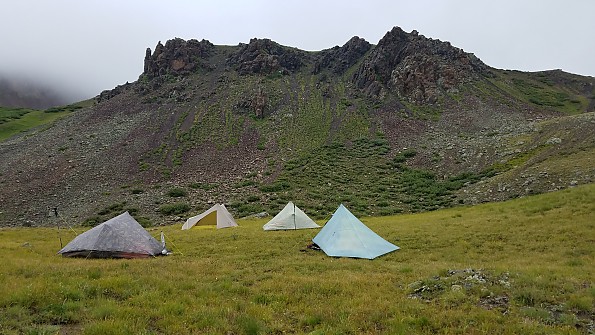 A collection of DCF tents and one Sierra Designs tent in the San Juans, Colorado.
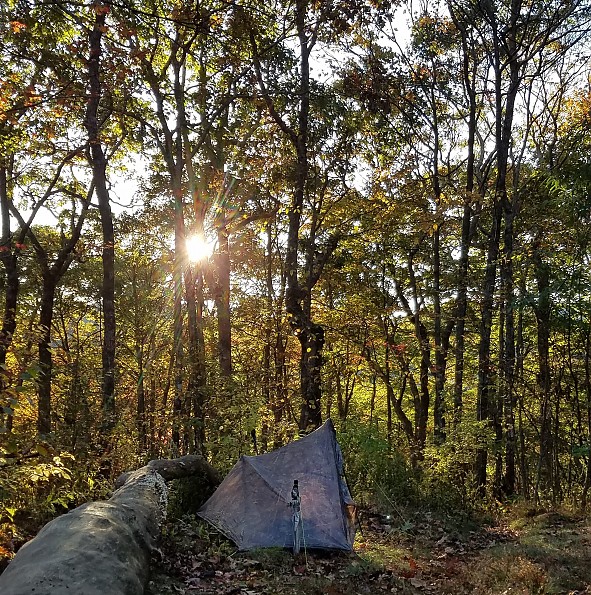
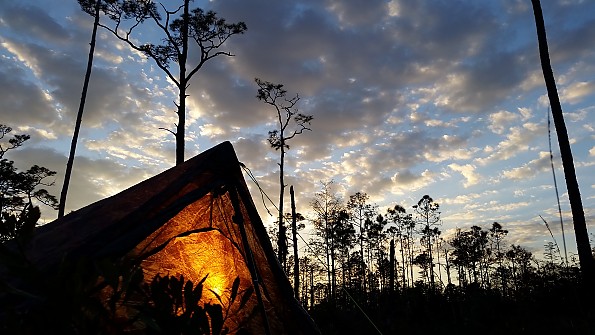
The camo Solplex is most at home along the Appalachian Trail, immersed in fall colors.
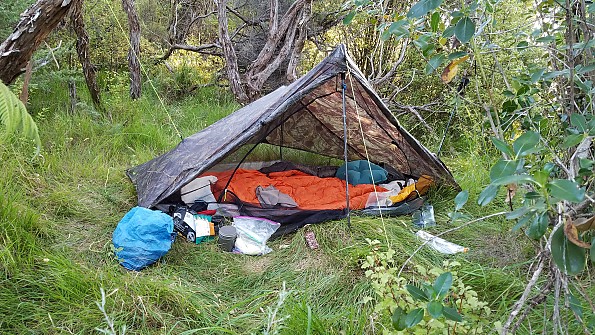
 But is also in perfect harmony in a wide variety of environments, from jungle to grassland to alpine.
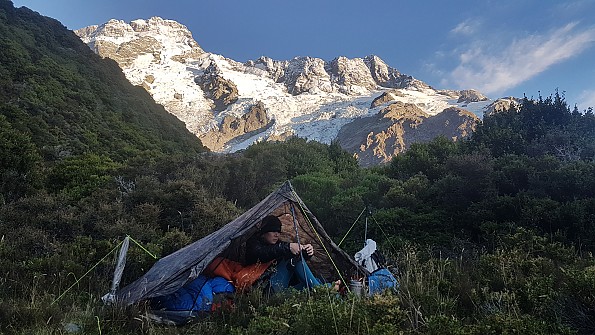

Construction & Durability: Zpacks is pretty up-front about the durability of their DCF products: “The expected life span of this shelter is at least one full 2500+ mile thru hike, or many years of casual use with some care.”
I have heard a lot of conjecture about this claim. Some think it is unreasonable for a $550 tent to last only so long, others seem to be at ease with this claim, given the benefits of packing such a lightweight and functional shelter. Obviously I am in the latter camp of thinking and the tent has actually far exceeded my expectations for durability. I have used it beyond the stated lifespan, with remarkably few signs of wear. And I have full confidence that it will make it through another 2500+ mile thru-hike.
The most obvious signs of wear thus far are the micro-creases in the DCF, caused by repetitive folding and rolling. This is inherent to all my DCF items and it is a topic widely described by others online. These creases can eventually lead to the break-down of the material, causing it to lose its water-proofness. I have noticed that this is happening to my Zpacks DCF food bag, which goes through a lot more folding, unfolding, and stuffing than my tent.
DCF fares better when it is rolled and not stuffed, which I have been careful to do with the tent and thus far, these creases have not led to a loss of water-proofing. DCF also does not withstand UV exposure very well, so it would be wise not to leave a tent pitched in full sunlight throughout the day. I am not one for lounging around camp much, preferring to break at first light, walk all day, and pitch only when it starts to get dark. Thus, my tent has not suffered from this problem.
Secondly, I have had to patch approximately seven pinhole punctures in the tent floor, as the result of rocks, twigs, thorns, etc. Punctures are easy to repair with DCF tape. I think this is exceptional performance by the floor material, seeing as how I have never used a ground tarp to protect it. I generally spend a little time clearing a pitch site of debris, but that is as far as it goes. I think the performance of the DCF bathtub floor is far superior to silnylon tent floors, as it does not absorb any water and dirt and mud are easy to wipe off. I am never the least bit worried about pitching the tent on damp surfaces and have even had puddles form under me, with no ill effect.
Lastly, I have put two dime-sized tears in the bug mesh, which I easily patched with some tenacious tape. The bug mesh also has a fair amount of micro-snags, which can usually be restored by repeatedly running a fingernail over the sight. All in all, the mesh is still 100% no-seeum-proof. Ultralight mesh has its downfalls, but can be mended
As for the construction, all the seams have held up and I have had no problems with loose threads. All Zpacks items are hand-sewn…as I can attest to, having seen the seamstresses hard at work on a Saturday morning. Zpacks offers a one-year warranty and can do repairs, but usually for a fee outside of the warranty.
Summary: Thru-hiking has taught me that life can be boiled down to just what will fit inside a 40 L pack. Integral to this, is discovering that feelings of comfort, safety, and peace can be replicated in something as simple and humble as a tent. The Solplex has been my refuge in some of the most amazing and challenging of circumstances.
It’s funny to feel such an emotional tie to this odd piece of equipment, but taking into account the peace and joy I have felt while inside it, surrounded by the places I love, it makes sense. I hope this review has helped or at the very least, been entertaining.
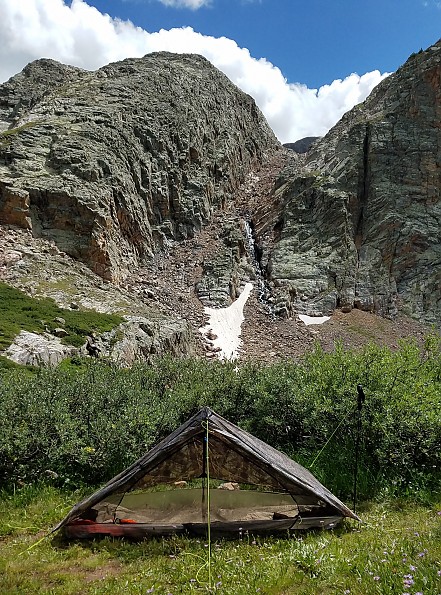
I thank Zpacks for making such an awesome product and Trailspace.com for letting me share.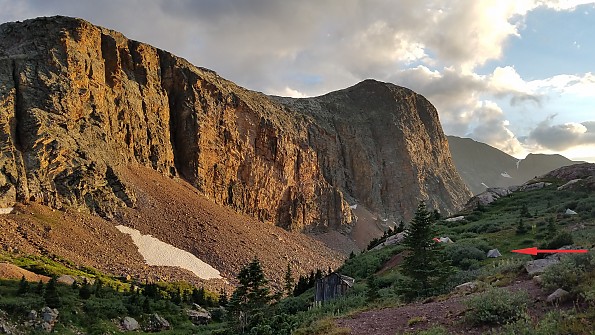 Dramatic Elk Creek canyon in the San Juans. One of the most magical nights I ever spent in my tent.
Source: bought it new
Price Paid: $505
 Reviewed by
Chris Myers
+1,069
 June 16, 2015
An excellent choice for the person who wants to cut pack weight without sacrificing protection from the elements. The Zpacks Soloplex is an amazing tent with a simple yet very effective design. Please continue reading to see if this could be the ultralight tent for you!
Pros
- Super lightweight
- Packs small
- Waterproof
- Material does not stretch or sag
- Easy to repair
Cons
- Expensive
- Easily punctured
- Slightly see through
- Not a lot of extra room inside
- Condensation
Zpacks uses a lot of methods to keep the weight of their gear down. Thinner and lighter materials, smaller lines and line locs, smaller zippers, and so on. From what I see they do their best to inform consumers of the materials strength and durability, and they are clear on what products uses what materials.
The company has a great reputation and outstanding customer service. Emails usually get a reply within 24 hours and they seem to go above and beyond to help customers with special orders, exchanges, returns, and with answering any questions they can. Their products are well constructed with attention to detail.
The Solplex is an ultralight single person tent that sets up with 2 trekking poles and 8 guy lines and 8 stakes. It has a cuben fiber tarp with a sewn in bathtub floor and ultralight insect netting. A single rainbow zipper door, and a vestibule with 2 storm doors that can be closed independently. Total weight with the complete tent, which is the tarp, screen, floor, doors, guy lines and clips, is 14.6 ounces!
Setting up takes some getting used to but once you do it a couple of time it is no problem. And since everything is attached in one neat package there is no need to set up the tent and then put on an additional rainfly. Pitches with tarp and everything together and once staked out it is very stable. Even in high winds. Spent 2 days getting rained on and wind sprayed. Stayed dry and warm in my Solplex the whole time!
At 5’11’’ this tent has plenty of room for me to lay in without touching the ends. I usually use the extra space to store my pack and other gear. It is just over 7 feet long, 30 inches wide and at its peak is 48 inches tall. Not a lot of room on either side while laying down, and not a lot of headroom while sitting up. If you are the type of person that spends a lot of time in a tent, likes a lot of extra space, or, if you are big and tall, you might want to consider stepping up in tent size.
This tent can be pitched using only 6 of the 8 guy lines but I find that the 2 lines on the ends do the most for interior space. They really allow for much some needed extra space around the head and foot area. Zpacks also offers carbon fiber tent poles that can be used in place of the two trekking poles. The Solplex requires a 32’’ and a 48’’ tent pole, or adjust your trekking poles to these heights. I did purchase the poles and they are great. They take up little space, weigh next to nothing, and allow me to hike to a summit from base camp with my poles.
Another accessory I feel should get some attention is the trekking pole cup. It goes directly over the handle of your trekking pole and one end is tied to the tent, the other to the stake in the ground. Use two and put them on the side guy out lines at your head and feet. So worth it! The guy lines that use the cup will be pulled upwards to the cup on the pole instead of directly to the ground. Adds a good deal of height around the head and feet that you will want.
There are loads of options and accessories that can be purchased with this tent, as is the case with most all of the Zpacks gear! You can get different thicknesses of cuben fiber material for the tarp, as well as a couple of different color options. You can order a variety of lines, line locs, tent poles, stakes, repair tape, etc. You really should check out their website and see all the goodies. They clearly show the weight for every item they sell too!
The tarp is made of .51 oz/sqyd cuben fiber. It is incredibly light, waterproof, and does not stretch or sag. All of the tie points are reinforced, bonded and any seams are sealed. The cuben material is a slightly see through when the tent is pitched. Does not affect me but some will not like this. It will come with the main line for the front storm doors as well as the clip and line loc for the doors. I was sent some of their line with the tent to be used as guy lines, they were not pre-cut lines but instructions were included on getting them cut and attached to the tent.
Condensation can be an issue with this tent. But honestly, I have not found a tent to date that did not get condensation on the inside in the right conditions. Just keep the doors open when possible and have a pack towel handy. Careful not to bump the tarp in the morning or all the moisture will rain down on you.
The Insect netting is a .7 ounce ultralight material. It comes already attached to the tarp and the bathtub floor. It has a tall rainbow door for the entry and the zipper is very small to help save those ounces. Offers great protection from the creepy crawlies and I like how it is attached to the tarp and floor. Newer versions of Zpacks tents now come with an 8’’ x 8’’ mesh pocket inside for storage.
The bathtub floor is made from a thicker 1.0 oz/sqyd cuben fiber material. It is 8 inches tall which means you can set this thing up in a small creek without fear of getting wet and in the rain it helps protect you from spray. Like all cuben fiber it is very strong and does not stretch. It is however easily punctured. Take extra care when choosing a spot to pitch this tent. Make sure that sticks or rocks could possibly poke through from underneath. If you do get a puncture it is an easy fix with the repair tape that Zpacks sells or just a bit of duct tape. They will also include a small roll of their tape with the purchase of the tent.
To sum it all up I feel this is a great tent for anyone. There is still adequate protection from the elements while keeping the weight below a pound. Attention to detail and awesome customer service ensure I will be doing more business with Zpacks in the future. Invest to day in a tent that beats the brakes of off the competition.
I am in no way affiliated with Zpacks or any other manufacturers. I buy gear for my own personal use and do not receive anything for free or any special discounts. I do these reviews for people, who like me, want to try and get the most informed and knowledgable information possible. I did email the guys at Zpacks and they gave me permission to do reviews on any of their items I want.
I hope you find this review useful. Please check out my other reviews and keep your eyes open for more great gear reviews in the future.


Source: bought it new
Price Paid: $535-Ouch