DIY: 6'x9’ Footprint Tarp Bivy


 Reviewed by
King Thurber
+1,038
 May 21, 2022
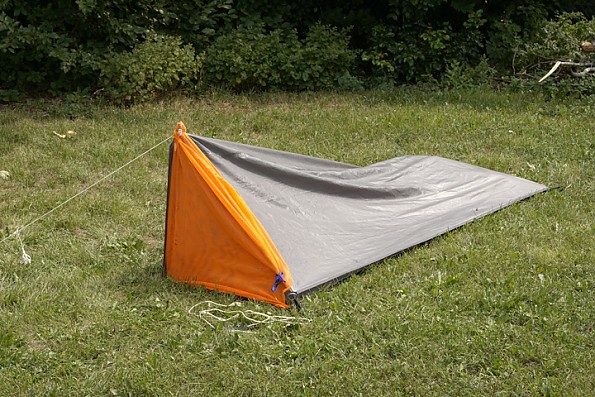
Figured out how to rig a 6x9' footprint into a water resistant, ventilated, and flying insect-resistant tarp bivy using hiking pole, tent pegs, a little para cord, and a light mesh.
Pros
- Light but strong material
- Excellent water resistant undercoating
- Loops on corners
Cons
- None...
6x9’ Tarp Bivy
I used this groundcloth for bivouacking on nights before me and my buddies hiked the next morning. First time there was a lonely fly that kept buzzing around my head unless I pulled it over me reducing ventilation. The second time no fly buzzing, but I was soaked from the condensation, including my sleeping bag which thankfully was PolarGuard and water resistant.
Thought I—hmmmm should be able to figure out some basic rig to reduce both pestering fly and condensation. Viola! (dark fiddle in the orchestra) I used my hiking pole, a little nylon line, some tent pegs, and a mesh laundry bag to craft a bivy.
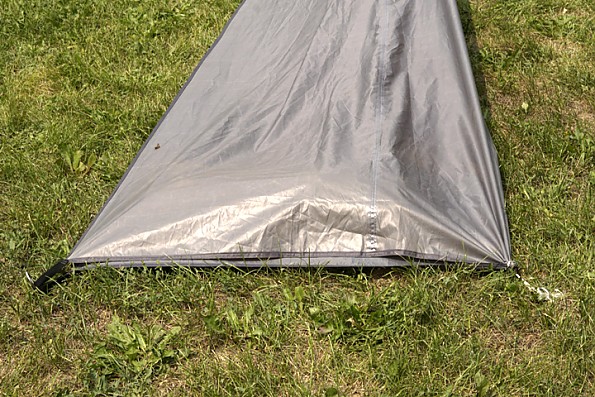
First, the groundcloth/tarp needs to be no smaller than 6'x9' and not much larger either. I used a ground cloth from Recreation Outlet in Utah. It is a perfect manufacture of durable but light material and robust waterproofing on the underside. And about $20. And it should have loops or grommets at the corners. Maybe put a grommet in halfway on the long side for convenience.

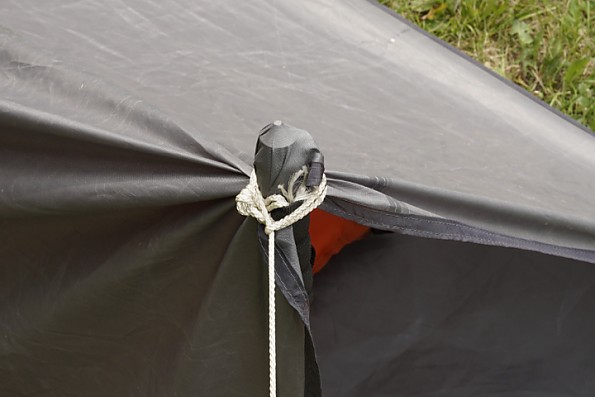
Of course you CAN try this at home. Lay out tarp. Stake one long side at each end. Fold one end in half to meet at the corner and stake together. Fold the head end and stake together.
With your hiking pole about 18 inches to 2 feet in height, stretch the head end to make a nice angle, with the foot of the pole on the tarp and wrap some nylon line around the knob, or whatever at the top of the pole. Then guy out the nylon line and stake it. The pictures should fill in the details.
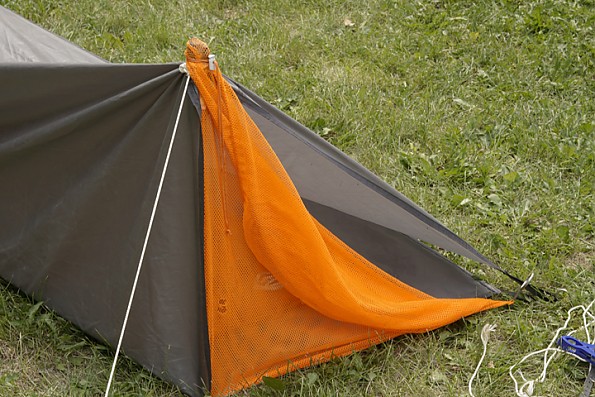
Rig a screen. I used an orange mesh laundry bag thing I had around, but you can use any light screen. In your kit pack a couple of good clips.
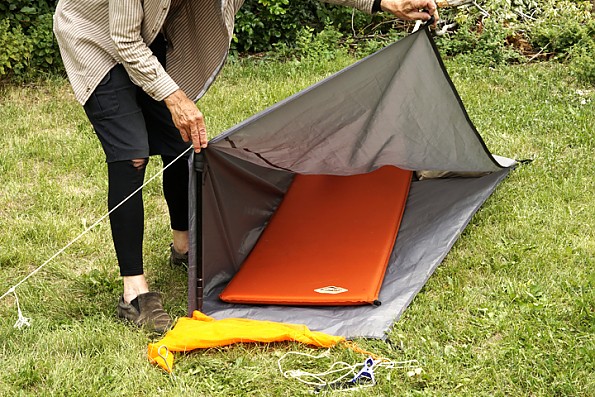
If it’s not raining, you can lay out your pad and sleeping bag before staking the head end. There should be some room at the foot to stow your backpack under the tarp–that is why it should be 9' long.
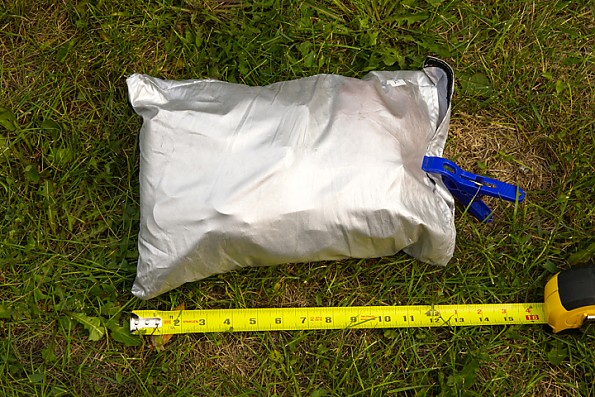
And it all fits in a little bag!
Of course, try this out and give it your own twist. Post how it works to this review!

Background
I am a Get Out There person and have backpacked in the Wind Rivers, Yellowstone, and Uintas.
Originally used as footprint for backpacking tent—excellent for car camping, a little heavy for wilderness. Then tried as bivy—the rest is history.
Source: bought it new
Price Paid: $20
Your Review
Where to Buy
You May Like
Specs
| Price |
Reviewers Paid: $20.00 |