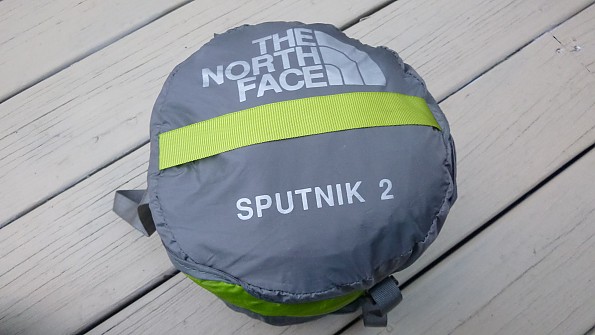
The North Face Sputnik 2
The Sputnik 2 has been discontinued. It last appeared in The North Face's 2011 product line. If you're looking for something new, check out the best three-season tents for 2025.


![]() Reviewed by
Reviewed by
Horn Rimmed Hiker
BRAND REP
+2,241
 January 26, 2014 (original Sep 25, 2013)
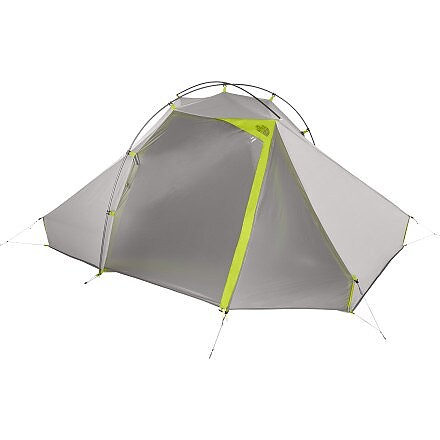
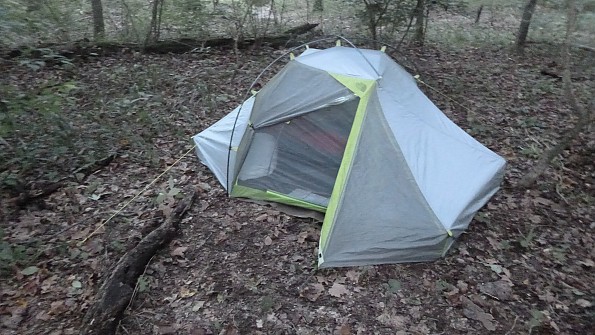
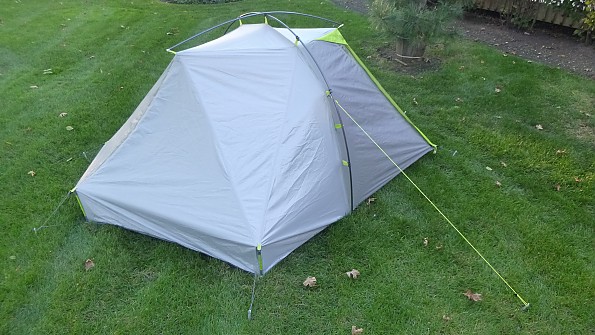
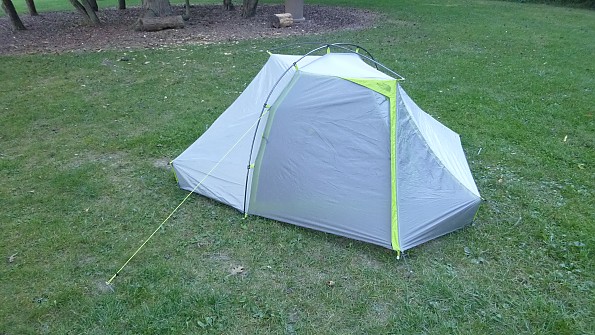
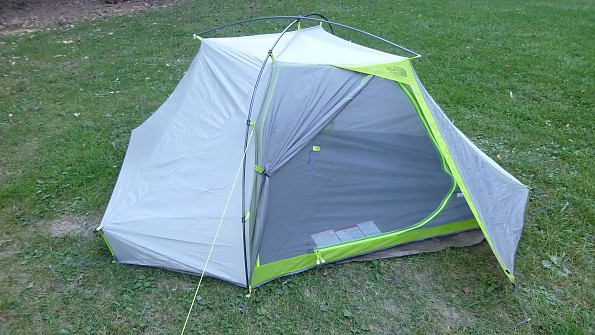
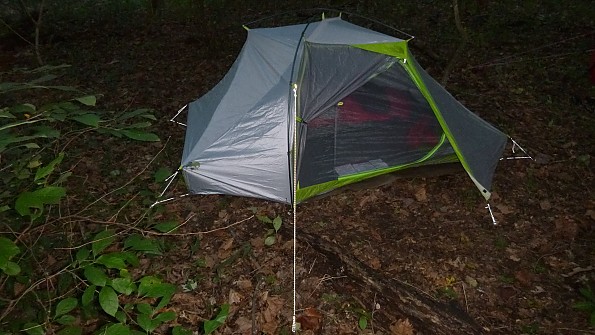
The North Face pushes the envelope, introducing a lightweight (3+ lbs) 2-person, 3-season tent whose weight loss can be attributed to a non-freestanding, semi-single wall, tunnel-shaped design. Borrowing design elements from the industry's best envelope-pushers (Hilleberg and TarpTent, namely), TNF makes their best attempt at creating a tent with a high space-to-weight ratio. Great for solo trips and dry weather, while less than ideal for two-person camping in wet weather. While not a magna cum laude graduate, this is a freshman with a lot of promise.
Pros
- High weight-to-space ratio
- Included compression sack packs canopy down to football-size
- Built-in corner struts create 8" vertical sidewalls
- Generous 39" interior ceiling height
- User-controlled front and rear venting options
- PU port window on front vestibule door
- 4 interior gear loops
- Under $200, entry-level pricing for those looking to go lighter
Cons
- Angularity of asymmetrical panels difficult to pitch tautly
- Small and difficult-to-access rear vestibule
- Requires 10 stakes, a flat surface, and soft ground to pitch on
- Small vestibules can fit a pair of shoes at best
- Single-skin fabric does not stand up to heavy, consistent rainfall
- Shallow bathtub floor not ideal for sand or snow
- Single entranceway awkward for 2-person use
FIELD TESTING CONDITIONS
Season(s): Mid through Late Fall
Temperature Range: 37°F to 72°F
Wind: Yes
Rain: Yes
Snow: No
FIELD TESTING LOCATIONS
1.) September 2013, Buzzard Bluff Dispersed Campsite, Shawnee Nat'l Forest
2.) September 2013, Little Lusk Creek Dispersed Campsite, Shawnee Nat'l Forest
3.) October 2013, Salt Creek Backpack Trail Site #6, Weldon Springs State Park
WEATHER RESISTANCE
River-to-River Trail Section Hike, Day #1: 09/20/2013
Buzzard Bluff Dispersed Campsite
H: Low 70's / L: 55°F
Since the ground was a mix of dirt and gravel, I first laid down a small tarp to protect the tent floor, folding it under itself to keep the footprint from taking on water.
The single-wall design is nice in that you can pitch the tent without getting the inside wet, since the canopy is one piece. The main fabric is TNF's proprietary "DryWall," single-skin fabric. Advertised as flame-retardant, breathable, water-resistant, and ultra-lightweight, it definitely feels promising packing as small and weighing as little as it does. But the fabric doesn't quite perform all the functions it's advertised to (and don't worry, I didn't deliberately try and set this tent ablaze - despite the frustrations I had with it).
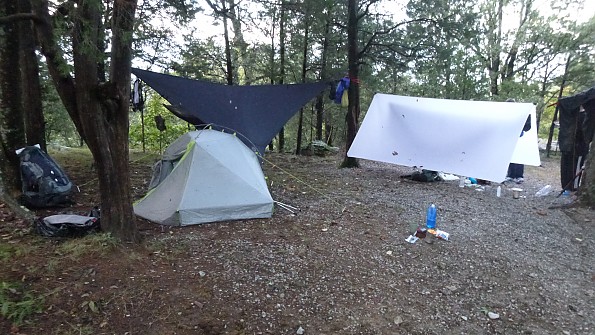
The rocky terrain wasn't easy to stake into, and stake-out points were not so much my choosing as they were the ground's. This made it near impossible to fine-tune my pitch as much as I'd have liked to. With this tent, if you're unable to pitch on completely flat ground, and if you're unable to pitch on ground with plentiful stake-out options, you're likely going to have a less-than-ideal, loose pitch.
It was fine for the first three hours. I put all my gear (save my wet pack) inside, changed into some dry clothes, and went under my friend's tarp to cook dinner.

By time I came back, the tent began collecting water. The angularity in the walls creates lots of flat surfaces to hold water. I wiped it down with my microfiber pack towel, rung it out, and kept it handy for later. I figured I could keep wiping it down until I went to bed, and hopefully the few hours I'd be asleep wouldn't be long enough for it to saturate through.
Thinking proactively, I adjusted the rear vestibule into the open and vented position, and left the front vestibule unzipped a few inches above the ground, hoping a cross-breeze would prevent any interior condensation. The weather would drop to 55 degrees that night (down from a daytime high in the mid 70's), and I wanted to be prepared.
Around 6:00AM the next morning, I woke up to find A.) water had saturated through the tent walls, and B.) it had rolled down and pooled into the corners. Luckily I slept in the center of the tent, stuffed my down pillow into a dry bag (resting my head on that), and kept all my gear wrapped inside a plastic garbage bag.
The pooling was only enough to get the end of my sleeping bag a little wet, however, the tent as a whole was wet and had to be put in a garbage bag before I stuffed it into my pack.
I was lucky enough to have a sunny morning, and wound up clipping it to a fence post at Garden of the Gods so it could dry in the sun and breeze.
River-to-River Trail Section Hike, Day #2: 09/21/2013
Little Lusk Creek Dispersed Campsite
H: 72°F / L: 45°F
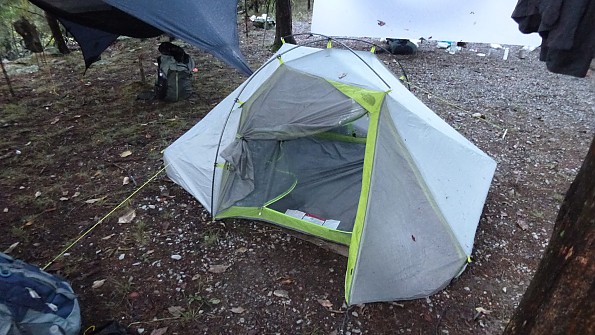
Only having a 40-degree sleeping bag, I clipped the rear vestibule into the low position against the ground, and zipped the front vestibule down to the ground as well. It's shown with both the front and rear in their "open" positions to keep the inside temperature consistent with the outside.
Despite the cold weather, and despite a significant amount of dew dripping down onto the tent from the tree tops, it didn't saturate through the tent fabric like it did the night before.

While a serviceable dry-weather tent, I cannot suggest anyone take it when significant rainfall is predicted without also taking a tarp to hang over the tent.
Not wanting to write it off completely, I decided to give it one more chance.
Weldon Springs State Park: 10/19/2013
Salt Creek Backpack Trail, Site #6
H: 55°F / L: 37°F
On this trip, the ground was firm enough to accept and hold a stake, and the dirt hadn't the rocks it did down at Shawnee.
More importantly, it was level, prime tent-camping real estate.
Despite the fact I was able to choose my stake-out points (and not let the ground choose for me), this tent is impossible to pitch completely taut. I tried adjusting the main pole points, the corner strut points, and each and every line-lock, buckle-style adjuster on this thing.
The main problem is the asymmetry. Making one thing stretch causes something else to sag.
I thought that if you could find a way to keep the tension even and keep the distances of the lines the same, you may be able to fix the pitch problems. Taking a trekking pole, I slid it through the two loops holding up the tent's side walls. This pulled them back an equal amount with the same amount of force.
It improved the problem, but it didn't fix it. Since rain wasn't in the forecast that night, all the tent really needed to do was keep the bugs away from me.
Since there are 10 stake-out points, this thing does hold steady in the wind. But it means not only packing in 10 stakes, but being able to find 10 good stake-out points. You can't pitch it without a minimum of 8.
The guy lines, in my experience, are merely decorative - if anything, they make the pitch worse.
The temperature that night dropped to 37 degrees. I dropped the rear vestibule down into the low position, against the ground, and zipped the front door all the way down. It held heat in fairly well, and at no point before falling asleep was I ever uncomfortably cold, or was there an unpleasant draft passing through. No condensation the next morning - likely due to the fact two of the interior walls are made from mesh that extends from floor height to ceiling height.
PACKABILITY
The Sputnik 2 has a unique look even before it's taken out of the package.
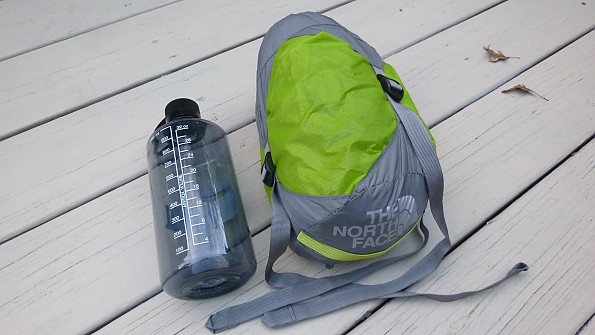
As mentioned, it weighs in at 3 lbs 9 oz.
Not too shabby for a two-person tent with mesh walls and a nylon floor.
The "trail weight" drops 10 oz to come down to 2 lbs 15 oz.
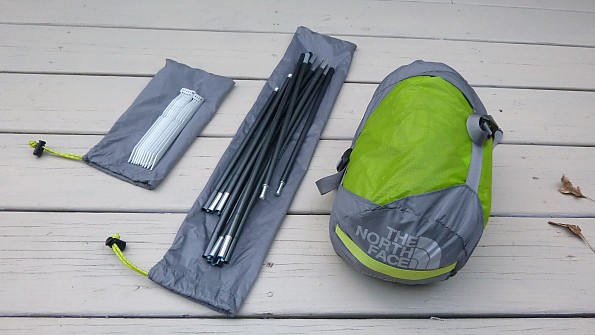
The stuff sack is actually a compression bag with vertically-compressing straps.
The advertised packed size is 20" x 7", though I've managed to compress it into a size smaller and wider than that.
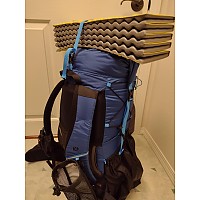
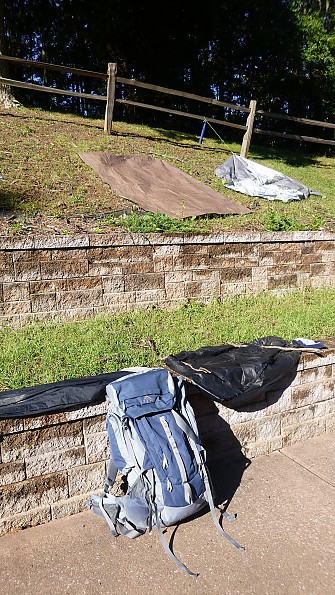
TIP: If you remove the pole and stake stuff sacks, you can actually compress the tent canopy down to about the size of a football. Or do without the stuff sacks altogether and just cram it in to your liking.
I'd a much easier time fitting three smaller items into my pack, opposed to one larger item. The main compression bag is made from sil-ny, while the pole and stake stuff sacks - despite this being a lightweight tent - are made from regular nylon, with full-size plastic cinches.
SETUP
This isn't a tent you can pitch all at once, as it's a non-freestanding design.
PITCHING INSTRUCTIONS
I've found it's best to first give it a quick-and-dirty pitch, and then to go back and adjust all the stake-out points to your liking. It takes practice, but will result in a tighter and more even pitch over time.
1.) After laying the one-piece tent body on the ground...
...make sure to remember which side the single [front] entrance is on.
Don't go pitching this tent with a tree in your front door.
2.) Assemble the main [long] pole and the ridge [short] pole.
Think of them as 1.5 poles.
Both are made from DAC Featherlite NSL Aluminum.
The main pole is a "Combi-Pole" design, meaning it's thicker at the top and thinner toward the ends.
(This allows a tighter bend in the pole, creating steeper walls and a higher ceiling).
3.) Insert the main pole tips through the grommets.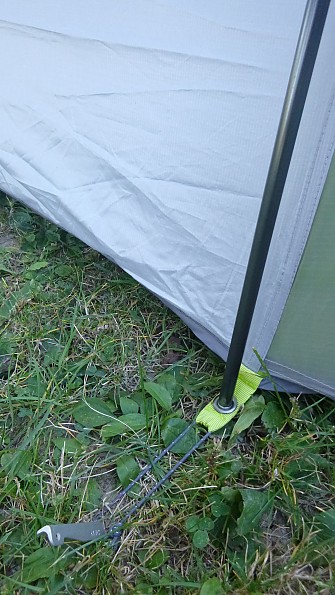
4.) Attach the "Cam-Action" clips to the pole.
These clips have a smaller profile than Twist Clips to conserve weight.
Unlike twist clips, these make a hard snap onto the poles (instead of simply sitting atop them).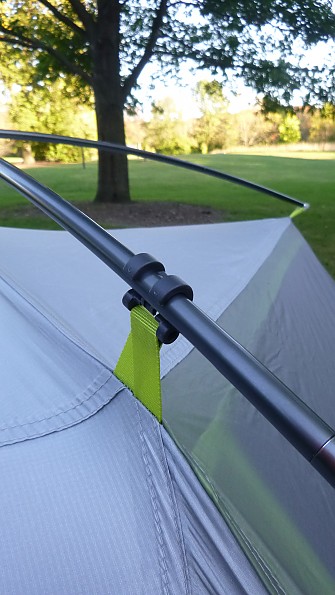
4.) The ridge pole goes atop the main pole, and sits perpendicular to it.
TIP: let the ridge pole rest between the two "claws" of the clip it sits on top of.
It will keep it in place and centered.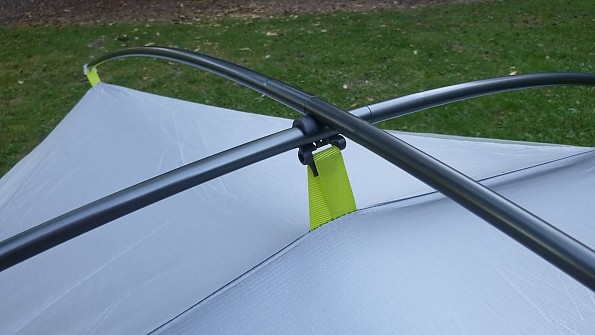
The ends plug into the ball-cap plastic connectors.
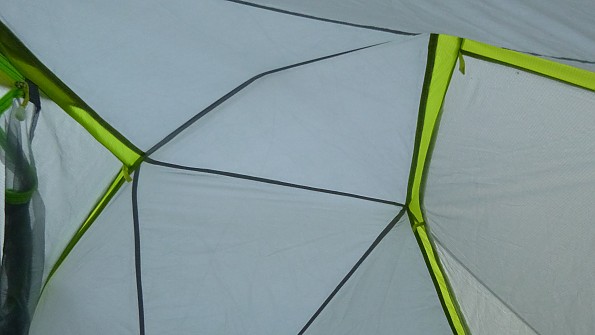
This forms the main "hoop" shape of the tent, and the diamond-shaped ceiling.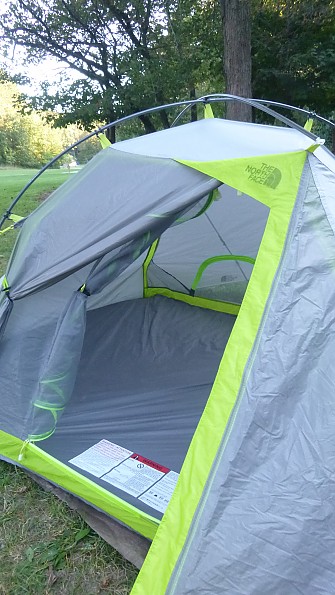
5.) Stake down the loops into which the main pole sits.
6.) Stake out the TarpTent-style corner struts, one side at a time.
These four aluminum struts are permanently sewn into the canopy body and cannot be removed.
7.) Repeat on the side opposite the one you've just staked down.
8.) Stake down the front and rear vestibules.
This is the front, with the vestibule zipped to the ground.
Here is the back side, shown with the "gear awning" [second vestibule] lowered into the closed position.
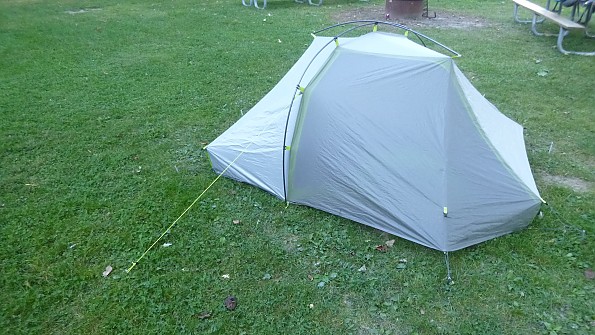
TIP: You won't get an even pitch unless you stake this down with all the vestibules zipped shut.
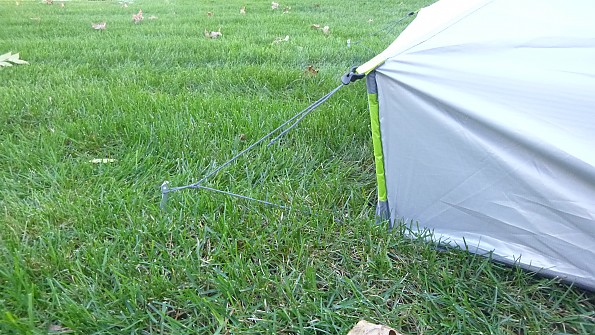
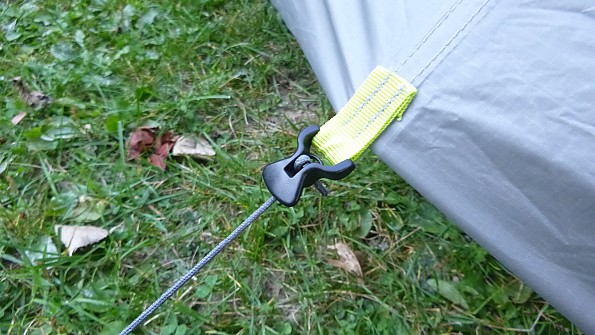
9.) Stake down the 2 guy lines:
1 at the front.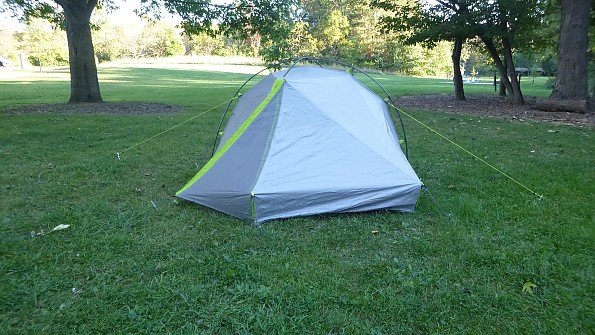
And 1 at the back.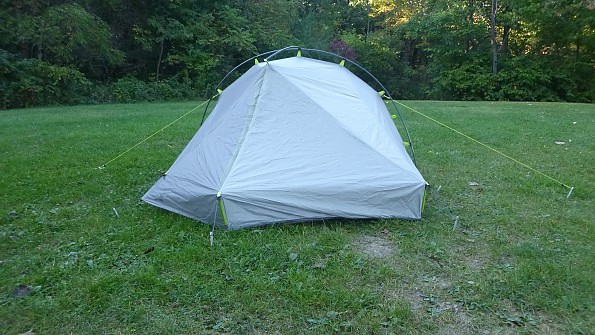
(Hilleberg-style guy-line adjusters are included).
10.) Tug on the adjustable lines: one on each of the four far corners.
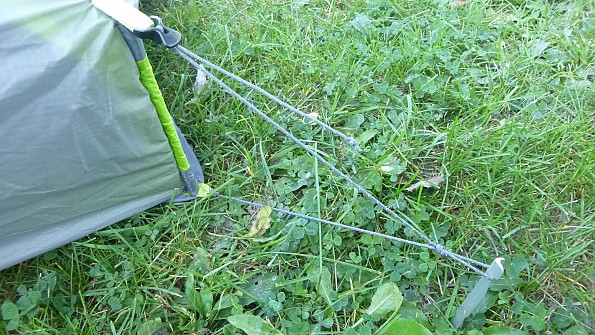
And one on each vestibule.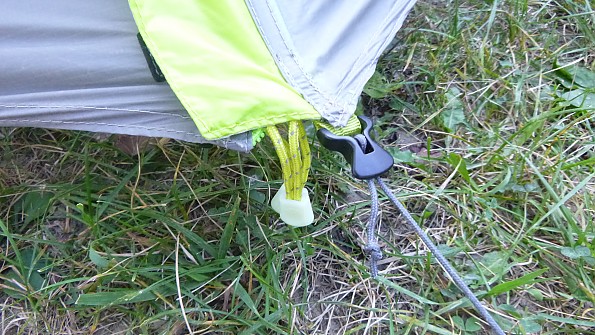
Each line is threaded through a tab-shaped, line lock.
11.) Plop down, take a breather, and wear a wide grin as your friends are still pitching their shelters.
MATERIALS
FLY: 33D 244T Ripstop Nylon with 1500mm PU and Water-Resistant Coating
CANOPY: DryWall (50D Polyester Ripstop)
MESH: No-See-Um Netting (20D Polyester)
FLOOR: 50D 270T Nylon Taffeta with 3000mm PU and Water-Resistant Coating
STABILITY
The tent is as only solid as you're able to pitch it.
10 stake-out points are required.
Being a non-freestanding tent, 8 of those 10 are non-negotiable and must be used (the 2 guy lines keep the tent taut, but aren't necessary to keep it upright).
And, yes, this means lugging around 10 stakes.
TNF's Aluminum DAC J-Stakes are included.
The more evenly you can keep all points properly tensioned, the stronger the tent will be. The tent does hold up to strong gusts, however, it is significantly harder to pitch when it's windy because of the non-freestanding design. In gusty weather, it's best to stake everything down as quickly as possible, then to go back and adjust stake-by-stake.
TIP: I drive them into the ground with my shoe, and when I need to remove them, I kick them very lightly toward the tent (so as not to stress the line).
NOTE: Because of the non-freestanding design and number of stakes required to pitch this tent, you will want to find a level site with ground soft enough to stake in. The guy-lines could be tied to trees, if need be, but the rest the stakes will need to be planted firmly in the ground. Pitching it on rocky soil at Shawee NF made for a lot of compromised stake positions one night.
VENTILATION/CONDITIONS
You can tell TNF did think about ventilation, but didn't completely think it through.
There are two venting options:
1.) Front Vestibule: dual zippers allow the top or bottom of the door to be left slightly unzipped to allow air in. Unzipping the top of the door (and letting it fall back behind itself) allows the most airflow, but permits rain to fall through. This could be aided with a built-in strut that velcro-ed into place, but the next best thing one can do is leave the bottom of the door cracked upward from the ground.
In kinder weather, you can pull the front door back completely (secured with an elastic loop and plastic toggle, shown on the L side of the door) and let the breeze come straight through.
The mesh door can also be held open with its own loop-and-toggle, too.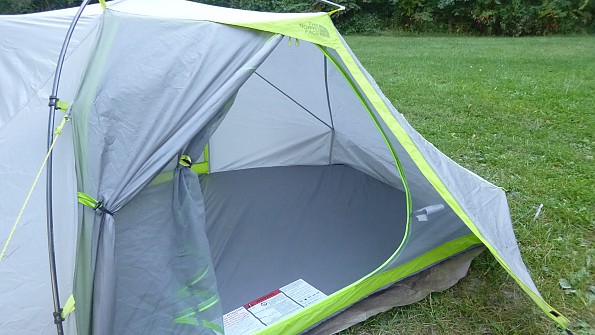
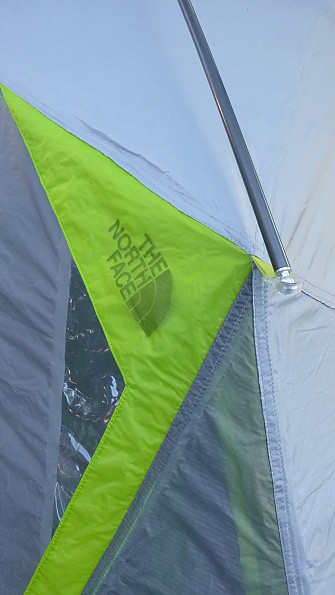
NOTE: The Front Vestibule also has a small, triangle-shaped PU (polyurethane) port window you can look through from the tent interior to check on the outside conditions.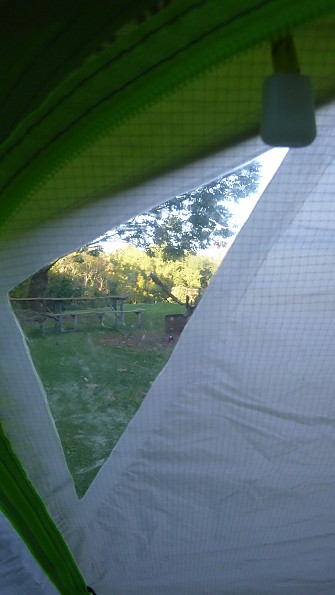
If you've raised the rear vent into the open position, you can also peek outside that way, too.
Also, if you're not careful, rain will come straight into the tent when you unzip the front vestibule door. This is easily remedied by supporting the fabric with one hand while unzipping it with the other, and pushing it outward to keep rain from dripping inward. Do note the top of the door does unzip over the screen entryway, and there is no covered "porch" area to the front vestibule.
2.) Rear Vestibule: while not a working, functional doorway, the rear "gear awning" is accessed via a small, zippered, D-shape door on the floor level of the tent interior.
To operate the rear vent?
A toggle at the end of the vestibule allows the user to clip it into an elastic loop and fold it back inward on itself (creating the "open" position).
You can open and close the vent from inside the tent, unzipping the door to access the toggle and loop.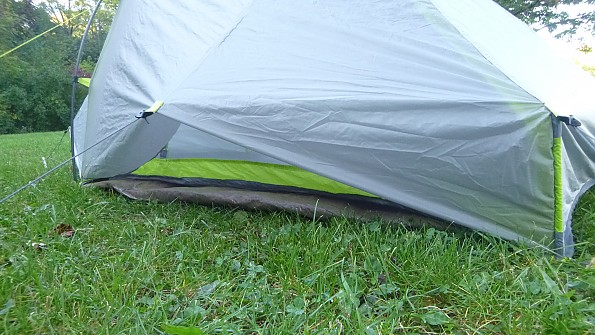
Or clip it down onto the stake-out point (creating the "closed" position) and have the fabric sit against the ground.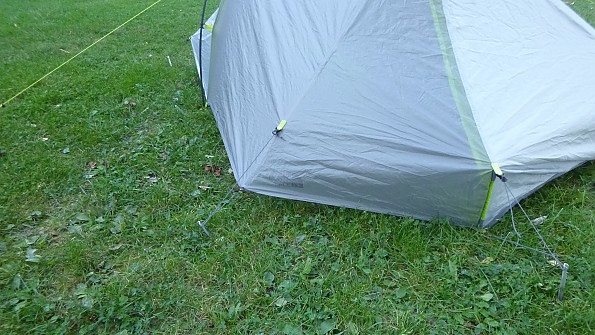
ROOM
If there's one thing this tent has going for it?
It's the space-to-weight ratio.
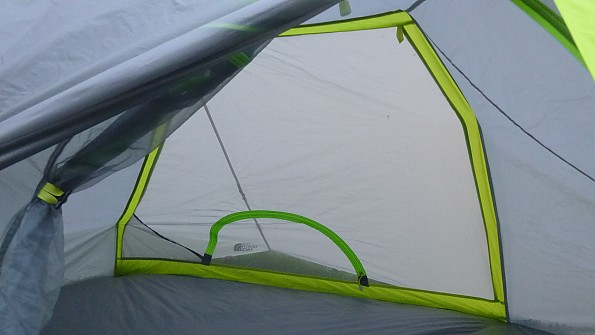
For a little over three pounds (3 lbs 9 oz), you get 28.5 sq ft of interior floor space (82" x 56.5") with a 39" interior ceiling height.
I like it because I can easily sit up inside the tent and it's a comfortable shelter to sit inside during inclement weather.
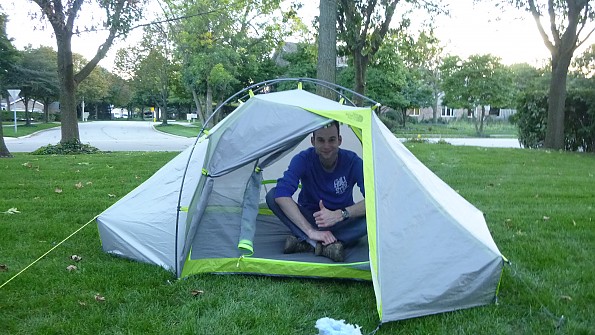
Plenty of head room, here, folks.
The design is similar to the Hilleberg Akto, but the angularity turns the floor shape into an asymmetrical hexagon.
HEAD ROOM AND FOOT ROOM
The corner struts create 8 completely vertical inches along the side walls and this helps with head and foot room.
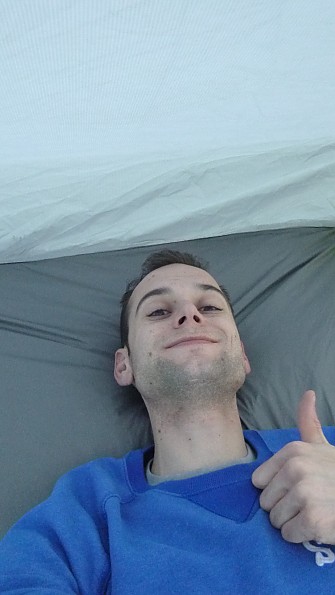
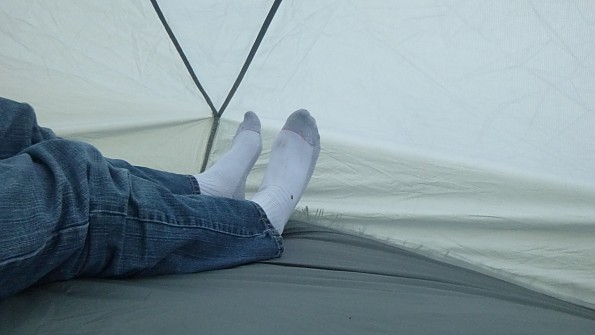
I'm an even 6 feet tall, and have room not only on the head end...
...but the foot end, too.
Let me first say, there are two completely different approaches to using this tent.
1.) Using it as a solo tent.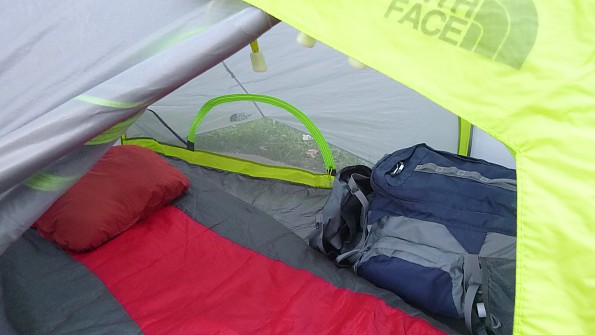
Angle the sleeping pad to maximize head and foot room.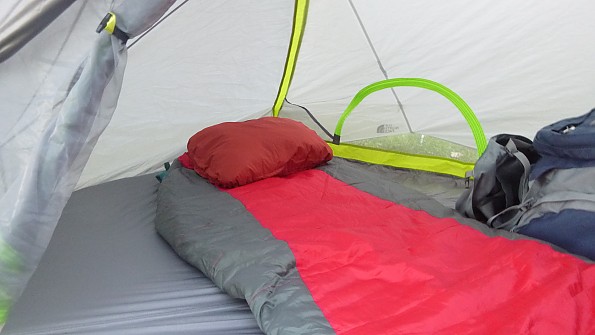
This creates two triangle-shaped spaces on each side of your sleeping pad to store your pack and gear.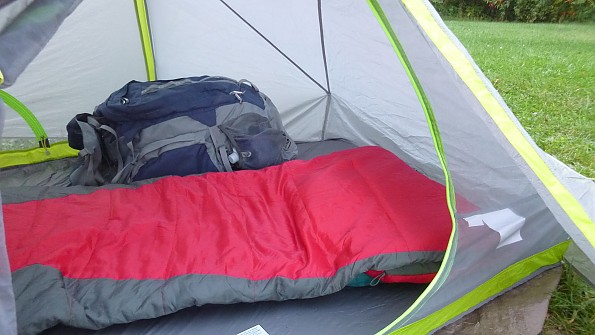
2.) Using it as a two-person tent.
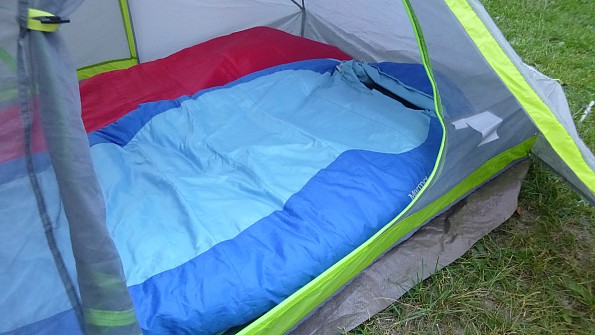
Truthfully, it will fit two people, but that's all it will fit.
You'll want to take full advantage of the rear gear awning, gear loops, mesh pockets, and front vestibule.
Two full-size sleeping pads (TAR NeoAir Trekker, Sz Reg) take up almost all of the floor space.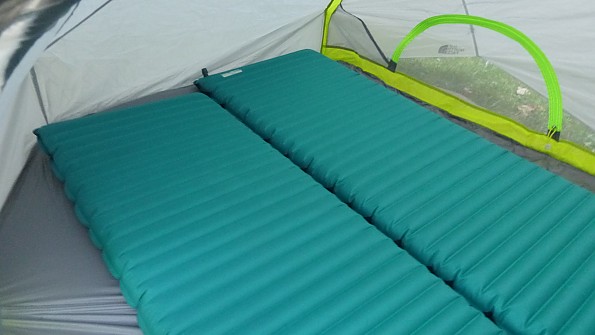
Adding sleeping bags atop the pads does take up all the floor space.
No gear, no packs, just two regular-size, full-length sleeping pads and that's it, with no spare floor space, save a few inches around the perimeter of your pads.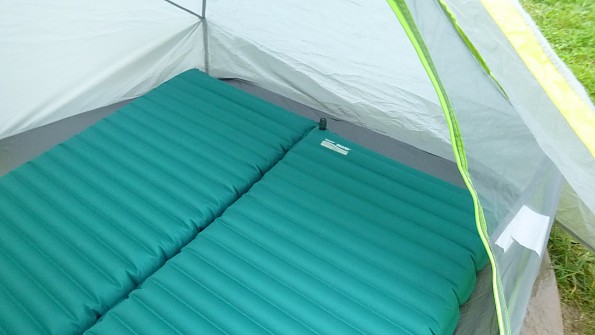
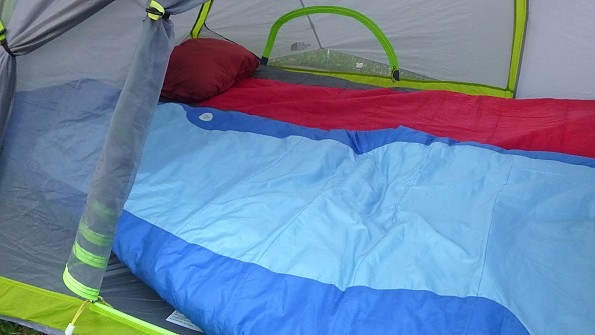
TIP: Unless you've a romantic evening planned, sleep with your heads at opposite ends to dovetail in and maximize use of the angular floor.
Technically both bags and pads fit, sure.
But if I was sleeping in the red bag and needed to exit the tent?
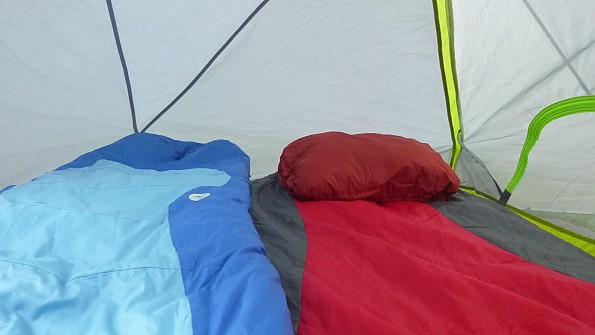
I'd have to climb over my friend in the blue bag.

Make sure you're either married, dating, or at least really close and comfortable friends before you share this tent with another person. While you can still see out the small gear awning, and while you can still store gear in it - is isn't an exit.
So, if you can't put anything on the floor inside, where are you gonna put it?
STORAGE
The two vestibules each measure 3 sq ft.
No, I'm not kidding, and no, my "0" key isn't broken.
Three square feet.
REAR VESTIBULE / GEAR AWNING
What can you put inside a 3 sq ft vestibule?

More than you'd think, actually!
I managed to fit a Mountainsmith Scream 25L daypack and a pair of size 12 hiking shoes.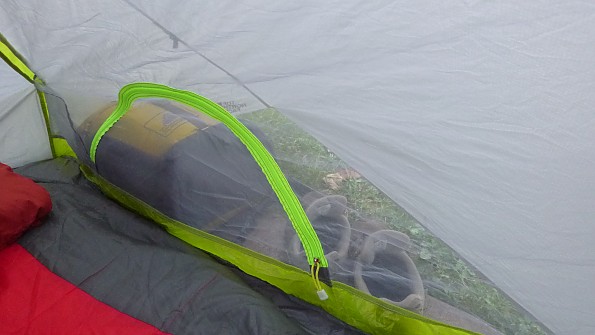
You can even stand a smaller pack or daypack upright in it!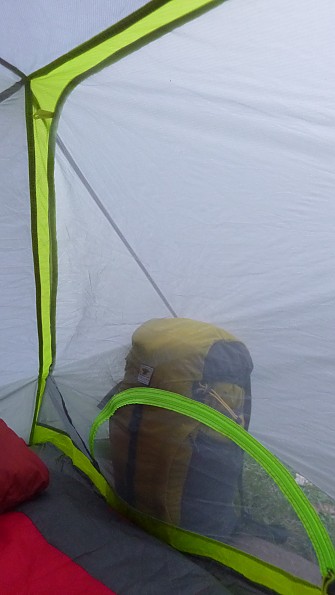
Because you can draw the rear vestibule pretty much down to the ground and keep things relatively protected from rain, there's a lot of usable room.
I'd say more room than the front vestibule, even, because you don't have to worry about things getting in the way of the entranceway.
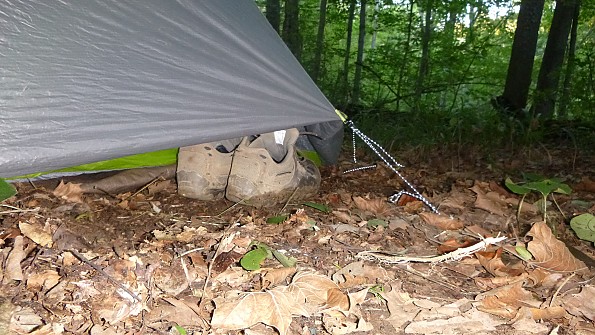
FRONT VESTIBULE / ENTRANCEWAY
That said, the front vestibule is best for footwear, i.e., things you're going to put on and get out of the way before you get out of the tent, anyhow.
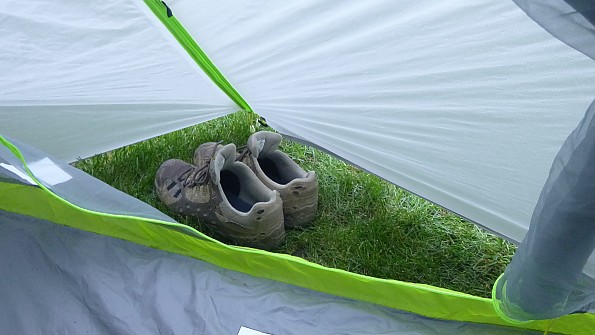
TIP: Putting shoes into the rear vestibule means you have to bring them inside the tent and risk tracking dirt or water all over the floor and your things.
If you're going to put shoes in the rear awning?
Change into your camp shoes outside the tent. Un-stake the rear vestibule and put your dirty shoes under it from outside the tent. Leave your clean shoes at the front vestibule.
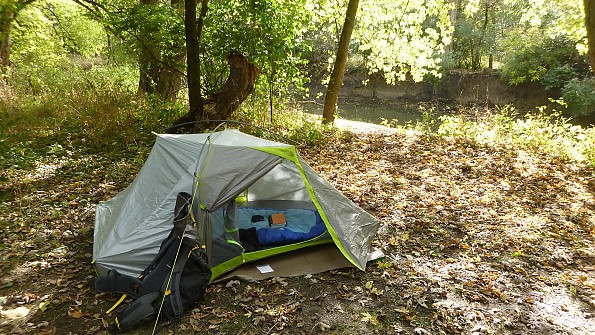
You can even fit a small pack in the corner of the front vestibule without blocking the entranceway at all.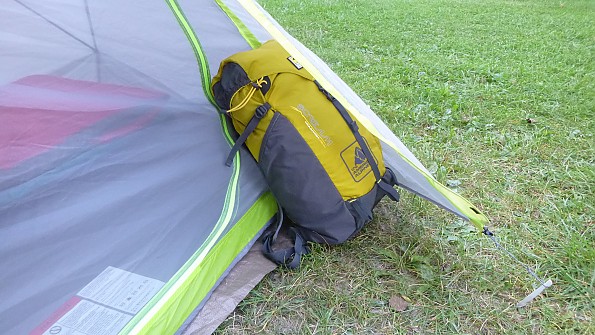
While it will fit a 25L daypack...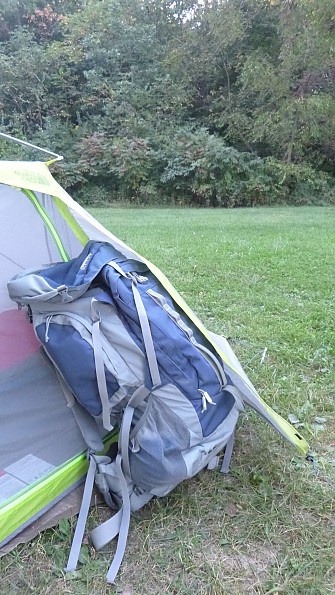
...it will most definitely NOT fit a 78L backpack without blocking the front door or pushing against the inside of the vestibule fabric.
So where does my pack go when I'm using this tent as a two-person?
My 78L pack stays outside the tent. Not exactly convenient.
The bathtub floor sits very low to the ground, and so much so, I wouldn't suggest taking this tent anyplace there's sand or snow, as they'd blow right into the interior. Placed alongside the "tub" walls is one of my Merrell hiking shoes for size comparison.

Speaking of the floor...
FLOOR-LEVEL STORAGE
There are two small mesh pockets:
One on the rear mesh wall.
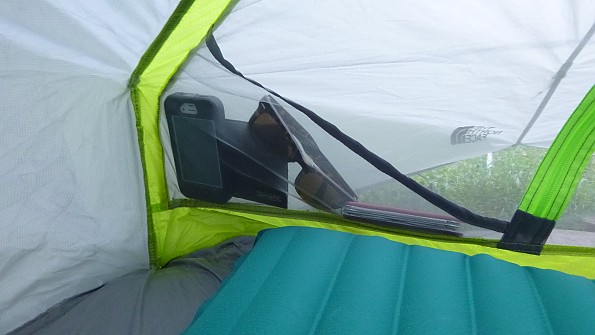
And one on the front entrance mesh wall.
They're suprisingly roomy for as small as they look.
You can definitely stuff a good amount of pocket-sized gear in these, or even some clothing.
CEILING-LEVEL STORAGE
TNF has generously provided four gear loops.
Two at the far upper corners of the front mesh wall.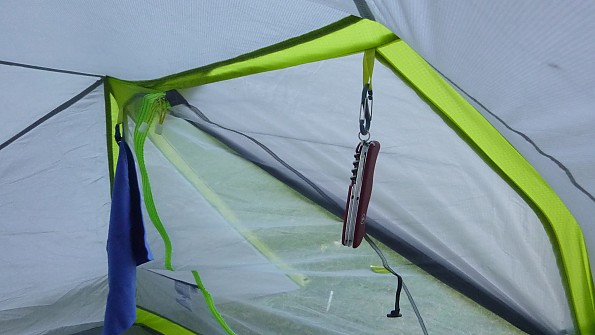
And another two in the far upper corners of the rear mesh wall.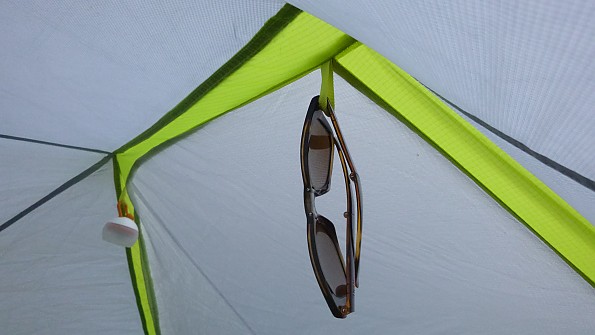
Sure, you could fit a gear loft up here, but it would shorten and compromise the generous ceiling height aforementioned. However, given the extremely limited storage options of this tent, you may want to consider a gear loft as an additional storage option. Still, though, it won't hold your pack. If you're camping solo, you could fit the pack inside with you, but when traveling with another person, you may need some extra storage.
For me, I was able to tie some paracord from one gear loop to another to dry my rain-soaked shirt and socks, keeping the other two loops open. One held my Black Diamond Orbit lantern, and the other I clipped my Black Diamond Storm headlamp onto (via a Nite-Ize S-Biner). I've found a little paracord and a few carabiners will offer a lot more hanging options than a simple gear loft, maintaining the full central ceiling height while fully utilizing the perimeter space. Note, though, that hanging anything across the front two gear loops may block access to the front door. Unless you want to turn your tent into a "Crocodile Mile" splash-zone, be careful where you hang your wet laundry.
NIGHT VISIBILITY
When you're using a non-freestanding tent, there are a lot of stake-out points.
Which means a lot of lines.
Lines you're more likely than not prone to trip over.
This tent won't leave the light on for ya like Motel 6 would, but its reflective guy-lines will reflect back against a headlamp or flashlight and save you an embarrassing stumble.
All the zipper pulls glow-in-the-dark, and are especially effective in the backcountry.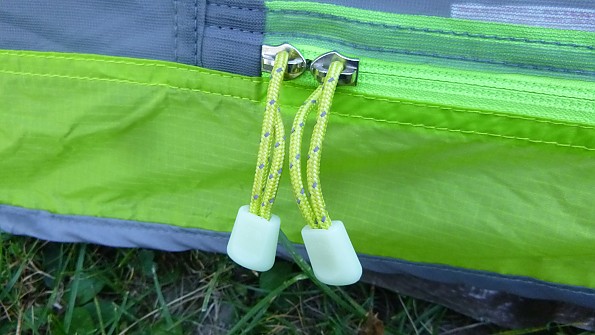
They glowed brightly enough that I had to open my eyes before falling asleep to make sure I didn't have a lantern on someplace. And if there's one thing TNF gets right? It's zipper pulls. Mine have always been buttery-smooth, snag-resistant (provided you pitch the tent evenly), and durable.
Source: bought it new
Price Paid: $165
Your Review
You May Like
Space-age technology meets mountaineering in this two-man, three-season tent built to withstand the harsh outdoor conditions of either hemisphere. Based on a tunnel-style design, the Sputnik 2 creates an impressive amount of living space for two campers. The breathable DryWall canopy is 50-denier polyester ripstop with a 1,200 mm water-resistant coating. A bathtub-style floor made of 50-denier nylon with a 3,000 mm water-proof coating keeps your gear on the ground dry. The fly is 33-denier nylon ripstop with a 1,500 mm polyurethane coating and water-resistant finish to expel any water-related weather. No-see-um mesh prevents biting bugs from intruding. There’s even a port window on the rainfly to check on conditions outside.
Features:
- DryWall proprietary single skin construction
- User-adjustable vents for increased air flow
- Internal access to rear gear awning
- Light and simple clip pitch
- Polyurethane port window on rainfly to monitor outdoor conditions
- Handy loop for hanging headlamps and accessories
- DAC Featherlite NSL poles and stakes
Specs
| Price |
Historic Range: $159.00-$269.00 Reviewers Paid: $165.00 |
| Minimum Weight |
2 lb 15 oz / 1.3 kg |
| Packed Weight |
3 lb 9 oz / 1.6 kg |
| Seasons |
3-Season |
| Sleeping Capacity |
2 |
| Doors |
1 |
| Floor Length |
82 in / 208 cm |
| Floor Width |
56.5 in / 144 cm |
| Floor Area |
28.5 sq ft / 2.7 sq m |
| Vestibules |
2 |
| Vestibule Area |
3 sq ft / 0.4 sq m |
| Peak Height |
39 in / 99 cm |