 by Kevin Da Silva
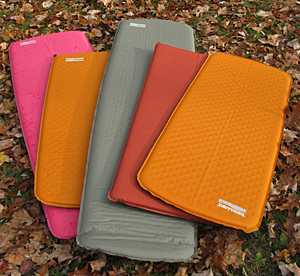
After a day of breathtaking vistas and ascents, you climb into your sleeping bag and doze off for the night, only to be woken up later by the cold, uncomfortable ground. Despite your usual care, your sleeping pad has sprung a leak.
Rather than sleeping on a flat air mattress with no insulating value, you can repair your sleeping pad, in the field or at home, with some basic materials, a few easy steps, and a little time.
Materials
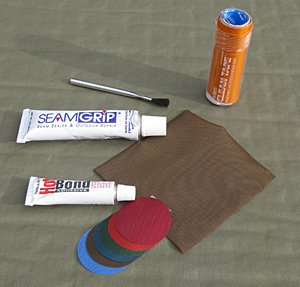
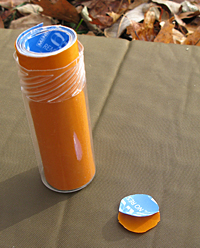
Repair Kits: If your pad goes flat out in the field, a repair kit can be well worth its light weight and small size. Many manufacturers of inflatable sleeping pads (like Therm-A-Rest, Big Agnes, Pacific Outdoor Equipment, and REI) sell repair kits, as does McNett. Typically, sleeping pad repair kits contain either a) self-adhering patches or b) patch(es) and a liquid adhesive.
The patches provided in repair kits can be small. For larger tears, you may be able to use several patches together, or try self-adhering Tenacious Tape, which comes in a roll. Duct tape will get the job done, but should be considered a last resort, since it will leave a reside on your air mattress after you remove it at home.
Liquid Adhesives: One of the most versatile liquid adhesives is Seam Grip. In this case it can be used alone or with a patch, depending on leak size, to plug holes, tears, and punctures. Seam Grip also has the advantage of a faster curing time in the field, when mixed with a few drops of water.
Check with the manufacturer of your air mattress for their recommended repair materials and methods.
Read all directions and warnings for your sleeping pad and repair kit and materials before starting.
Preparation
First, you need to identify the leak(s), any pinholes, holes, tears, or punctures in your sleeping pad. Unless the leak is obvious, you’ll have to locate it by one of the methods below:
 Listen: Inflate the sleeping pad, close the valve, and listen closely for the sound of leaking air.
- Add soap and water: Mix together a little soap and water and pour some onto the inflated mattress (if you’re in the backcountry keep soap at least 50 meters from water sources). Bubbles on the pad’s surface should help you pinpoint the leak.
- Submerge: If you’re at home you can submerge the inflated pad in your bathtub, or try it in a lake or stream in the field. Carefully fold over and rotate the pad so its entire surface area is eventually under water. Escaping bubbles should pinpoint any leaks.
- Mark: You may want to mark the location of your leak with a pencil, lest you have to search again.
- Clean: Once you’ve located your leak, clean the area of any debris or residue with water, a pre-cleaner (like Cotol-240 from McNett), or an isopropyl alcohol pad.
- Deflate the mattress and close the valve.
- Dry: Let the pad dry thoroughly before repairing it.
Pinholes: No Patch Method
-
If the leaks are small pinholes, apply a few drops of Seam Grip to fill in each hole and spread the adhesive at least 1/4 inch beyond each side of the hole.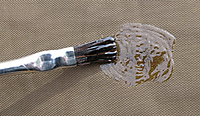
- Let the pad dry flat overnight.
Liquid Adhesive and Patch
If the holes are larger than pinholes, a patch from your repair kit may be needed.
- Cut a patch from the repair material. The patch should extend 1/2 inch beyond the tear or hole in all directions. Cut the patch in a circular shape; avoiding corners will help keep the patch from coming off.
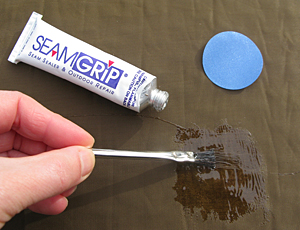
- Apply your adhesive to the leak area, extending beyond the size of the patch you’re going to apply.
- Press the entire patch down on the adhesive on the pad and hold it down for 2-3 minutes to help the adhesive get a good hold.
- Let dry flat for 5-10 minutes, then you can apply another coat of adhesive and give it 15-20 minutes to cure.
- Let the pad dry flat overnight.
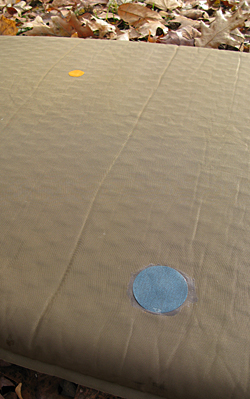
Self-Adhering Patch
Similar to the liquid adhesive method is the self-adhesive, or peel-and-stick, patch method.
- Cut a patch that extends past the edges of the tear or hole. For larger tears and holes leave a larger overhang to give the patch better grip. Cut the patch in a circular shape; avoiding corners will help keep the patch from coming off.
- Peel away the protective film from the sticky side of the patch and firmly apply the patch to the air mattress.
- Hold the patch down for 2-3 minutes to help the adhesive get a good hold. Then give it another 5 minutes to cure. Use a bit of Seam Grip for extra holding power if available.
- Let the pad dry flat overnight.
Valve Leaks
- If you develop a small leak in your sleeping pad’s valve, carefully apply Seam Grip to the leak.
- Allow the pad to dry in an upright position, giving it extra drying time due to the pressure on the valve.
- If your valve is beyond repair and needs replacing, see if your manufacturer offers a valve repair kit.
Faster Curing
There are a few options for faster curing times.
Hot Bond Adhesive: Therm-A-Rest sells repair kits with Hot Bond, a permanent adhesive that works in cold and wet conditions and cures very quickly. This is the short version of Hot Bond directions (always read the complete directions first):
- Place a Hot Bond pouch in boiling water for three minutes.
- Quickly, and carefully, apply Hot Bond, then patch, to leaky area of pad.
- Place your hot pan of water on top of patch for 60 seconds (be sure mattress valve is open!). You may want a piece of plastic bag between the pan and patch.
- Smooth out the patch by rolling a water bottle over it a few times.
- Let pad rest 10 minutes. It’s now ready for immediate use.
Seam Grip + Water: In the field you can speed up Seam Grip’s cure time by mixing in a few drops of water before application:
- Mix together the water and adhesive on the back of the repair patch you’ll be applying.
- After applying the Seam Grip and patch to the pad (as described above), allow the pad to cure flat for 30 minutes. It will fully cure in 2 hours.
- Note that mixing water with Seam Grip will give it a cloudier appearance. McNett’s Cotol-240 also works as a cure accelerator.
Uncured + Self-adhering Patch: if you must use your sleeping pad before the adhesive has fully cured:
 Apply a self-adhering repair patch over the uncured Seam Grip. The patch should extend 1/2 inch beyond the adhesive area.
- Press the patch firmly onto the pad.
- Remove the patch after 3 or 4 days and the Seam Grip should have permanently sealed the hole underneath.
The moment of truth
The final test is to slowly inflate the repaired air mattress and listen for leaks. If you notice any additional leaks follow the same process you used above to fix them.
Regardless of the repair method you use, the longer you leave the adhesive to dry, the better hold it will have on your sleeping pad. If possible, allow the repair to cure overnight, ideally up to 24 hours, before using.
The best care for your sleeping pad is to avoid leaks in the first place. Check your sleeping pad for leaks out of the box, before heading into the backcountry. In camp, remove any rocks, sticks, or other items that could cause pressure points and holes, as well as discomfort, underneath.
Always check first with the manufacturer of your air mattress for their recommended repair materials and methods. Read all directions and warnings for your sleeping pad and repair kit and materials before starting.


