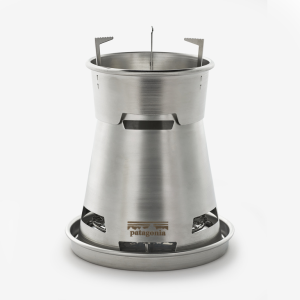
Patagonia Wood Burning Stove


 Reviewed by
PhilNC
REVIEW CORPS
+5,175
 August 4, 2020
The Patagonia Wood Burning Stove is a foray into the lightweight wood stove arena from one of the larger retailers in the outdoor industry. It's a good first attempt resulting in a sturdy, fast boiling, simple stove that suits long distance, high mileage hikes with ample fuel where you want to extend or replace heavy fuel and boil water for simple meals. However it comes up short on stability, ease of adding fuel, and simmer/cook performance compared to other wood burning options.
Pros
- Durable construction
- Burns fuel efficiency for a single wall stove
- Fast boil once fire is going
- Packs down nicely
- Simple setup
- Attached grate (can't lose it)
- Adapts to different pots
Cons
- Relatively heavy
- Doesn't burn fuel like a double-wall "gassifier"
- Pot stability varies
- Feeder opening small—limits fuel
- Need to refuel often
- Not easy to see flames/coals
- Difficult to simmer/control (up and down)
- Can rattle a bit in the pack
Patagonia's foray into the wood burning stove market is designed for "minimalist excursions into the backcountry." They told Trailspace that "Its intentional simplicity makes it a hands-on cooking experience rather than a light-and-go situation. We designed this for a user who wants to have that involved cooking experience in the field."
I like the fact that a major company with a reputation like Patagonia is recognizing wood stoves as an option, be it for minimalist, sustainability, or any other reasons. Major outfitters have generally left these stoves to the cottage industry until now, but they will have a lot of ground and experience to make up.
Before digging into the details a few notes:
- Wood burning stoves are not for everyone. They can be a bit finicky with variable fuel sources, blacken pots (if you care about that sort of thing), and obviously don't light right up like a gas stove. If you are looking to compare wood stoves with other types of stoves (gas, alcohol etc) there are numerous sources on the internet, but this review will not delve into that arena.
- There are numerous pros and cons of all the different types of stoves. You may want to keep several kinds in your "quiver" for different trips, like I do (although I carry a wood stove most times).
- A bit about the tester...I am not an impatient cooker—often simmering my own home dehydrated recipes for 10-15 minutes, and re-stoking a wood stove fire for cleaning the pot, heating water for an evening drink or a second cup of coffee in the morning.
- And finally a waiver: Always check local regulations and fire hazard warnings in your area before using a wood burning stove. They may be allowed or may not depending on the regulatory authorities with jurisdiction over the area. Also note that regulations may change as you hike (i.e. between National Forest, Wilderness Area, or other). For safety considerations please see below under both Setup and LNT.
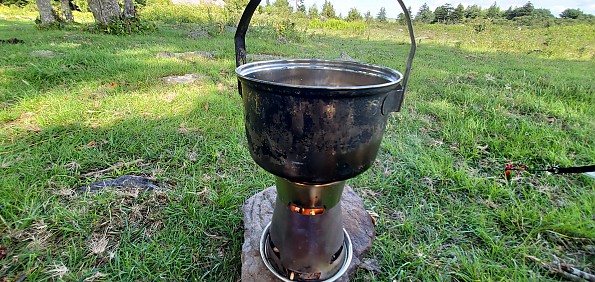
Setup
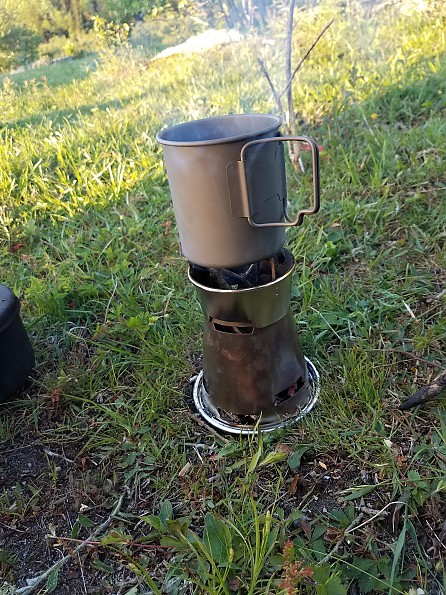
Setup of the Patagonia Wood Stove could hardly be easier. Assembling the three parts, base plate, cone, and pot stand, takes literally seconds.
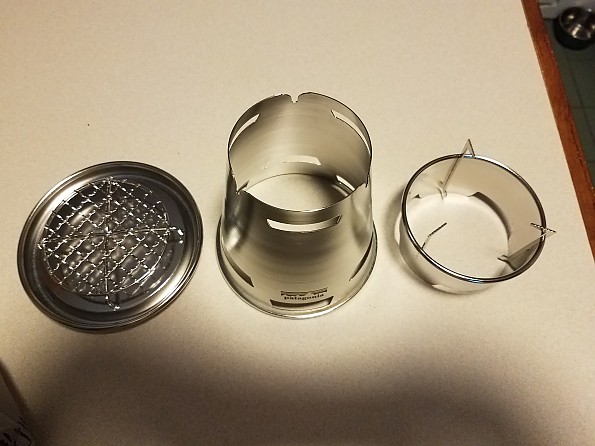
I really like the attached grate as it prevents me from losing that piece. Yes, that has happened to me on another wood burning stove.
The hardest part of setup by far is selecting a cooking surface. Extreme care should be taken to select an appropriate cook site—both flat and free of combustible materials. More on this in the Sustainability/LNT section.
Also consideration should be given to the conditions—I go to a backup option like an alcohol stove on high wind days.
Ignition
Ignition is obviously a major factor in wood burning stoves, but will vary highly based on the type of available fuel. The steps are relatively simple:
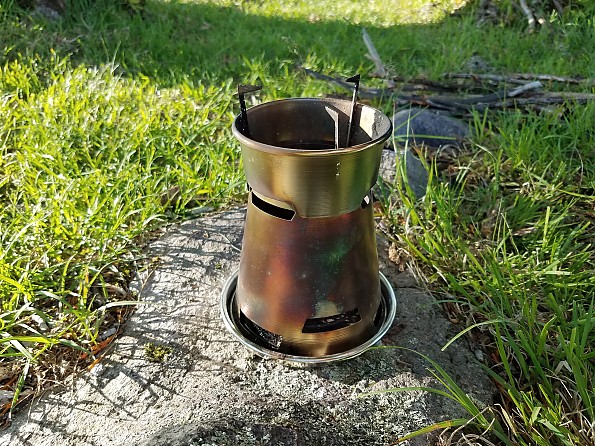
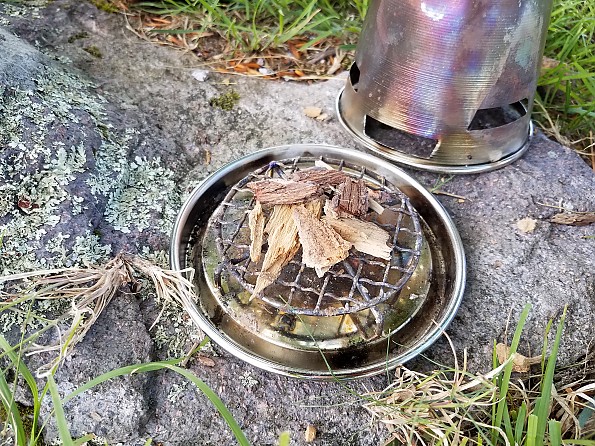
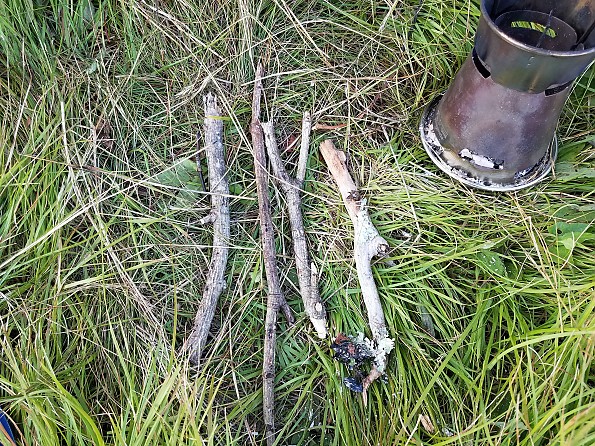
Step 1. Gather wood or other fuel. This doesn't take long, as a small handful of downed twigs will be more than enough for one meal. I usually spend a couple of minutes gathering twigs enough for dinner and breakfast and store them in my vestibule so they are dry when needed. Other fuel could include coals from old campfires, wood pellets for trips where available fuel is not present (I have used very old dried wildlife scat in some instances on another wood burning stove—handle with care!). Please note this stove only needs deadfall, and you should never cut live branches for fuel...first it's not LNT and second they are terrible fuel anyway.
Step 2. Build your fire...
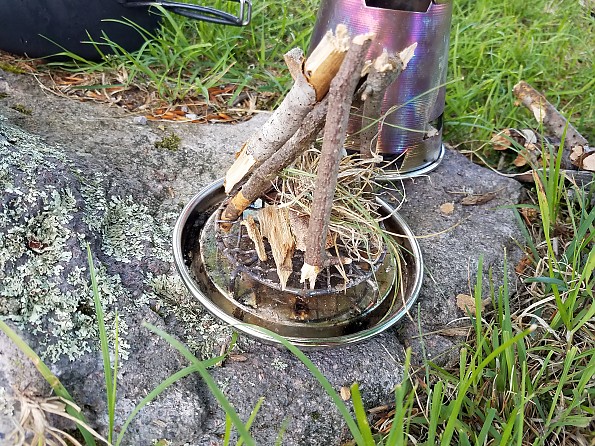
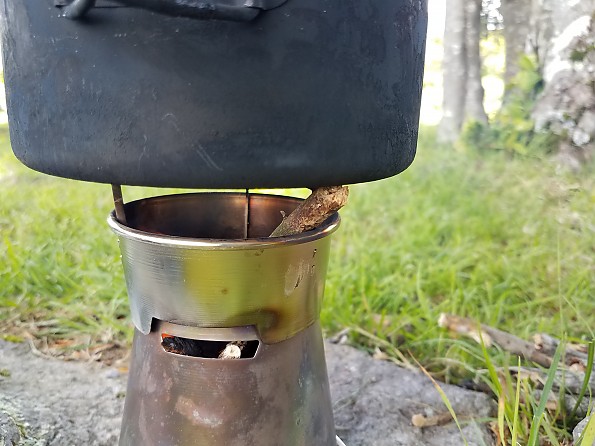
Step 3. I then add the cone to contain everything, add more twigs, and light from below.

The setup is similar to other wood burners (depends on fuel type and some skill). However, the small base plate of the Patagonia wood stove makes building the fire more finicky than wider ones. (Bushcrafters, brace yourselves!) I cheat a lot and often add a bit of firestarter or splash of alcohol especially on days when my only option is damp wood.
Step 4. Then feed the flame, which brings us to....
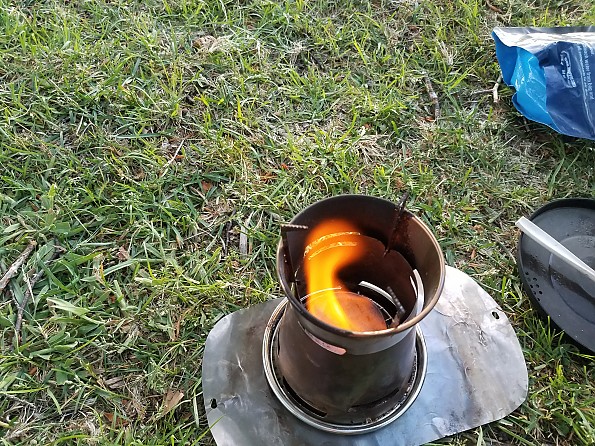
Flame Control
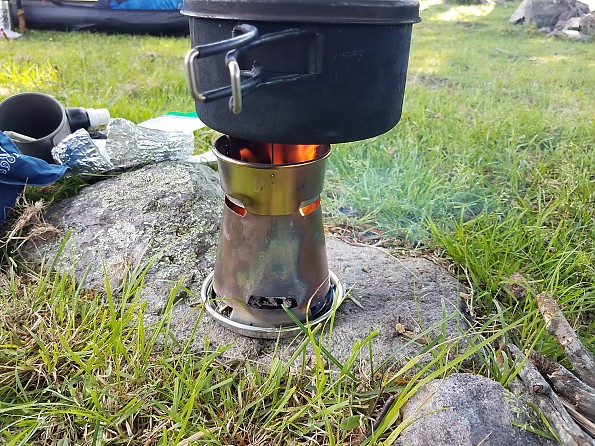
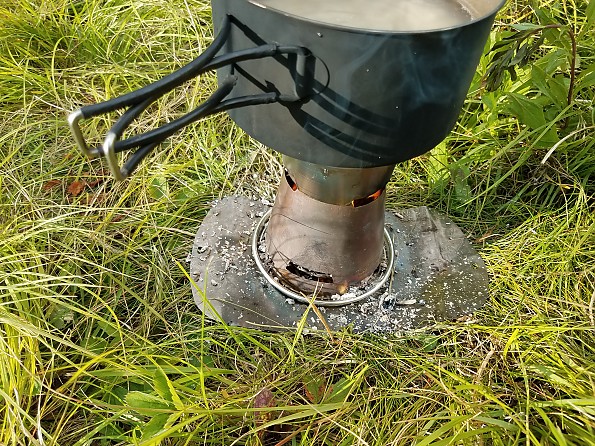
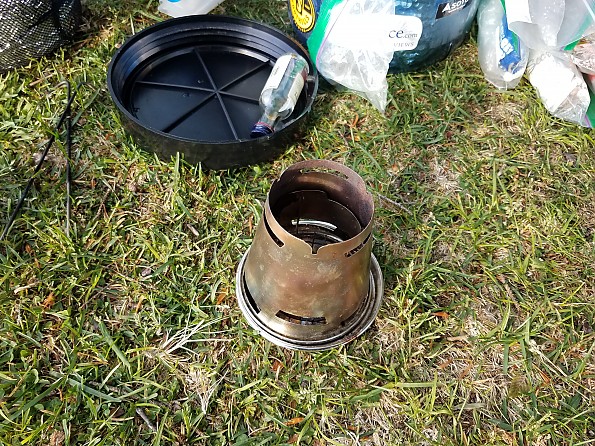
Flame control and fueling the fire is where I feel the Patagonia wood stove has some room for improvement. Due to the small "feeder" opening (between the pot and the stand), there is a limited diameter and length of fuel that can be easily added. To feed larger wood, you would actually have to lift the pot off stove, which I prefer not to do.
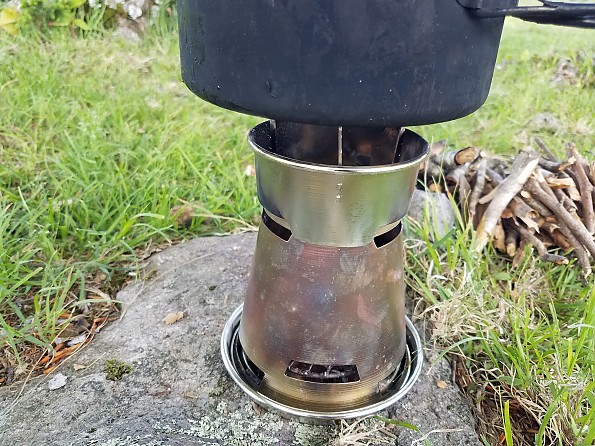
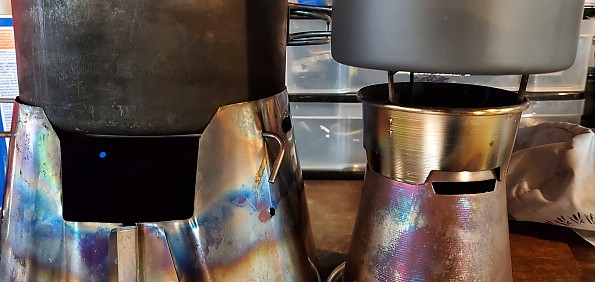
As a comparison, here is the feeder opening of the Patagonia stove (a little over 3/4") compared to the opening of my Trail Designs Sidewinder (about 1.5"). I put a smaller Soto 1L pot on the Patagonia stove to allow for maximum access to the feeder for the photo.
Limited twig size leads to fuel being burned through faster, and difficulty controlling the fire which results in more ups and downs of flames and heat. The limited opening also doesn't allow a good view of the fire to judge when an adjustment is needed—it went out on me several times during cooking due to this.
I experimented with a slightly thinner pot to see if that would help...went old-school since the Patagonia stove is stainless steel and took an old but trusty stainless steel cook set with a 1L pot.
The thinner pot, slightly wider than the stove base so it could be nestled in as a cook kit, was easier to feed but still made it finicky and limited to smaller twigs, therefore burning quickly. An even thinner pot might help (see photo above in the comparison shot) but then you couldn't store the stove inside it, which I really prefer for packability.
Cooking
Cooking with any wood burning stove, in my opinion, is something that takes time and patience to really learn the stove's "personality," much more than other types of stoves. I find this one of the joys of cooking with this type of stove. I really get attached to them.
The Patagonia Wood Stove adapts easily to various types and sizes of pots, however a smaller diameter pot is better suited due to the feeding of the fuel discussed above. With a wider pot, assuming balance/stability is OK, I like to shift it a bit so I can feed fuel easier.
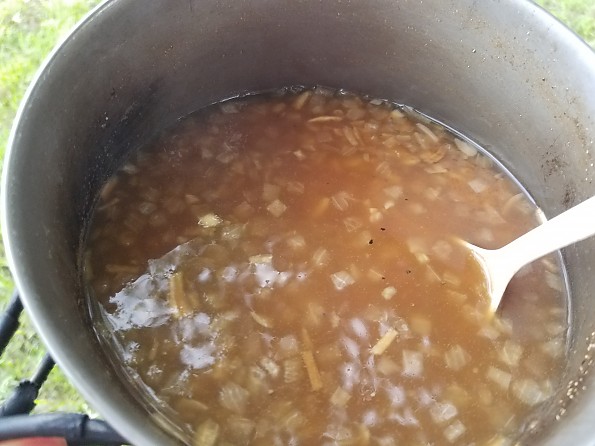
Simmering for a while is a job for the vigilant, as a constant feed is needed due to the smaller fuel size, and relative small size of the base plate which limits coals. This could change as I learn the stove better, but it definitely had its ups and downs as I made one of my traditional barley and onion soups one night.
The advantage of the pot stand and wood burning function is some of the alternative cooking methods such as toasting an English muffin
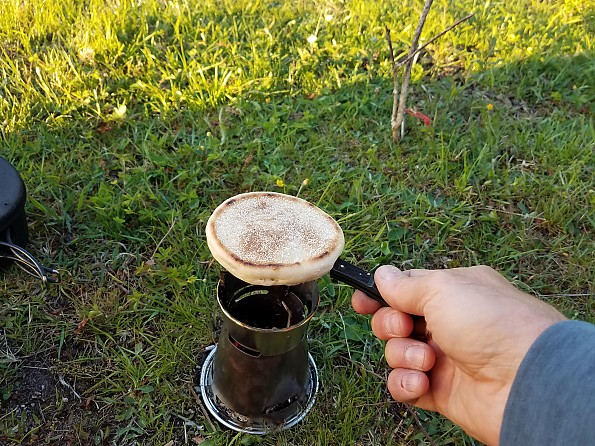
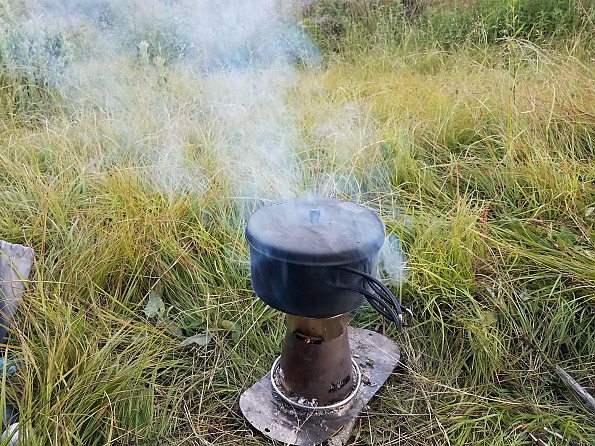
or re-stoking the flame and re-heating coffee in the mug on a cooler morning
So in summary, I would prefer a different wood stove for much of my more casual cooking, but this stove works well for boiling water for coffee and in-the-bag meals, which brings us to...
Boil Time
If you are looking at a wood burning stove you may not be as concerned with boil times, but the Patagonia Wood Stove seems to be pretty efficient, although this is a tough category to evaluate as fuel type and moisture content will vary widely.
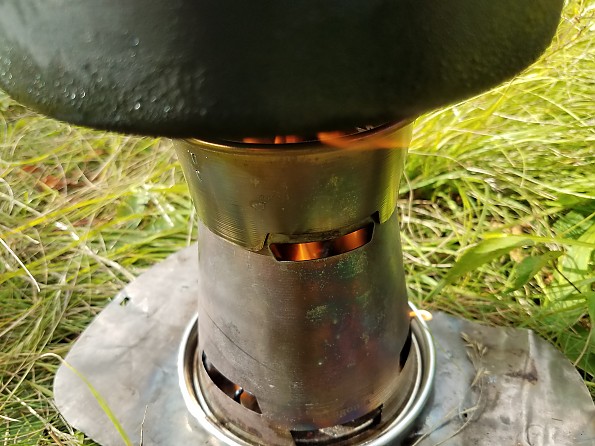
In "normal" situations, the Patagonia wood stove boils water quickly, after the fire is going.
Again, variability is the word of the day when it comes to wood stoves due to the inconsistency of fuel. I reverted to testing at home:
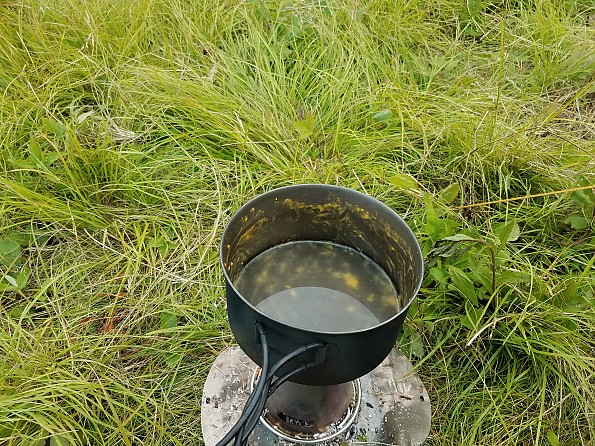
On an 80 deg F day, with no wind, and dry wood fuel, I boiled 2 cups of cool water in my Vargo 1.3 L pot in 2 minutes 30 seconds, after allowing the fire to stoke for 2-3 minutes.
For a more standardized test, and also to evaluate both the use of an alcohol backup stove inside the Patagonia stove, as well as see which size and type of pot I own works best, I did some real "science." With 2 cool cups of water on a 70 degree day (no wind), I set up my Kojin stove
and tested five different pots
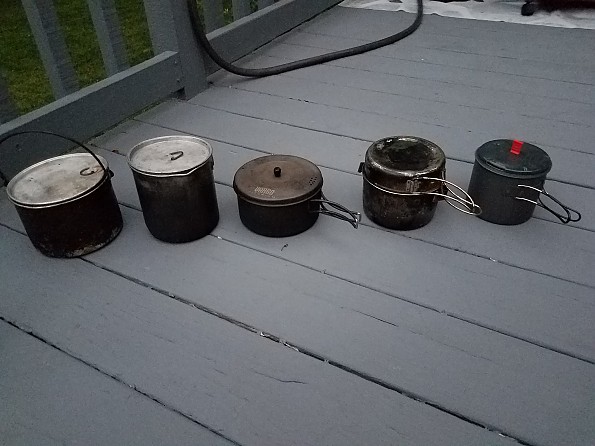
The results were really consistent, with all of the above but one bringing 2 cups of water to a boil in 6 minutes to 6 minutes 45 seconds. The first aluminum pot (wider 1980s version) took 10 minutes—not sure if that was the pot or the first run or what. So consistent times with different pots, although obviously much slower than wood burning.
Note that Patagonia has paired this stove with their own pot (Miir Quantumiir Pot with a built-in heat exchanger and silicone lid), but this was not available for testing.
Wind
The Patagonia wood stove doesn't come with a wind screen as the base cone provides that protection. I would judge it average on wind protection. Higher winds seem to affect the boil time a little, more so than my Trail Designs stove, including a higher wind situation with limited fuel selection that led to a 10 minute boil time. I didn't use it a lot for safety reasons on windy days, and anyone considering a wood stove should take that into account and bring a backup option for adverse conditions.
The stove could do with an outer wind screen to prevent ash from scattering a little,
and it could also create the super-heated "gassifier" function of some other wood stoves. You still need air flow for the fire, but the vents at the bottom help with that.
Fuel Efficiency
Can you get more efficient than not having to carry any fuel? Well, obviously we need to evaluate wood burning stoves differently. The Patagonia Wood Stove burns wood quickly, in fact too quickly due to the limit of size of sticks you can add easily.
It leaves a fine ash for the most part, with a few "coals" that break up with just a brush. Not quite as efficient a burner as a double walled gassifier option, but good enough to result in no-hassle disposal (either buried or dispersed after a good soaking) or a small amount to pack out.
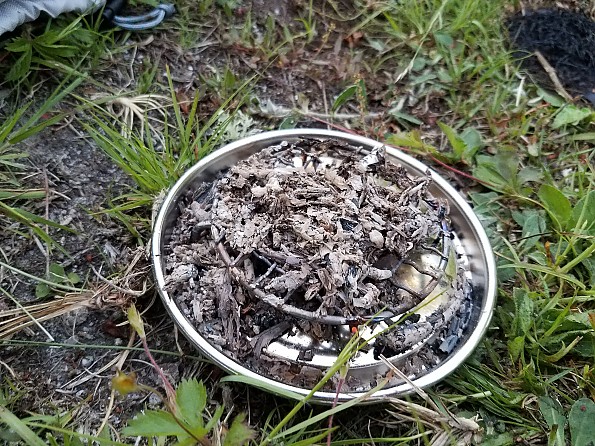
While it does eat through fuel, you still don't need more than a handful to boil, and a couple of handfuls to cook for longer. It takes a matter of minutes to collect what you need in most cases.
Stability
The Patagonia stove is stable if it sits on a flat surface, which can be difficult...I bring a small sheet of titanium to help with that and protect the surrounding vegetation from the occasional spark.

It's a little thin for my taste—the base could be wider (not only for stability but you could build a better fire as mentioned earlier).The weakest stability point is the pot stand—I would prefer if it had four supports, not the three provided. I know some folks prefer three supports so one of the four doesn't get bent and make it unstable but this is made of stainless steel and shouldn't bend. Depending on the pot size and how full it is, tippy-ness can result. I counter that with lining the handle up with a pot stand, when I remember. There are more unstable stoves, but also much more stable ones.
Packability
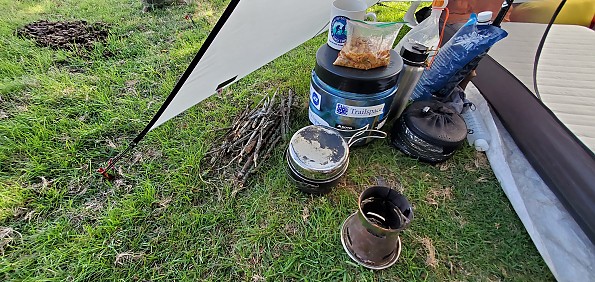
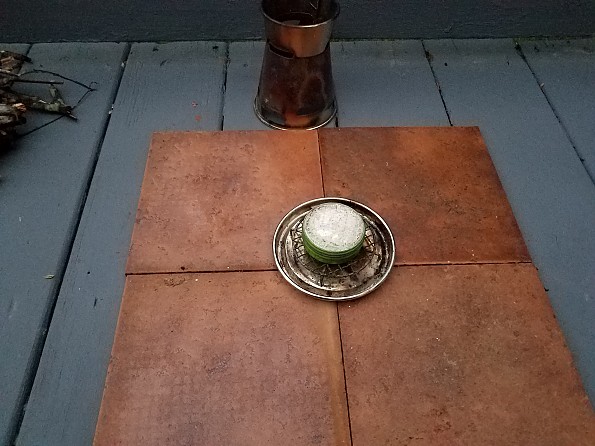
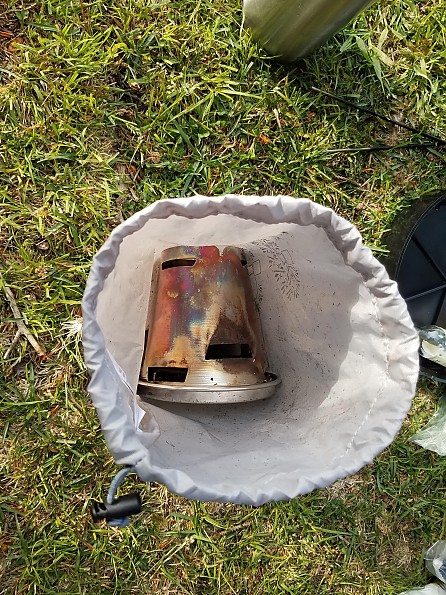
The stove packs down nicely—nesting the pot stand upside down in the cone, which goes on the base plate and into the provided stuff sack. Note the stuff sack has ample room for the stove and more like your firestarting kit (a pet peeve of mine is stuff sacks that barely fit the equipment they are designed for).
It can rattle a bit in the pack, as the pieces don't fit snuggly together, but careful packing avoids that.
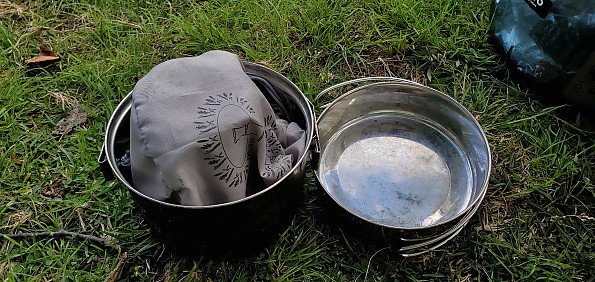
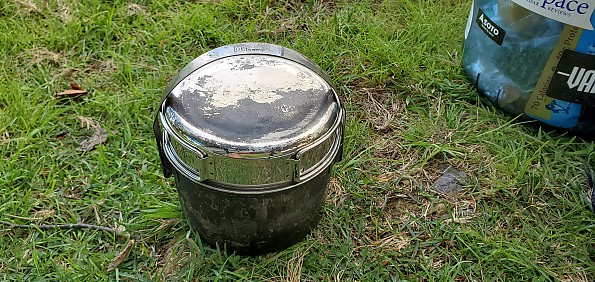
I have used several combinations of pots to cook on the stove, but for packing I like the 1L stainless steel old-school set (Olicamp) that I rarely use any more. Heavy, but fun to go retro! Here is the stove inside the pot/pan.
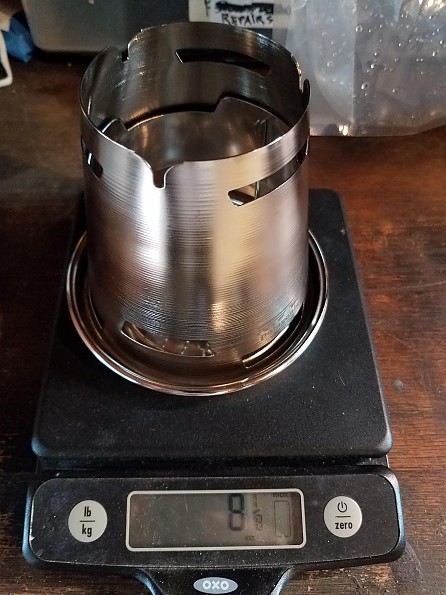
The stove packs down to a height of just over 4 inches with a similar base width.
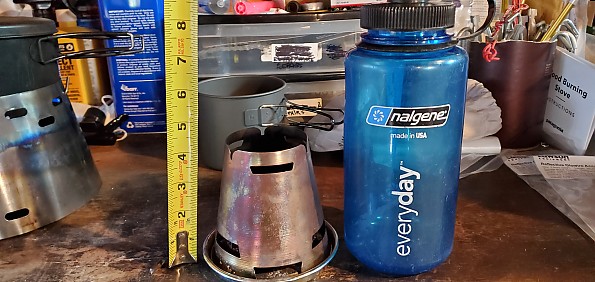
While it is relative light at 8 oz without the heavy duty stuff sack (Patagonia says 10 oz but that may be with the sack), I consider it heavy compared to other alternatives. But see construction/durability for the advantage of that.
Ease of Use
Ease of use is a relative term—it's a wood stove—you need to learn its "personality" over time, and this applies to any wood burner.
Basically it is pretty simple, even simpler with some help (a firestarter). Here are Patagonia's thoughts on its use:
More complex cooking takes more time, and any wood burning stove including this one needs constant vigilance. No lighting it up and putting on a pot of water then walking off to do other camp chores.
As mentioned above, it takes a couple of minutes to gather wood (a handful per meal), which is relatively simple depending on the natural community and vegetation where you are camping.
Features
There are limited features to discuss as this stove is simple in design. The base plate and grate, cone, and pot stand are it. The standout features to me, besides the simplicity and ease of setup, are the grate attached to the base plate (no way to lose it like I have with others), and the airflow vents, which seemed positioned well for stoking the fire with lower vents that you can use to light the stove with a match from under the grate.
To me, the "features" of a wood stove are less concrete and more about usage. While damp wood isn't optimal, it is helpful to throw some on and smoke out the bugs
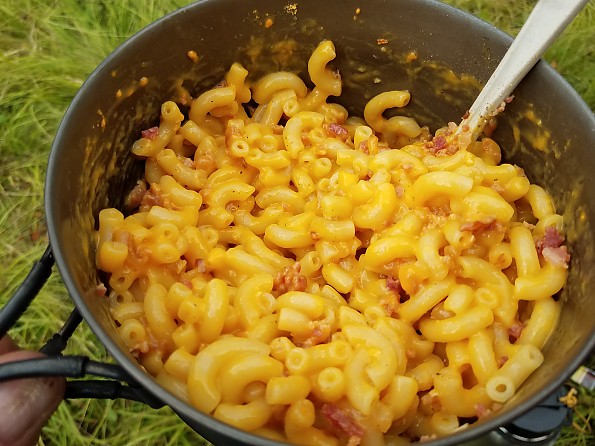
Re-stoking the fire if it is just burned down for a second cup of coffee, or to clean up the pot with boiling water (especially after creamy mac and cheese with bacon!) is a real benefit without wasting precious fuel.
Finally, you can on occasion use any wood burning stove as a limited replacement for a campfire on freezing nights when you aren't quite ready to curl up into a sleeping bag...it won't provide all the heat you need but can break the ice if you huddle over it!
Construction/Durability
I don't think the Patagonia stove could be built in a more durable manner. The stainless steel construction (while adding weight), and simple design make it almost (I hate to use the word) "bombproof". I think I could stand on it, but haven't done it yet. I would expect it to last for decades.
Sustainability & Leave-No-Trace
Several factors can be considered regarding the sustainability of the Patagonia stove. First, it is built of sturdy stainless steel, so it is almost guaranteed to be long lasting with no need for a replacement in the foreseeable future. Freeing oneself from fossil fuels (well, I guess you still have to get to the trail head) is a nice feeling as well. Gathering a handful or two of downed twigs is minor usage of forest resources, and could be a very minor benefit in some areas where there is an overburden of forest fire fuel. In areas where fuel is scarce this could be a detriment.
LNT practices can be mostly upheld with this stove. Disposing of the limited ash is almost the only trace left besides a few missing twigs. Wetting it down and either burying with your waste or dispersing a dusting around (if it is absolutely out!) are the two primary options, but there is so little ash you could easily pack it out. If you are at an established site with a fire ring, simply putting the ash there is easiest.
The biggest LNT issue for me is when you are not at a site with a suitable surface. Patagonia's instructions state that you should set it up with no flammable materials within a 36" radius. I agree completely, but there are a lot of places where this is next to impossible without digging up vegetation or otherwise leaving a large footprint. Therefore I tested the stove in some less than ideal circumstances.
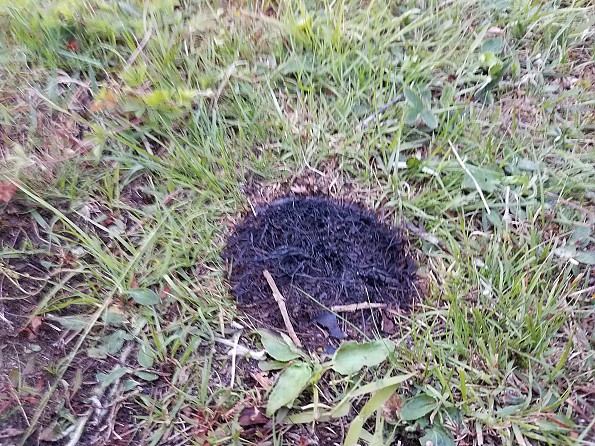
It is easy to leave burn marks if the stove is not on durable surface
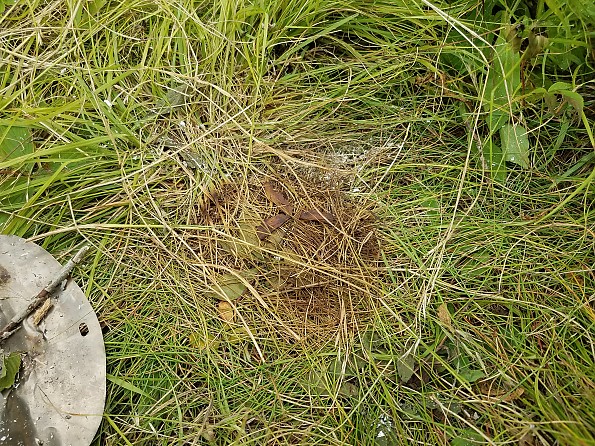
or doesn't have added protection like a layer of twigs
or a base plate in addition to the built-in one.
These situations should all be last resort—finding an adequate sized rock or surface without debris and vegetation is best, and attempting to meet Patagonia's perfect site conditions should be the goal every time.
Please note in the examples above I "tested" the Leave-No-Trace abilities of this stove on less than ideal surfaces with plenty of water on hand to douse any problems and never took my eyes of the stove. I also carefully selected fuel that was really dry and tends not to pop or throw sparks. They were also performed in areas that allowed campfires and had no other restrictions against the activity. All areas were repaired as best I could prior to leaving camp.
Conditions
I have used the Patagonia Wood Stove on four backpacking trips so far (9 nights)—including cooking breakfast and dinner (14 total meals), and multiple re-heats, cleanups, or hot drinks around camp. COVID-19 restrictions have prevented more excursions, but I will update this with the full review now that we are allowed back in the local National Forests and Wilderness Areas.
In addition, I have performed several backyard tests described above and cooked breakfast and dinner on the deck using the stove several times. Menus have included scrambled eggs, toasted bagels, and various soups.
Temperatures during testing have ranged from around 50 to 80 degrees (F), with winds absent to up to 15 mph (I declined to use the stove above that in an open camp, and was very vigilant in winds over a light breeze to test it out).
Both dry and wet wood have been used, with supplemental firestarters to coax things along at times.
Recommendation
I am reserved to pass full judgement yet on this stove as all wood stoves take more of a learning curve to learn each one's "personality." That said, here's what I think so far:
Good For:
- Hikes with ample fuel supply and limited stretches above treeline
- Folks who want to boil water or do minimal cooking, but drop the fossil fuel weight
- Folks who want to cook multiple times per day coffee then breakfast, dinner and cocoa, afternoon tea anyone?, without fuel worries
- Folks who want to reduce their hiking "footprint"
Not as Good For:
- Simmerers or chefs—there are better options with less constant need for fuel and easier feeder/adjustment
- Variable trails where wood supply is questionable
- Finicky folks who like clean pots!
- Hikers that arrive in camp absolutely starving and need calories right away
- Droughts or fire-restricted areas
- Windy days (over 10 mph for me) without a really sheltered cook site
Thanks to Patagonia and Trailspace for the opportunity to test this stove. I have enjoyed learning its ways and will update after the full review period.
Background
I have been backpacking for about 35 years now, and using wood burning stoves since the mid '90s, most recently with an alcohol stove as a backup or for wet/above treeline trips. My experience ranges through most types of wood burners as I mentioned in the introduction (Bushbuddy type, simple grates, Sierra Zip, and the Trail Designs Sidewinder Inferno since 2014).
Source: received for testing via the Trailspace Review Corps
(Sample for testing and review provided by Patagonia)
Your Review
Where to Buy
You May Like
Specs
| Price |
MSRP: $99.00 Historic Range: $48.99 |
| Weight |
261 g / 9.2 oz |
| Material |
stainless steel |
| Burns |
available deadfall or compressed wood pellets |
| Boil Time |
1 liter of water in an average of 16 minutes |
| Origin |
Made in the Philippines |