Wacaco Nanopresso


 Reviewed by
StoicFabian
+2,982
 May 24, 2021
For espresso lovers like me, having the ability to brew a shot or two of espresso of this quality and taste in the middle of nature while camping, backpacking, or just traveling around, is a luxury well worth the price, weight, and hassle. Love this!
Pros
- Compact
- High quality
- No electricity
- Brews amazing shots consistently—anywhere!
- Versatile: works with ground or pods
Cons
- Bit of a learning curve to brew a perfect shot
- Requires a cup or mug (not really a con)
- Still needs something to boil the water (also not really a con)
I say “hassle” but it’s actually a joy, at least for me. Since the previous reviewer did a thorough job detailing the bits, pieces, and processes, I’ll focus more on my personal experience and tips on using the Nanopresso in real life.
There’s just something about being able to brew a perfect, creamy, tasty espresso while camping, backpacking, or hiking (or even just traveling anywhere), especially while out in the nature. And without electricity, with such a small piece of gear! Outdoor folks who are also coffee and especially espresso lovers sure will know what I’m talking about. It’s really fun and a joyous luxury.
Many times it’s hard to find a decent espresso even at bars and restaurants, especially when traveling to some places. The Nanopresso just get this covered perfectly every time: as long as there’s a way to boil some water (campers/backpackers and their kind always do...), this is no longer a problem. In fact it becomes a pleasure.
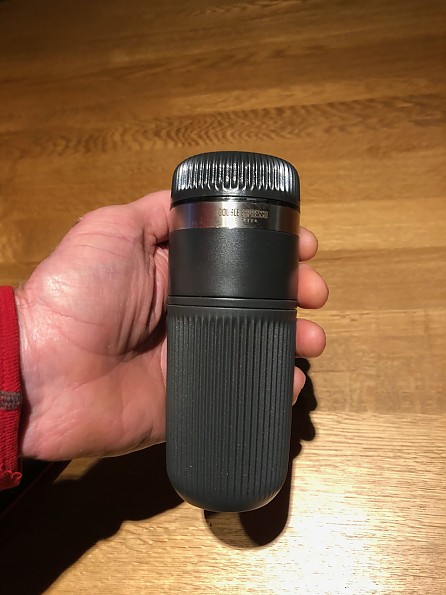
The Minipresso was already a decent product. The Nanopresso is even better: smaller, more consistent, reliable, and durable. It’s well made, feels solid in action, one can tell it’s well made just by holding it in the hand. The parts are well built and the fit is precise, high tolerance throughout. It is also easy to assemble.
These qualities become even more evident when you learn to use it. I was able to brew a decent shot at first attempt, though it took a few more to really get it perfect. I’ve developed my routines, and it does help to use boiling water and pre-heating the cup and water recipient.
I must say that, even having a lower-spec (i.e. lower pressure), the older Minipresso is also able to make wonderful shots, much like Nanopresso. I still get perfect ones from it after years of use. But the Nanopresso is so much smaller and consistent that it has replaced the Mini for good. It’s quite tough so I expect it to last a long time. So far it has held up well.
In use (my routine):
I‘m a lightweight outdoor type, so I use either a spirit stove (Trangia style) or a titanium Esbit for cooking and boiling water for any trip. Sometimes, usually when it’s too cold (winter season) I take both just to be able to boil water and prepare food at the same time. Every meal is a 15-20 minute affair no matter what I’m cooking or where I am, so both work just fine for that.
When I’m preparing breakfast, lunch, or dinner, I put the water to boil first. It can be used to make a soup, a freeze-dried meal, etc. Or I’ll just make a toast from a slice of bread for b’fast. When the water is almost boiling, I take it off and put the meal on the fire to get it ready. I then use part of the hot water to prep the Nanopresso and get it warmed up.
When the food is ready, I put all the pre-warmed water back onto the fire, and leave it there while I’m eating. When it’s boiling I’m ready to make the coffee. I’ve done this so many times that it’s automatic, repeating just makes it perfect and everyone can get its own routine in no time I’m sure.
So, it still requires a system to heat the water. But every hot beverage does, even instant espresso, so that’s nothing special. At home, I have used the hot water off of our Nespresso a couple of times, just as a test. It’s works, if there’s not other way to heat water. But using boiling water does produce a much better coffee when using the Nanopresso.
The adapter:
I purchased the adapter for pods and it works perfectly too. Of course it’s not the same as using ground coffee. But it’s more convenient: overall faster, and also easier to wash and clean afterwards. Sometimes this is good, a positive. It’s way better than instant coffee, it’s also better than good coffee through a filter (IMHO), so I don’t complain either way.
I love espresso but I’m not an specialist, I just dig a good, frothy, thick espresso, and the Nano provides it as long as there’s decent coffee and hot water. In the end, just being able to drink an espresso of this quality while camping or on the trail is awesome as-it-is, so I keep switching between the two according to the moment and situation.
The small bits:
Yes, the parts are small. If I’m in a rush or not able to pay attention to what I’m doing (or need to do something else), I will use instant coffee or just pass it until I can brew my espresso calmly and focusing on what I’m doing. In fact it’s the same with most other outdoor equipment, and I can live without coffee a day or two (or more) if necessary. I get it that this is a luxury.
Cleaning:
Cleaning after use is not too hard either. I usually wash the parts clean with water, and dry the parts using a rag or clean toilet paper (which I also use to clean/dry the cooking hardware). It doesn’t dry entirely though, so when I get home from the trip, I wash everything and leave it out drying for a couple of days before putting it back on the case.
After months of consistent use, even at home, I still get impressed and satisfied using the Nanopresso. Every person who’s seen me using it and tried the taste of the espresso made with this little gadget got impressed too. It’s like a toy, but a very useful one.
Background
I have used instant coffee (we do have some good ones here in Brazil in fact), and also compact camping pour-on systems for decades. I still carry a couple of instant ones for emergencies.
But since I much prefer espressos, I tried the Minipresso before and since then fell in love with the Wacacos. They just plain work and last long, I find a joy using it during my trips.
I have recorded a video but since I don’t have a YT channel, I had to post it on my Instagram @stoicsurvivor. It shows me brewing one after dinner during a wild camping trip recently. Espresso in the middle of the nature: it’s such a nice luxury!
Source: bought it new
Price Paid: Above U.S. price because of import taxes, but the combo had a discount.
 Reviewed by
BigRed
TOP 10 REVIEWER
REVIEW CORPS
+10,775
 January 13, 2021
A hand-pumped espresso maker that is small and light enough to take along on weekenders, hut-to-hut trips, to base camp, and the like. Reliably delivers high quality espresso shots. Add-ons for double shots or using capsules.
Pros
- Real espresso on the go
- Light and compact enough to take along on day trips, weekenders, and hut trips
- Efficient use of coffee—8 grams per shot
- Double shot and capsule add-ins boost versatility
Cons
- Too heavy for extended trips
- Small parts to keep track of in some configurations
- Capsule coffee not as good
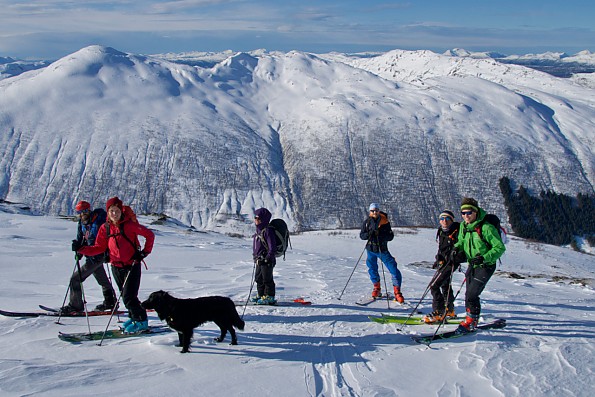
A couple years ago I shared a hut with a group of mostly younger skiers of several nationalities, including an Italian named Simone. In the morning he whipped out a classic aluminum Moka espresso pot with necessary accessories and proceeded to crank out his best brew for all takers, two demitasses at a time, with all the fiddling and waiting it takes to get the pot up to pressure and for the Goodness to bubble up to the top.
I still ski with Simone every now and then, and I’m kind of hoping that at some point we’ll share a hut again so I can return the favor and see what he thinks of my fancy new Nanopresso system. He’s an engineer, so he darn well ought to appreciate its smart design and solid build.
What it is
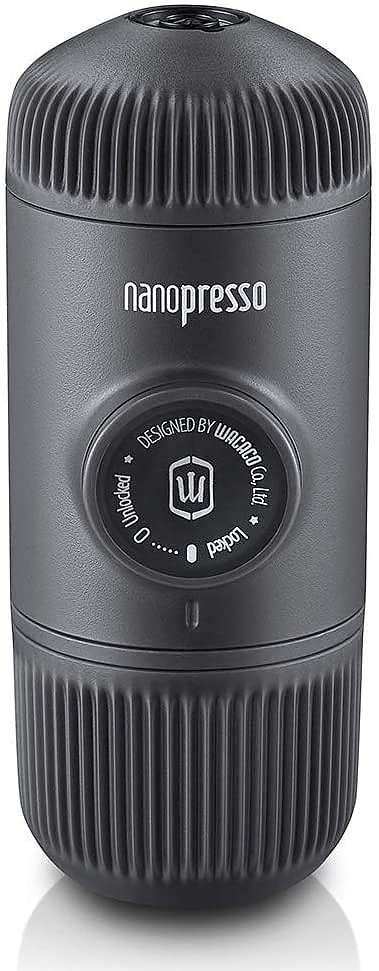
The Nanopresso is a compact and reasonably lightweight, hand-pump espresso maker that delivers single or (with the Barista kit add-on) double shots that can meet (depending as always on the bean and the barista) ISO standards for espresso, including the signature layer of crema (froth) on top. It is slightly lighter, more compact, and more versatile, but also pricier than, its predecessor, Wacaco’s Minipresso. A key difference is that it operates at up to 18 bar of pressure, well above the ISO minimum pressure of 9 bar, rather than a substandard 8 bar in the Minipresso (and possibly other, often cheaper handheld espresso systems out there).
Like a lot of other more or less gourmet coffee brewing methods, it’s a bit over the top for extended backpacking trips but could be a welcome partner (and conversation starter) at base camp and on weekenders, self-service hut-to-hut excursions, or car camping trips.
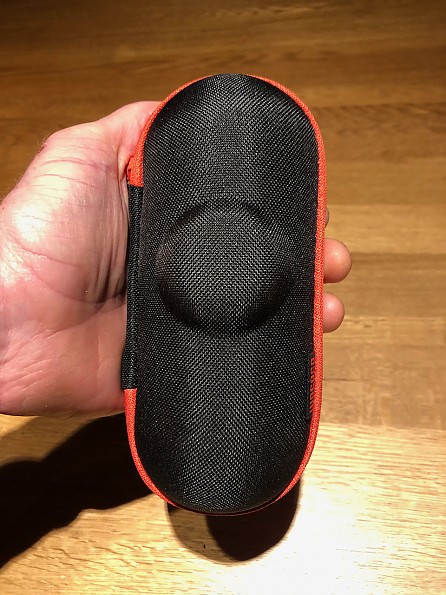
Versatile weight
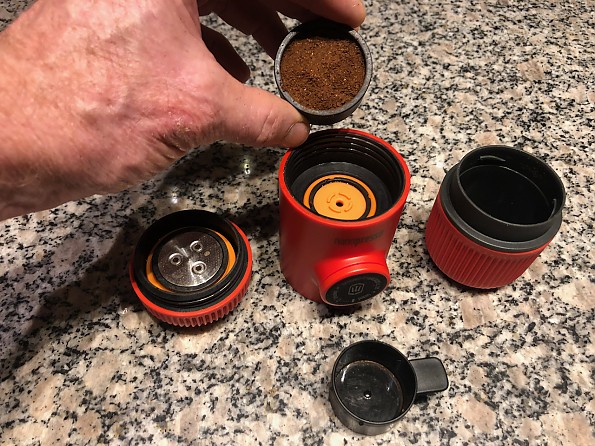
The Nanopresso comes in a nifty zippered carrying case, which I don’t really see as necessary and will likely leave at home. It won’t fit some of the alternative setups described below anyway. The core components are the hand pump, the nozzle assembly from which issues forth the Goodness, a filter basket that holds 8 g (ISO: 7 g) of your favorite grind, and a water tank that gets filled with hot water (should be 90 to 95˚ C, but since the water cools a little when you fill the tank, even when the tank is preheated, I just use boiling water). It also comes with a demitasse that fits over and helps insulate the water tank, a scoop for measuring out 8 g of coffee, and a little cleaning brush.
The add-on Barista kit expands capacity to 16 grams and 140 ml for making double shots, and includes three more filter baskets, two 16-gram and one 8-gram, with tight fitting lids so that you can pre-pack and carry coffee for 5 shots total, all in one self-contained package. I also bought the barista kit so that I could brew for two in one go.

Another add-on, the NS-Adapter, accommodates Nespresso-compatible capsules. In the spirit of rigorous reviewing, I decided to buy and try the NS adapter as well.
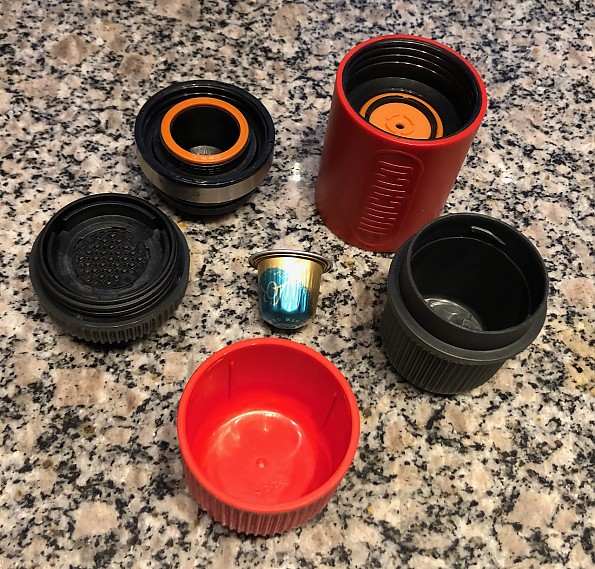
If you go ahead and buy All The Things as I did, you can mix and match components in various self-contained (i.e. all in one tidy cylinder) combinations depending on the needs of the moment or coming days or weeks. Here are some useful variations, with weights (to the extent that weight matters, since this is clearly a weight-luxury):
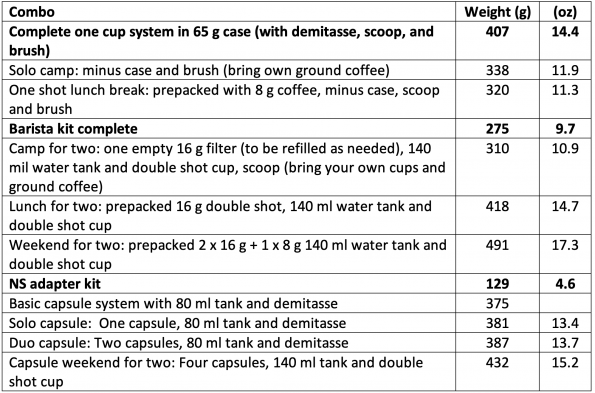
The pump (194 g) is the only constant in all these variations; the NS Adapter uses a different filter/nozzle. Originally I thought it would be smart to leave behind the demitasse (21 g) or double shot cup (36 g) to save a few grams, but now I think they add an insulating layer to the water tank and should help deliver a hotter cup, especially in colder conditions, and so have included one or the other in all the options in the table.
Theory and practice
Wacaco’s how to use video is a good way to see how the system works:
The illustrations and demo video show a two-handed pumping method, but big-handed folks like myself can pump one-handed with either the thumb or a couple fingers on the piston, although my hand does get fatigued when pumping a double shot (maybe Caldwell and Jorgensen could have used a Nanopresso to combine finger strength training and gastrointestinal inspiration up on the Dawn Wall—one-finger shots, anyone?).
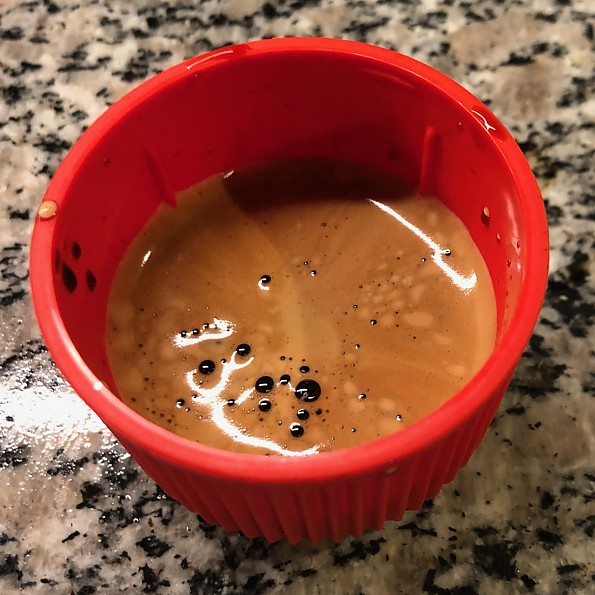
The result is the real thing, a rich shot with little bitterness and a full head of crema. As at your favorite coffee bar this can be the basis for a galaxy of variations. My wife and I are fond of lattes in the morning, even while camping. I use a little whisk to foam the milk but may try to use a 500 ml thermos as a shaker on outdoor trips. If you have a sweet tooth you could also bring along your favorite flavored syrup and engineer a way to produce a double caramel macchiato. Some would call it sacrilege to dilute such a beautiful brew with a packet of Swiss Miss with mini-marshmallows, but who am I to say?
There is always a little unused water left in the pump and the coffee grounds also absorb some, so that only 60-70 ml comes out the other end, only worth a couple swallows in cold weather (but the ISO standard is only 25 ml!). I like to use the 140 ml tank (83 g including cup vs. 51 g for the 80 ml with demitasse) to pump out a lungo, brewed with an espresso machine but with a greater volume of water, for a longer lasting albeit somewhat weaker cuppa.
I have been using an Aeropress to make espresso-like shots and lattes for years. The Nanopresso delivers a tastier but smaller shot using less than half as much coffee. Because the scoop inverts nicely on the filter basket, scooping and packing from, say, a baggie full of ground coffee can be done cleanly enough over a counter. Some grounds can stick to the bottom of the scoop after packing but can be scraped back into the basket as a last step before sealing it in.
Fresh grinding and then transferring just 8 g is a bit more finicky—I use a little plastic beaker and tap it in to the basket a few grams at a time. I’d be happy to do that in a hut or maybe over a flat stone, but in the confines of a tent or vestibule I’d be afraid of spillage or at least escapage (they say coffee keeps some people awake at night, how about a little ground coffee in the sleeping bag?).
When the job is done, the coffee grounds are tightly packed in the filter basket and can’t be tapped out easily. I find that I need to use the back end of a spoon to dig the puck out into the compost bucket. The filter basket and other parts can be rinsed with water. The manual suggests disassembling and cleaning the filter periodically, i.e. when you get back home.
A minor point still worth considering: the smaller parts, mainly filter baskets, lids, and scoop, risk getting misplaced or lost in some situations.
To capsule or not to capsule
That’s where the no fuss-no mess NS Adapter comes in. We have resisted buying a capsule system at home, where we don’t even use a plug-in coffee maker, instead preferring fresh grind and Aeropress (me) or pour over (my wife) brewing. We didn’t want another kitchen machine taking up counter space or to contribute used capsules to the waste stream, and I for one haven’t been all that impressed by the capsule brews that I have tried. But, just as we downgrade to instant coffee on long trips, it seemed to me that capsules might be less fussy alternative to making acceptable espresso in a tent or hut.
I bought a selection of capsules from a Norwegian supplier that offers whole beans from all over the world, including some lighter roasts from Ethiopia, Rwanda, and Papua New Guinea that I have come to prefer. On the capsule side there isn’t as much to choose from. I chose French roast, Espresso, and Lungo, the lightest roast they had.
The capsules weigh 6.5 g full and about 1 g empty, and so hold only about 5.5 g of ground coffee. All else being equal that means they deliver less than ¾ as much of a caffeine kick as the 8 g shots in the self-pack system. Judging from head feel, that sounds about right. A shot made from 8 g of fresh ground gives a surprising kick; not so much from a capsule brew.
When it comes to taste the Lungo capsules are OK, but there’s not much of the nuance I have come appreciate in some of my favorite bean. It would probably go down well enough in a tent or hut, but it might take two shots to get a proper start on the day. The darker roasts are not to my taste, but my wife’s impressions are similar, a bit short on both taste and kick.
A potential problem with capsules is they could get banged up if carried in a plastic bag in backpack, in which case they might not work so well. They should probably be carried in a rigid container or otherwise protected. Starbucks capsules come in stacks of 10 in a cardboard “square tube”; that might be good enough if packed with care. Gram for gram, the capsules also cost nearly twice as much as my preferred beans.
Fortunately, the Weekend for two option in the table offers a happy compromise: pre-packed filter baskets with tight-fitting lids that can be dropped right into the pump just like a capsule. I have it in mind to inquire about ordering extra 8-g baskets so that we can have his and hers coffee. I’ll try out the capsules on an outing or two or until they are used up, but will likely stick to the filter baskets and a choice grind in the future.
Look and feel
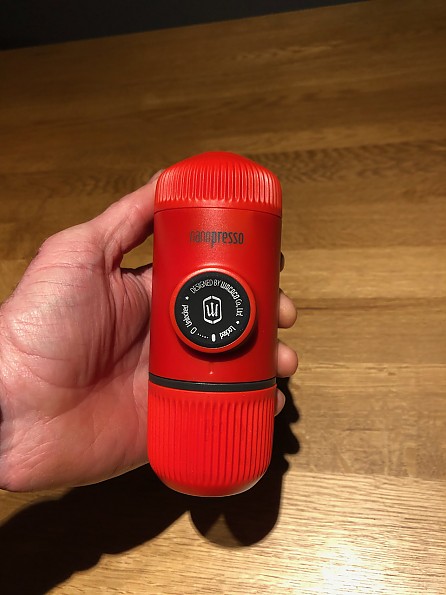
The Nanopresso base system comes in 7 solid color variants or, for a slight bump in price, with the pump printed with various decorative themes. Unfortunately, the Winter Ride model, which features a bearded skier and mountain scenery, became available in Norway only after I had ordered my Lava Red version. The Barista and NS kits are a staid gray.
I’m very impressed by the design and quality of the system. Everything fits tightly and works smoothly. I have seen some complaints about the Minipresso blowing its seals after use, but I have been cranking out two to three shots a day using various configurations for about three weeks, so far so good—very good, in fact.
I fully intend to bring the Nanopresso along, in one configuration or another, on this winter and spring’s base camp and hut-to-hut tours, and I’ll surely consider taking it on shorter backpacking trips, and maybe even for in-car brewing on the long drive to Jotunheimen or Sunnmøre. There are lighter options, right on down to instant coffee, but none that I know of deliver the flavor and jolt of real espresso. The Nanopresso does just that.
Background
I have been making about 3 shots a day for about a month, at home and in a mountain hut. Haven't used it in a tent yet. Otherwise I have used a Moka pot and Aeropress over the years for making espresso (like) brews. Around camp I have used the venerable cowboy method, collapsible filters, the French press add-on to my MSR Windburner, and, yes, instant coffee to start my day .
Source: bought it new
Price Paid: Too much at Norwegian prices; the basic Nanopresso runs $70-80 in the US.
![]() Reviewed by
Reviewed by
Charyl Beard
+26
 May 31, 2021
I love the Nanopresso! So easy to use.
Pros
- It’s so much easier to use than it seems it would be.
- It’s Delicious!
- Saves me money because I’m not getting a $4 expresso at a coffee shop.
Cons
- Hard to keep hot during the process.
The coffee is delicious! It has a few different pieces to be able to use it, so initially I was turned off by it because it seemed complicated, but it is not difficult at all to use. I really enjoy it.
Background
I’ve used it quite a bit and love it. I wouldn’t take it backpacking, but I would camp with it. I typically just use it at home though.
Source: received it as a personal gift
Your Review
Where to Buy
You May Like
Specs
| Price |
MSRP: $64.90 Historic Range: $64.90 |
| Weight |
336 g / 0.74 lb |
| Dimensions |
156 x 71 x 62 mm / 6.14 x 2.8 x 2.44 in |
| Water capacity |
80 ml / 2.70 fl oz |
| Ground capacity |
8 g / 0.28 oz |
| Max. pressure |
18 bar / 261 psi |
| Package includes |
Nanopresso, built-in espresso cup, filter basket, scoop, brush, multi-languages instruction book, warranty card |